Extract Margin Line
Extract and save the margin line of the marked (corresponding) teeth.
Click under the "Pre-design" process to enter the margin line extraction interface.
Caution
Please mark the teeth before extracting its margin line. More details see Mark Teeth.
Note
IntraoralScan will recognize margin lines automatically when importing projects.
Click to extract margin line for teeth with apparent edge line automatically.
 |
 |
|---|---|
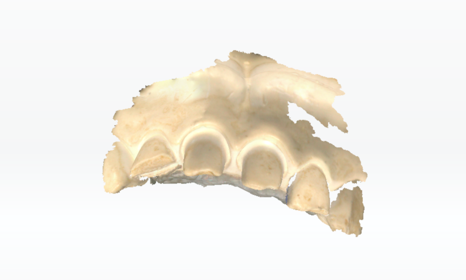
| Margin line not extracted | Margin line extracted |
Steps:
1 On the teeth position marking list, select a tooth.
2 Under tooth map, click to select margin line extraction method.
- Sectional view
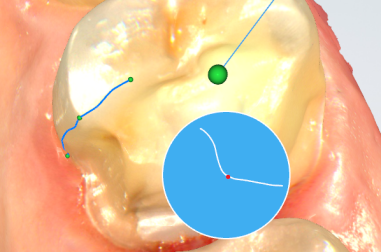
: The curvature of the profile along the tooth surface normal to the occlusion plane is displayed, and the effect is as follows.

- Drawing line extraction
 : Long press the left mouse key to draw a line, and release the mouse to extract part of the margin line, each drawn line is automatically connected with the previous one, and finally a closed margin line is extracted.
 - Segment extraction
 : Left click the mouse to generate a control point, move the mouse along the margin of the tooth, a line segment will be automatically generated between previous control point and current mouse position, left click to generate another control point; repeat the above steps before you set the final control point to overlap with the first one to form a closed margin line by double clicking.
Note
Line segment extraction is a complementary tool for magnetic extraction, suitable for teeth with no clear margins.
- Magnetic switcher
 : Used to control the magnetic suction function switch of the line segment extraction method. After the magnetic suction function is turned on, the line between the current position of the mouse and the previous control point will be automatically attached to the margin (large curvature), the attaching effect is related to the current mouse position; when you left click to add a new control point, the attached line segment between the first two control points will not change again, repeat the above steps before you set the final control point to overlap with the first one to form a closed margin line by double clicking. When the magnetic suction function is off, a straight line will be created between the current mouse position and the previous control point (i.e. line segment extraction). Magnetic suction extraction is suitable for teeth with clear margins.
3 Click to add a new control point and a margin line will be drawn automatically between two control points. Repeat the above steps and you will draw a closed margin line by double clicking near the first control point.
4 The model size can be adjusted by scrolling up and down the wheel. You can view the margin line by pressing right mouse button then rotating the model, or pressing right and left mouse buttons to move the model.
5 Edit margin lines to make them closer to tooth edges.
-
Draw line extraction mode: The newly drawn line replaces part of originally extracted margin line.
-
Segment extraction mode: Move the mouse to the extracted margin line, the red point indicates the location of the control point, if you left click the mouse key, a new control point will be added; select a control point, the control point color changes from green to red, you can move or delete the control point.
![]() on the left of the tooth list indicates the line has been extracted.
on the left of the tooth list indicates the line has been extracted.
Buttons
| Icon | Name | Description |
|---|---|---|
| Delete | Delete the currently extracted margin line of the tooth. | |
| Undo | Undo the last operation. | |
| Redo | Restore the operation that has been undone. |