Tooth Preparation Monitoring
By monitoring the prepared tooth, data will be saved during the grinding. So it's convenient to compare multiple sets of tooth preparation data to standard model. Only pre-op scanning order can switch into tooth preparation monitoring order.
Note
- A prompt of "Functionality is limited" is popped up when the device is not authorized.
- Before scanning the prepared teeth, you can enable Save the data of the tooth preparation monitoring and scanning process in the
> Scan Settings. The tooth preparation data after each scanning will be saved and you can check and compare multiple sets of tooth preparation data in the Pre-Design.
Steps
The default scanning process of a pre-op order: Pre-operative Upper Jaw > Pre-operative Lower Jaw > Bite > Upper Jaw > Lower Jaw > Bite(automatic alignment)

Note
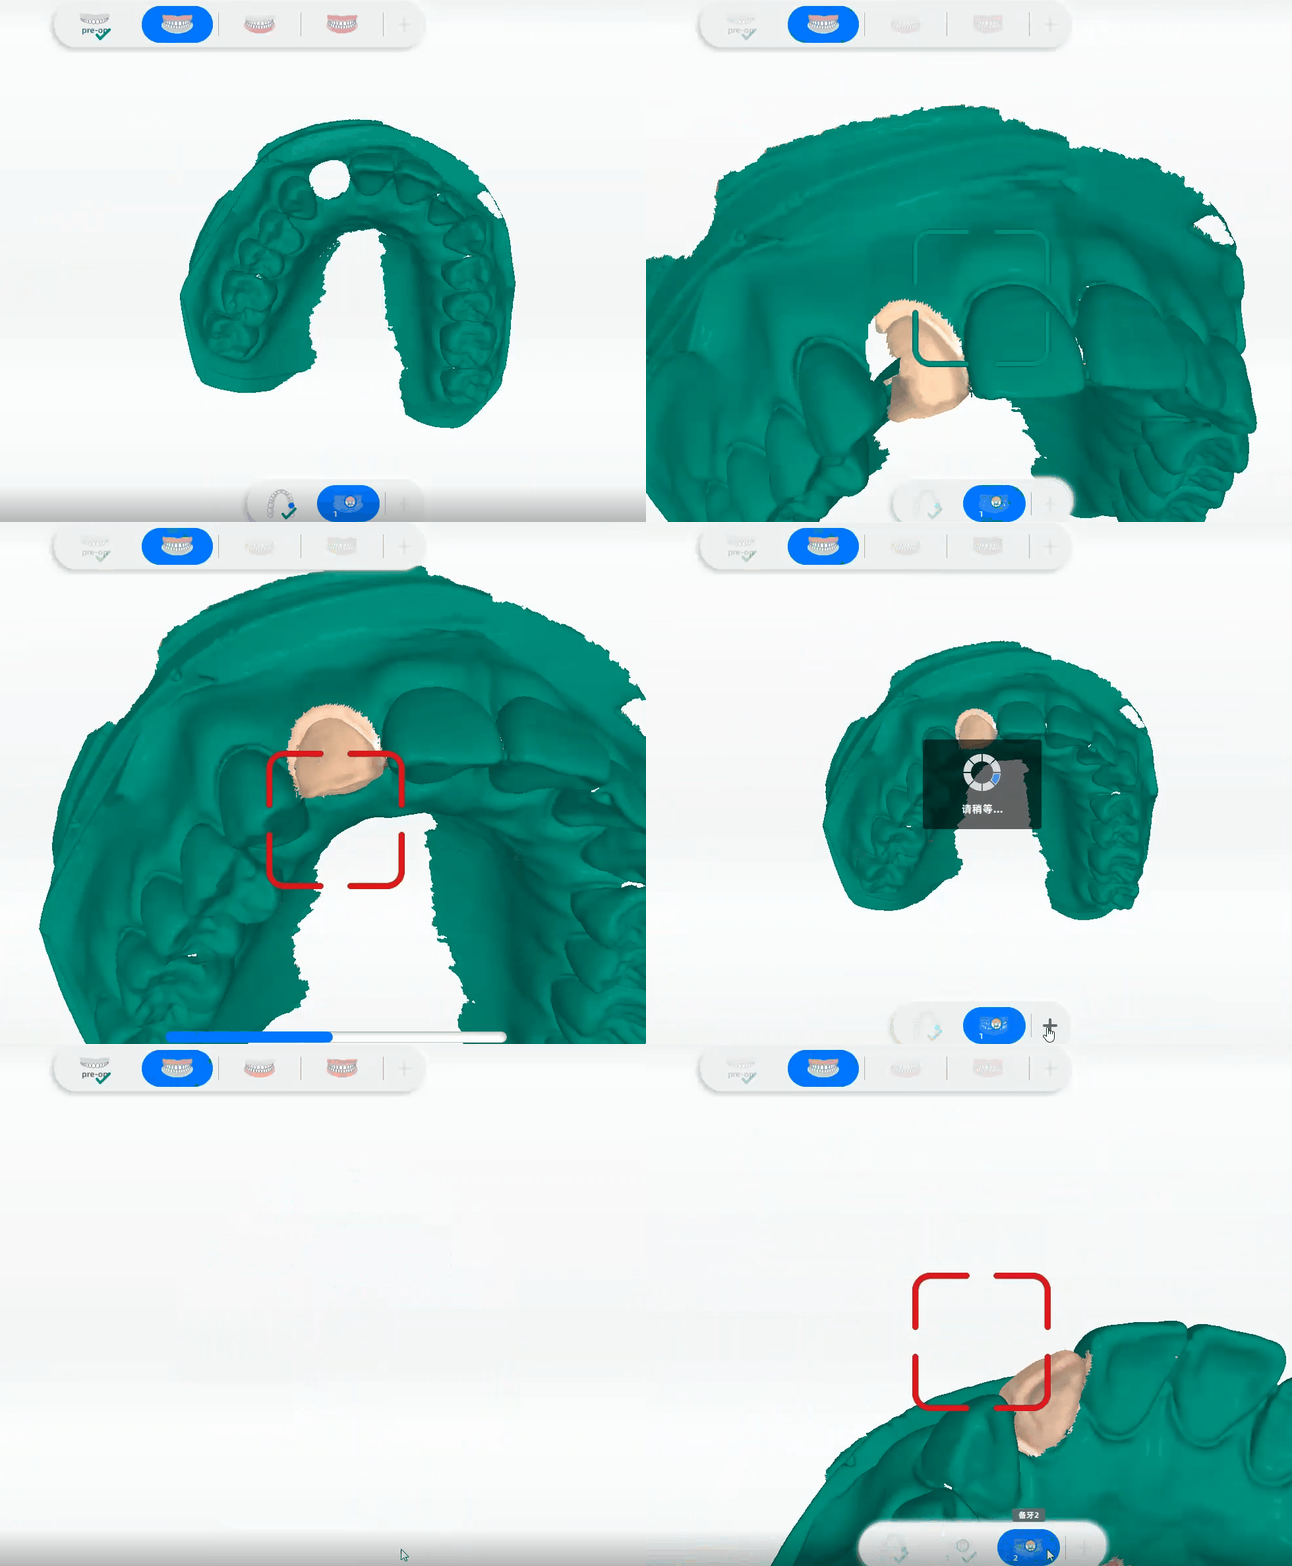
The scanning steps of the upper jaw or the lower jaw (post-op) is similar to implant jaw: After loading pre-op data, you need to dig a hole on the tooth, then starts scanning post-op teeth.
1 Scan pre-op upper jaw with a disinfected scanner.
Caution
● Please keep moving the scanner at a relatively same speed.
● The distance between the scanner tip and the surface of the teeth should be 3 mm to 5 mm.
2 Dig a hole on the treated tooth to avoid alignment failure resulting from the inconsistent scanning data of pre-op and post-op.
(1) Move the cursor to the treated tooth.
(2) Scroll the wheel up and down to zoom in and out the tooth model (make the treated tooth as big as the circle). Select the tooth place and make preparation for digging a hole.
(3) Double-click to dig a hole.

3 Scan the post-op teeth.
4 Click to add tooth preparation group number for multiple prepared tooth scanning.


5 Click ![]() and then click
and then click ![]() to import the standard models.
to import the standard models.
6 Compare the data of prepared tooth with that of standard prepared tooth. Click different position of prepared tooth to check the value.
| Color | Status |
|---|---|
| Blue | The tooth isn't prepared. |
| Green | The tooth is well-prepared. |
| Red | The Prepared tooth needs to grind off. |
7 When completed all scanning steps, you can check multiple sets of tooth preparation data in the Pre-Design.
Function
| Icon | Function | Description |
|---|---|---|
| Contrast | Compare a set of model with an imported standard model. | |
| Screenshot | Capture the picture of comparison between two prepared teeth. | |
| Show report | The report will be generated after capturing a screenshot. | |
| Delete report | Delete the generated report. | |
| Confirm | Apply. |