Interface
After logging in, you can check your orders.
Preview

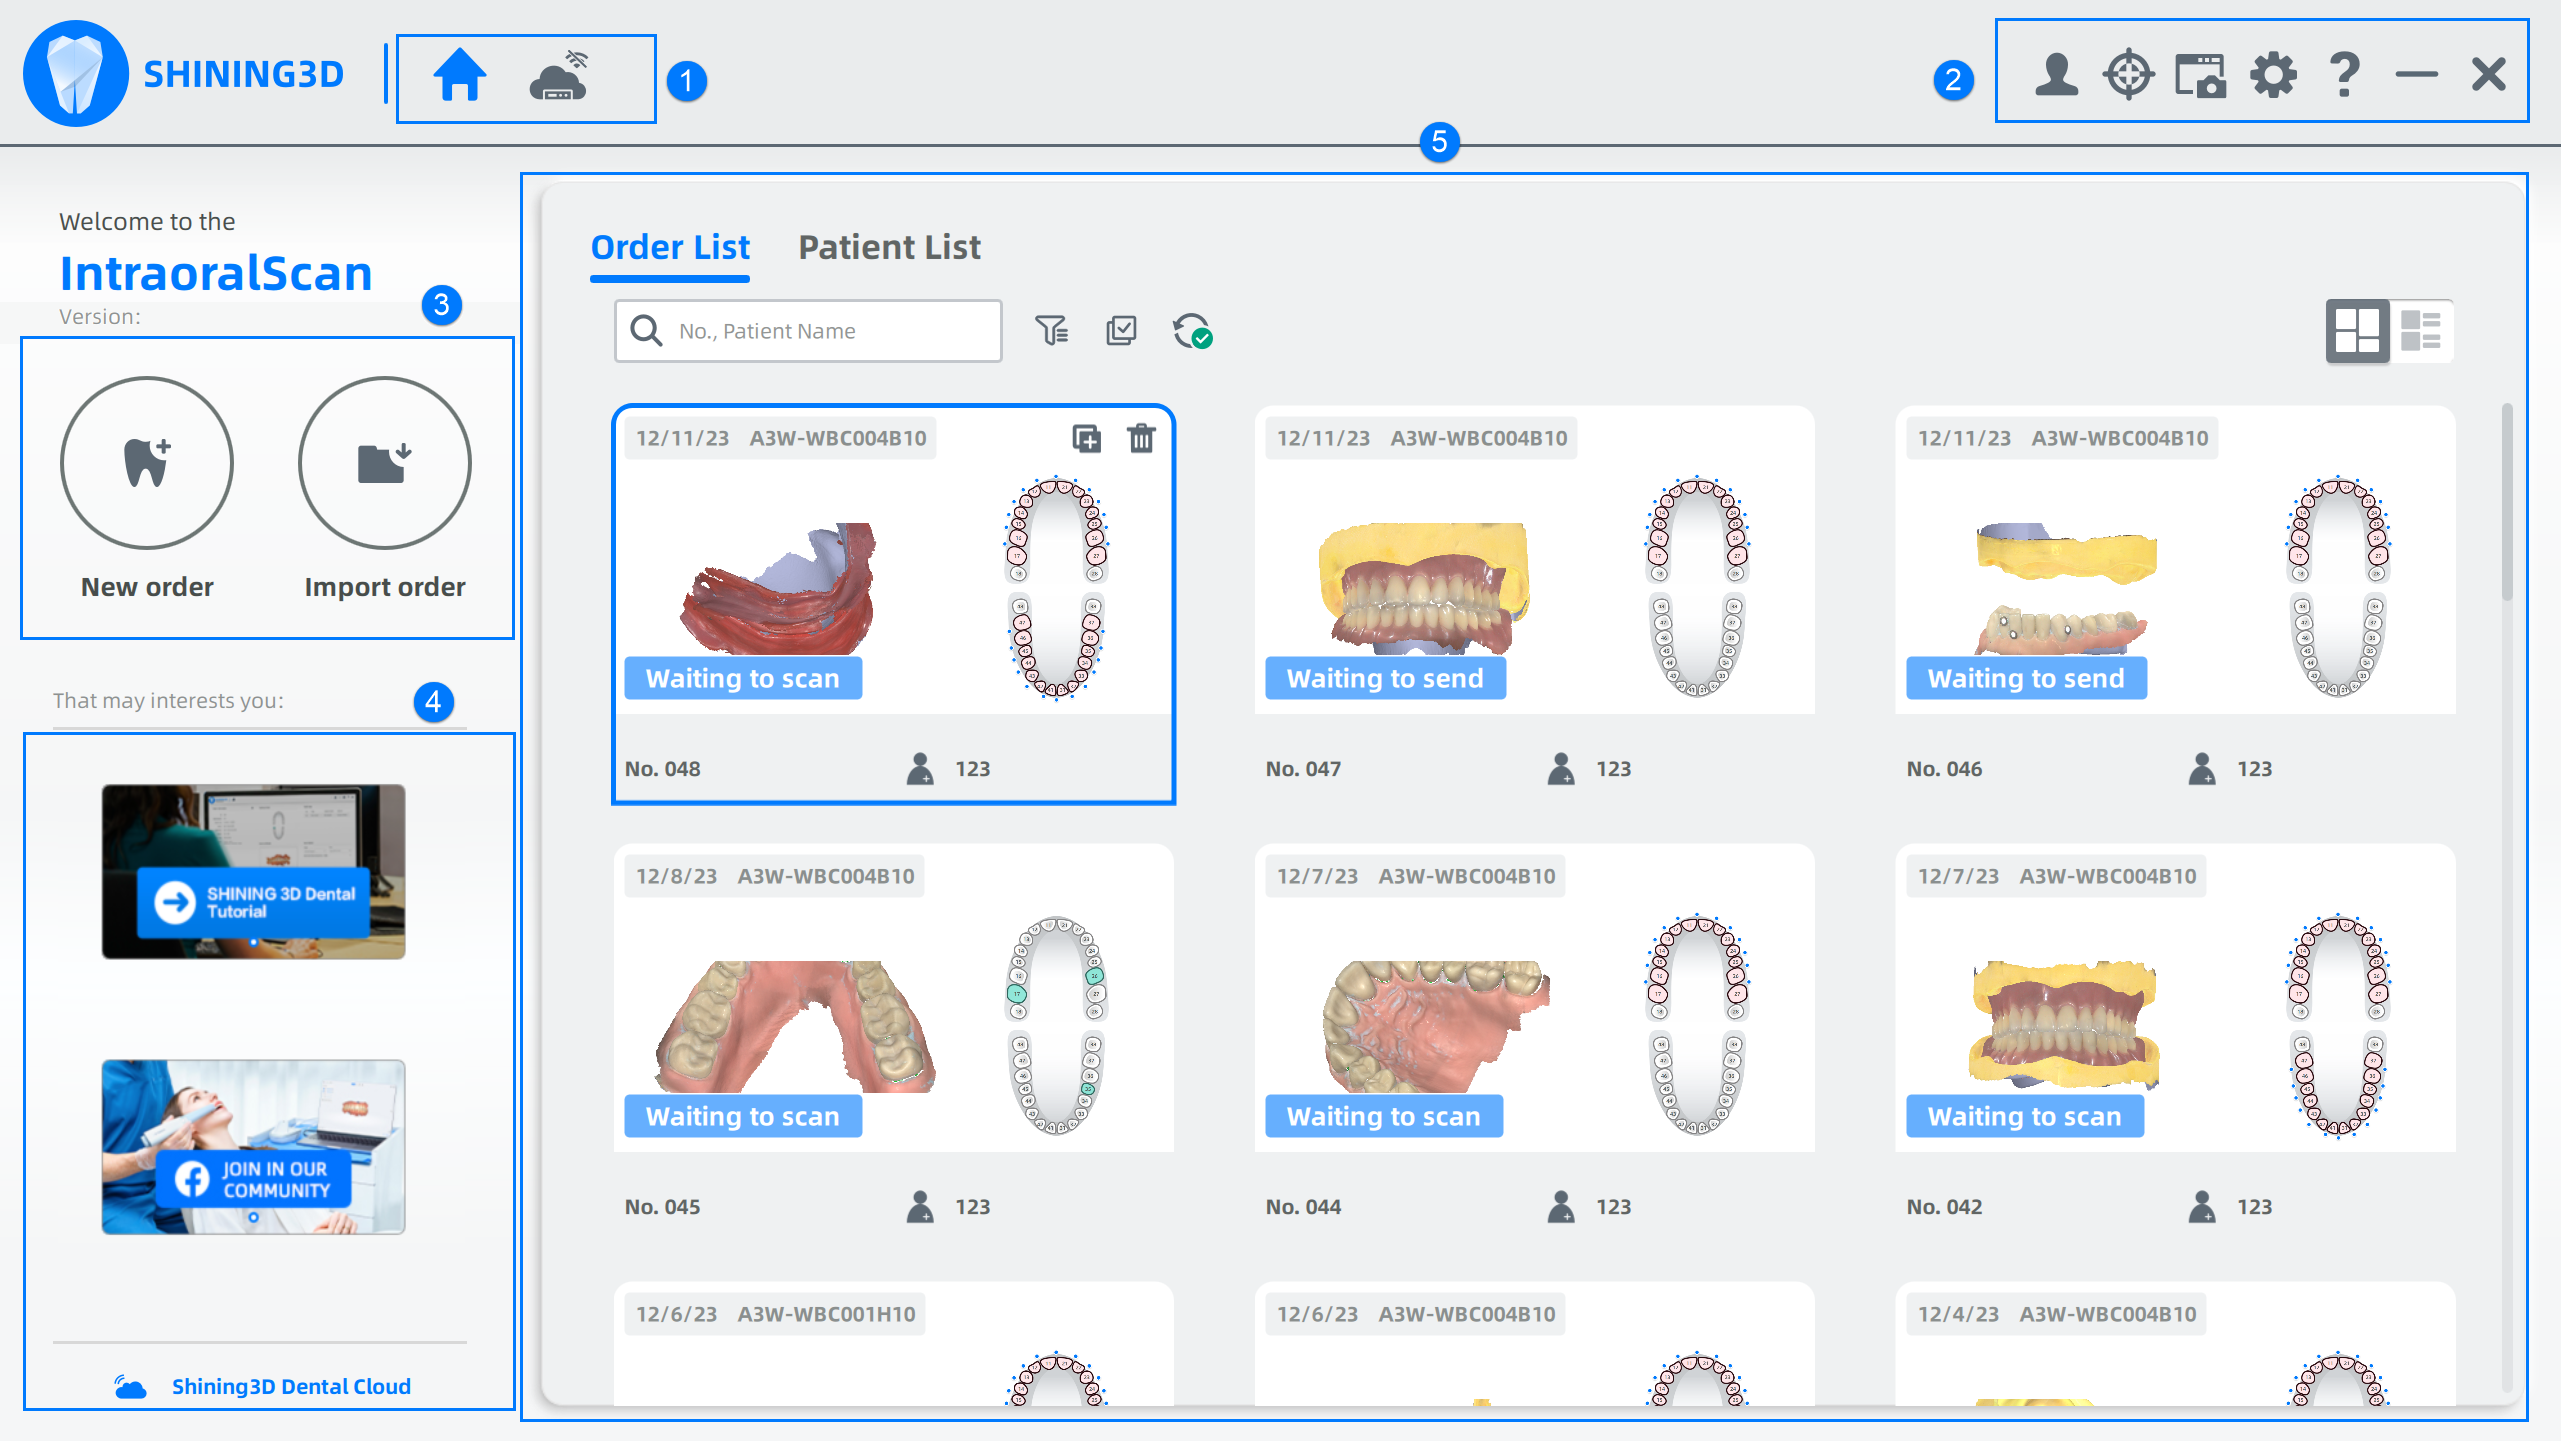
① Home and dental cloud connection
:Click to return to the homepage.
Dental cloud connection
: Normal connection.
: Failed connection.
: Unstable connection.
② Settings
Check ![]() Users information and connection,
Users information and connection, Calibration,
Record and screenshot,
Order settings and
Help.
Users information and connection
- When adding connections with a lab and the lab is not verified, a tip pops up to inform the users.
- Click Confirm to add connection with the lab.
Screenshot
Record the screen, take a screenshot and check screenshots.
- Click Screen Record to record the screen and click
to end it.
- Click Screenshot to capture the picture and you can edit the picture by clicking it displayed in the lower right corner.
- Click Find the screenshots/screen records to view the storage path.
Help
Click for remote assistance, online consultant, the manual and other instructions.
③ Create/ Import Orders
:Click to create a new order, as well as a scanning order. Details in Create/Import Order.
 :Click to import an order from ExoCAD and IntraoralScan.
④ Advertisement
See information of other productions in Shining 3D.
Click Shining 3D Dental Cloud to enter cloud platform.
⑤ Orders
Including Order list and Patient list.
Order list
| Icon | Description |
|---|---|
Search |
Enter order number or patient's name for searching. |
Filter |
|
Multi-selection mode |
Process the duplication or the deletion of multiple orders. Click |
Sync information |
Synchronize the cloud order to the software. |
Card Mode &Table Mode |
Switch arraying methods between card & table. Check order information (e.g. patient's information, order status and creating time). Open a certain order by double-clicking it. |
Send |
Send order information and scanning data to other labs. |
Duplicate |
Create a new order identical to the current one and re-scan. |
Delete |
Delete the selected order(s) from the list. Delete the file and scanning data permanently by checking Delete File and Scanning Data. |
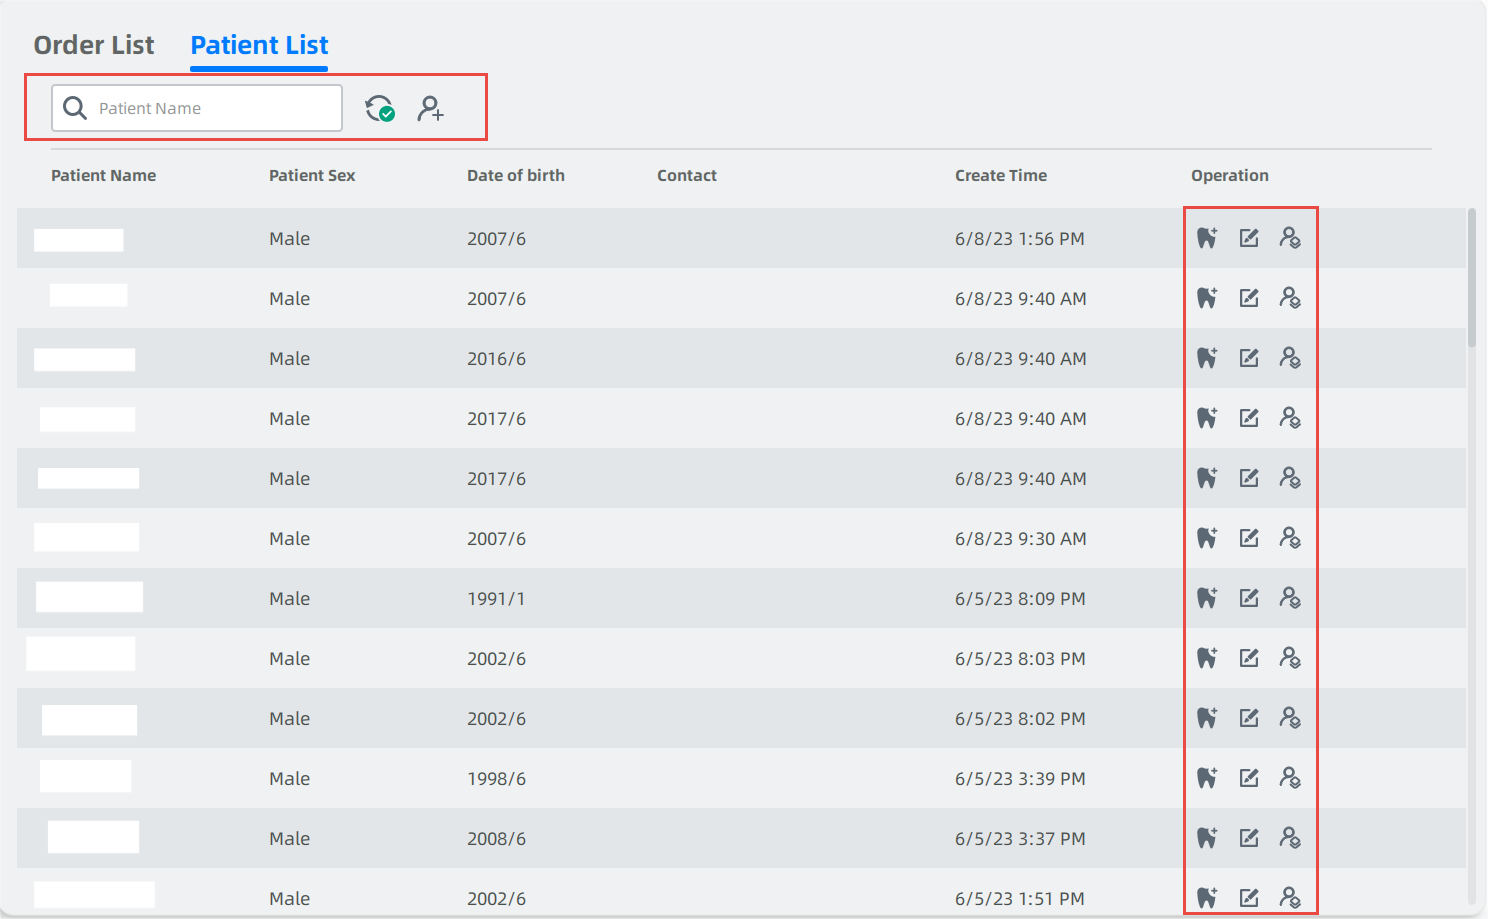
Patient list

| Icon | Description | Icon | Description |
|---|---|---|---|
Search |
Enter patient's name to search orders. | Sync information |
Synchronize the cloud order to the software. |
Add a patient |
Click the button to enter the New Patient window. Enter name, gender, age and other necessary information to add a new patient. | Create an order |
Create a new order based on the certain patient. Relative information will be filled automatically and can be edited. More details can be found in Create/Import Order. |
Edit patient |
Click to edit relative information of the certain patient. |  Merge patient |
Merge the same patient for better patient management. More details can be found in Patient Merge. |
Note
- If the user edits patient information, creates new orders or adds a patient when the computer is not connected to the network, the relative information will be synchronized to the cloud.
- Only institution manager can merge patients.