Measurement Guidance
Click to enter the interface of measurement analysis.
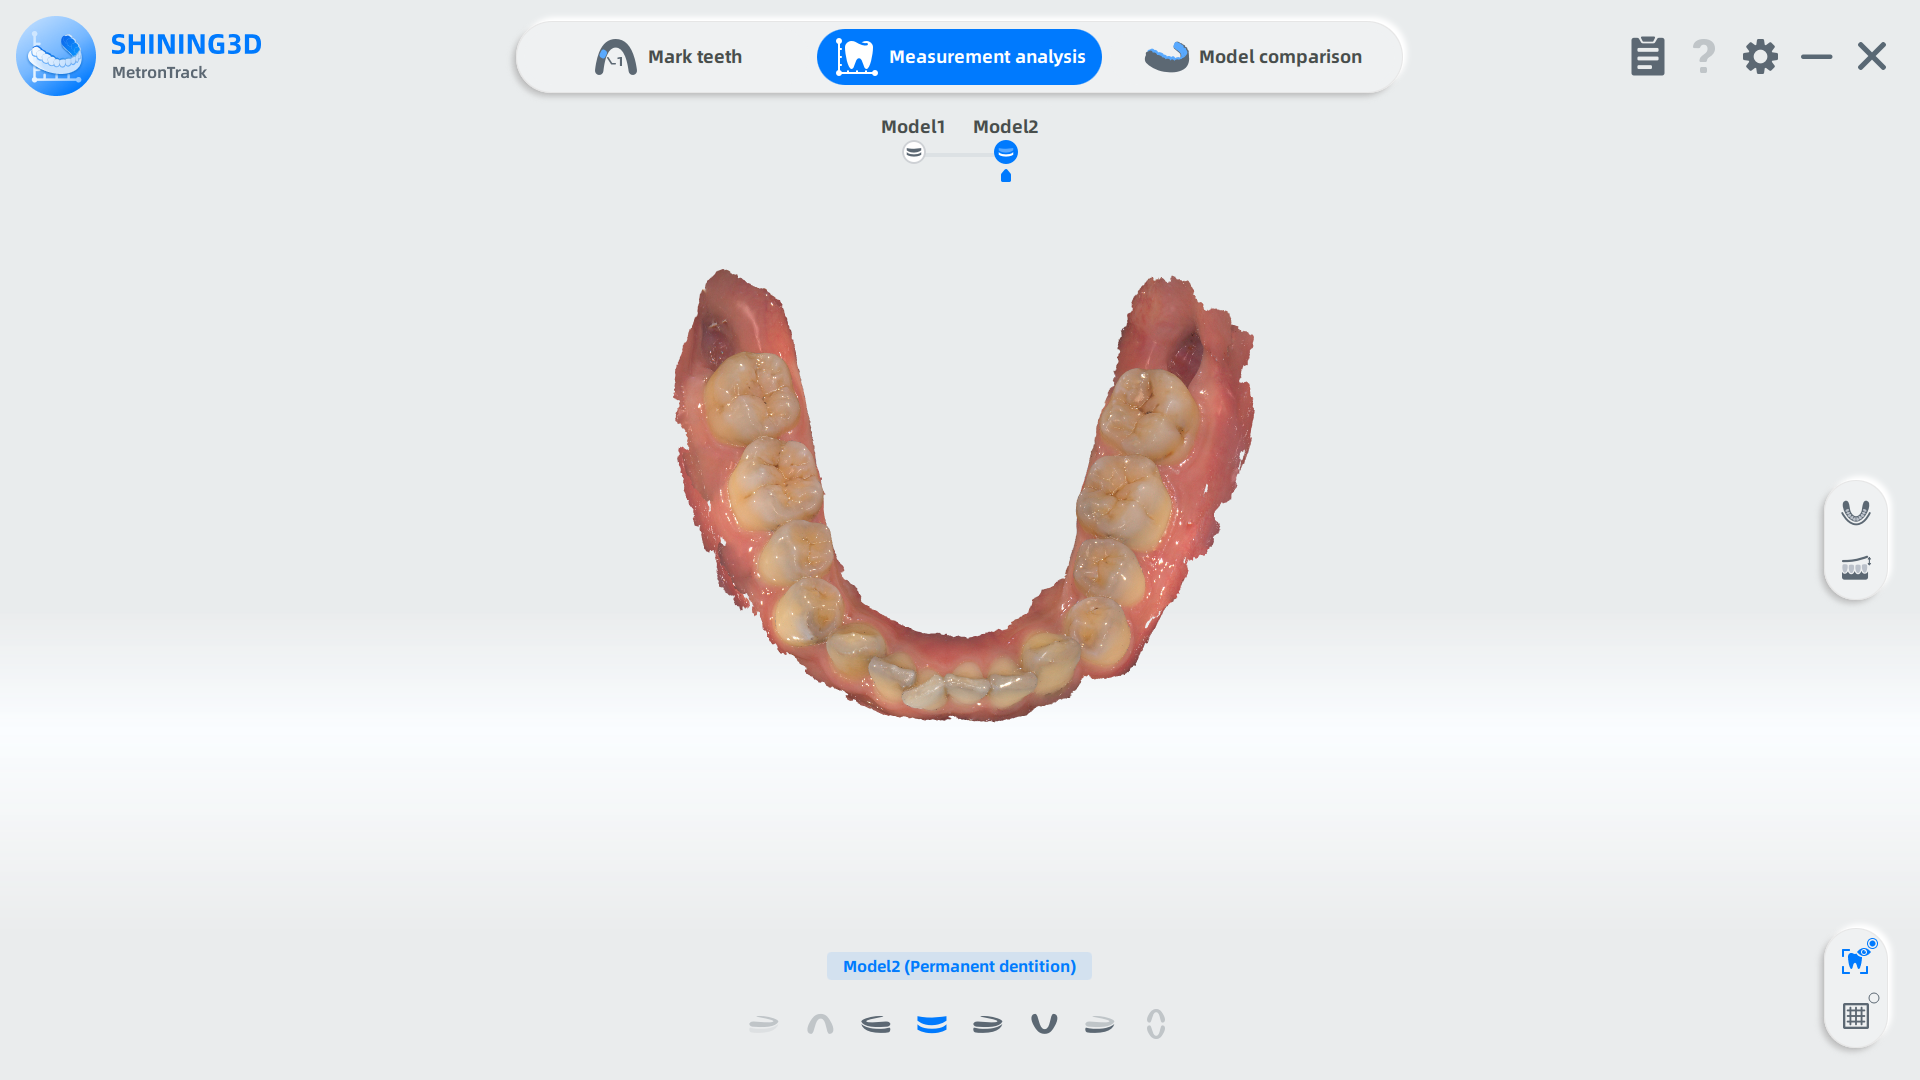
Measurement Items
For patients in the mixed dentition stage, the software will predict the crowding of the permanent teeth that are yet to erupt based on the existing mandibular permanent teeth.
Caution
Moyers forecast can only be used in mixed dentition state teeth. When only a single upper jaw is imported, Moyers forecast is not accessible.
The dental arches of the upper jaw and lower jaw will be displayed.
Adjust the dental arch manually:
-
Click the dental arch when it turns into blue and a window pops up.
-
Move the control point on the dental arch to adjust the arch.
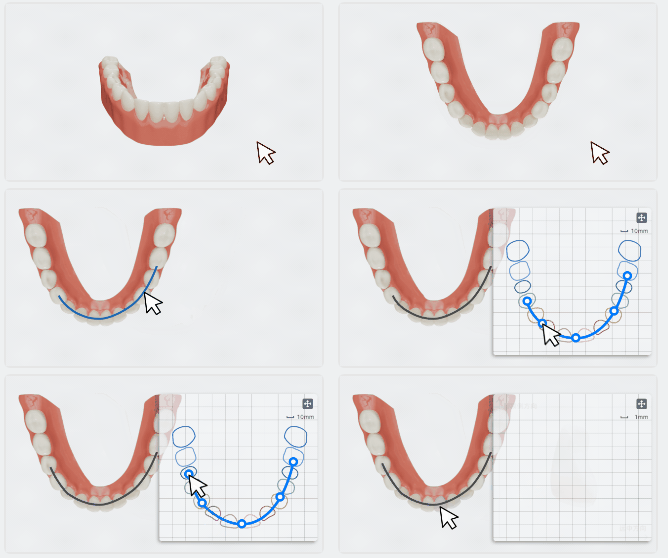
Adjust the tooth width manually:
-
Click a tooth and a window showing its labio-buccal direction and mesial direction pops up.
-
Rotate the tooth to adjust the labio-buccal direction and distal direction. The tooth width is adjusted as well.
The dental crowding measurement is used to measure the crowding degree of the teeth. Crowding teeth usually happen when the teeth are not regularly arranged. By analyzing the teeth model, the sum of teeth width and the circumference of the dental arch are measured and the difference between the two values represents the degree of crowding. Crowding measurement is an important indicator in determining whether tooth extraction is necessary.
Moyers forecast can be used for crowding measurement in mixed dental stage. While in permanent dentition stage, moyers forecast is not accurate. Thus, dental crowding measurement is used to measure the crowding degree in the permanent dentition state.
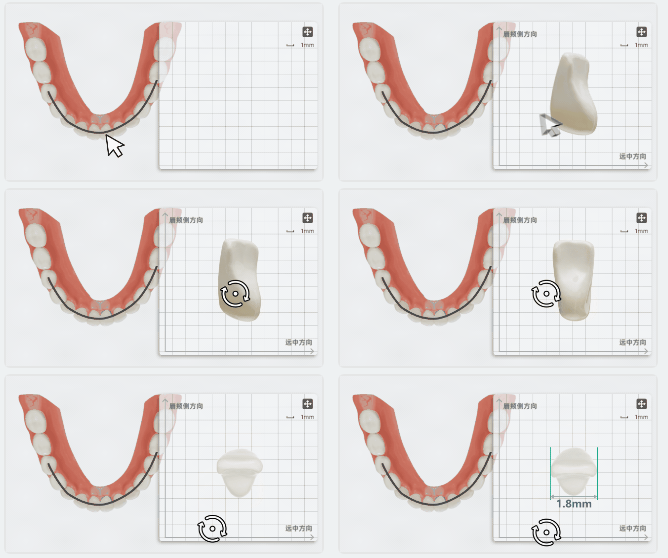
The dental arches of the upper jaw and lower jaw will be displayed.
Adjust the dental arch manually:
-
Click the dental arch when it turns into blue and a window pops up.
-
Move the control point on the dental arch to adjust the arch.

Adjust the tooth width manually:
-
Click a tooth and a window pops up.
-
Rotate the tooth to adjust the labio-buccal direction and distal direction. The tooth width is adjusted as well.

The Bolton Index refers to the proportional relationship between the widths of the upper and lower teeth. It helps preliminarily determine whether the upper and lower teeth are proportionally aligned or if there is an abnormality in their width relationship, serving as a reference for diagnosing dental malocclusions. Besides, the Bolton Ratio Measurement enables to analyze the size of the upper and lower teeth to achieve effective adjustment of teeth alignment. Therefore, this measurement is also valuable as a reference in orthodontic treatment.
Caution
The result of the Bolton ratio can be influenced by factors such as the malocclusion type, gender, ethnicity, extraction patterns, measurement errors, tooth thickness, and torque, which may introduce errors in the Bolton Ratio Measurement. Therefore, it is important to consider these factors and to use this measurement as a reference alongside other clinical assessments for an accurate treatment plan.
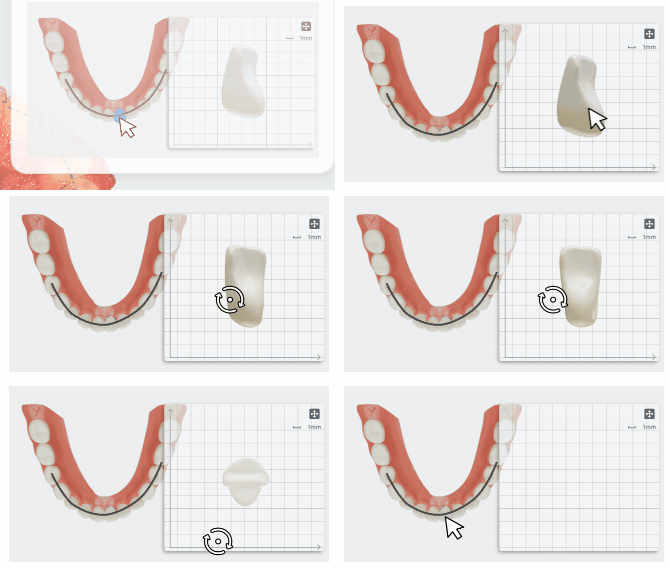
Manually adjust tooth width
1 Click a specific tooth to display the adjustment panel in lower right corner to adjust tooth width.
2 Rotate the tooth to align its mesiodistal and buccolingual directions with the coordinate axes. The measurement value of the tooth width will be updated in real-time.
Click![]() to enter Overbite and Overjet Measurement.
to enter Overbite and Overjet Measurement.
Steps
-
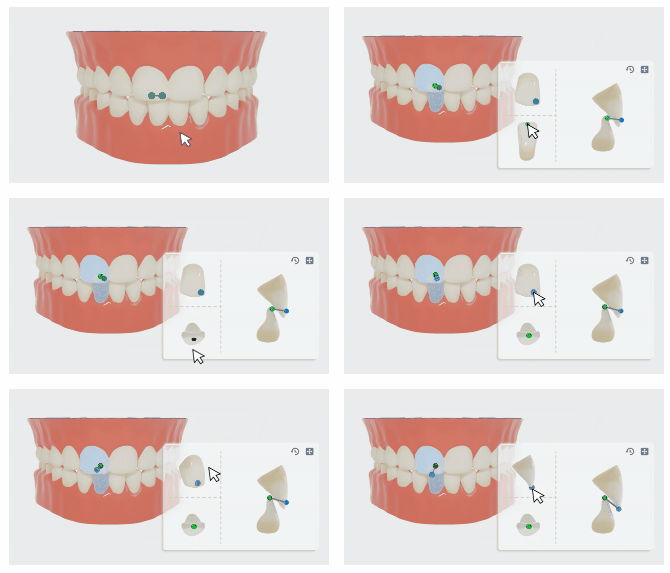
Click a specific point on the model to display the adjustment panel in lower right corner.
-
Manually adjust the point in the panel, bringing a corresponding change in Overbite and Overjet data. Rotate the tooth to align its mesiodistal and buccolingual directions with the coordinate axes.
-
For example, click Middle point of Incisal edge in upper jaw and manually adjust its position in the panel in lower right corner.
-
The position changes between central incisor in upper jaw and central incisor crown in upper jaw reveal the overbite data.
-
Move the Middle point of Incisal edge in upper jaw to adjust the distance between this point and Middle point of Incisal edge in lower jaw. The overjet data on measurement table will be updated.
-
| Position | Overbite | Distance(mm) | Overjet |
|---|---|---|---|
| No contact | Open jaw | ≤ 0 | Crossbite |
| Within incisal edge 1/3 | Normal | 0~3(including 3) | Normal |
| Incisal edge 1/3~1/2 | Ⅰ° deep overbite | 3~5(including 5) | Ⅰ° deep overjet |
| Incisal edge 1/2~2/3 | Ⅱ° deep overbite | 5~7(including 7) | Ⅱ° deep overjet |
| Above incisal edge 2/3 | Ⅲ° deep overbite | >7 | Ⅲ° deep overjet |
Click![]() to enter Molar Relationship Measurement. The points are displayed differently in primary dentition, permanent dentition and mixed dentition.
to enter Molar Relationship Measurement. The points are displayed differently in primary dentition, permanent dentition and mixed dentition.
Steps
-
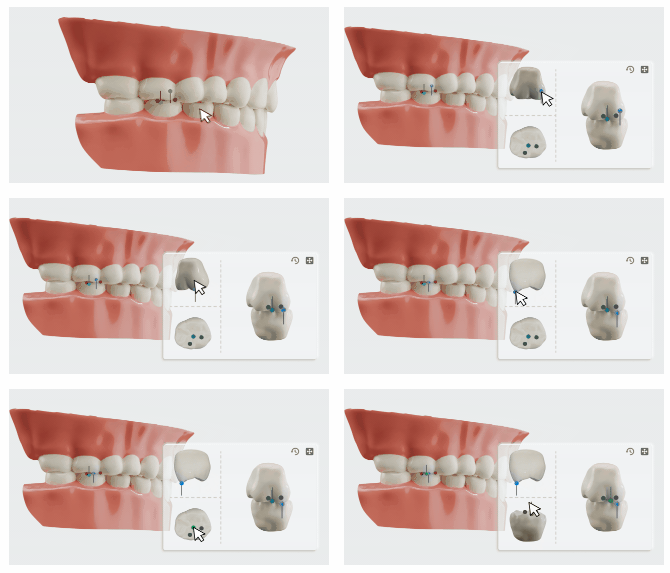
Click a specific point on the model to display the adjustment panel in lower right corner.
-
Manually adjust the point in the panel, bringing a position changes between buccal groove and buccal cusp. Rotate the tooth to align its mesiodistal and buccolingual directions with the coordinate axes.
-
Take the permanent dentition as example.
- Click the point Mesiobuccal cusp in upper jaw on the model.
- Drag this point at desired position, changing the distance between this point and other three points in lower jaw, including Distobuccal cusp, Mesiobuccal cusp and Buccal groove.
- Accordingly, the measurement value will be updated, defining Molar relationship.
| Position | Molar relationship |
|---|---|
| The Mesiobuccal cusp in upper jaw is located between Distobuccal cusp and Mesiobuccal cusp in lower jaw. | Neutral relationship |
| The Mesiobuccal cusp in upper jaw is located in front of Mesiobuccal cusp in lower jaw. | Mesial relationship |
| The Mesiobuccal cusp in upper jaw is located behind Distobuccal cusp and Mesiobuccal cusp in lower jaw. | Distal relationship |
Note
When one or two teeth are missing in each pair of upper and lower jaws, the points are not displayed.
Click![]() to enter Curve of Spee measurement.
to enter Curve of Spee measurement.
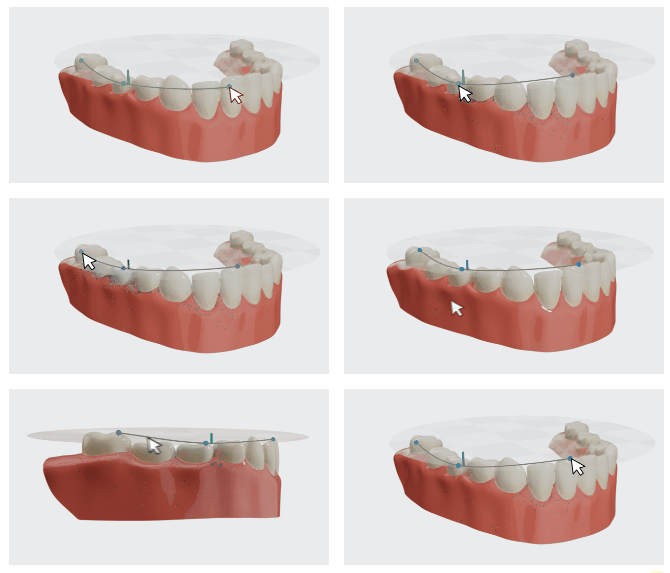
Click a point from left or right view to manually adjust Curve of Spee, bringing a change in measurement value updated on the table.
Caution
If too many teeth are missing, the Curve of Spee measurement is not accessible.
Measurement Template
Two templates are provided in MetronTrack for your reference.
Steps
-
Click
 in the right top corner.
 -
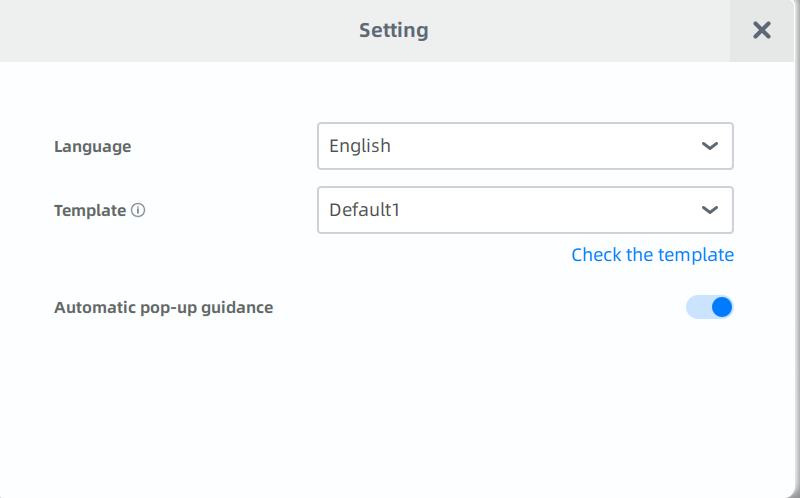
In the pop-up setting window, select one template from the dropdown menu: default 1 or default 2.
-
Click
 to check,and then click Select this template.