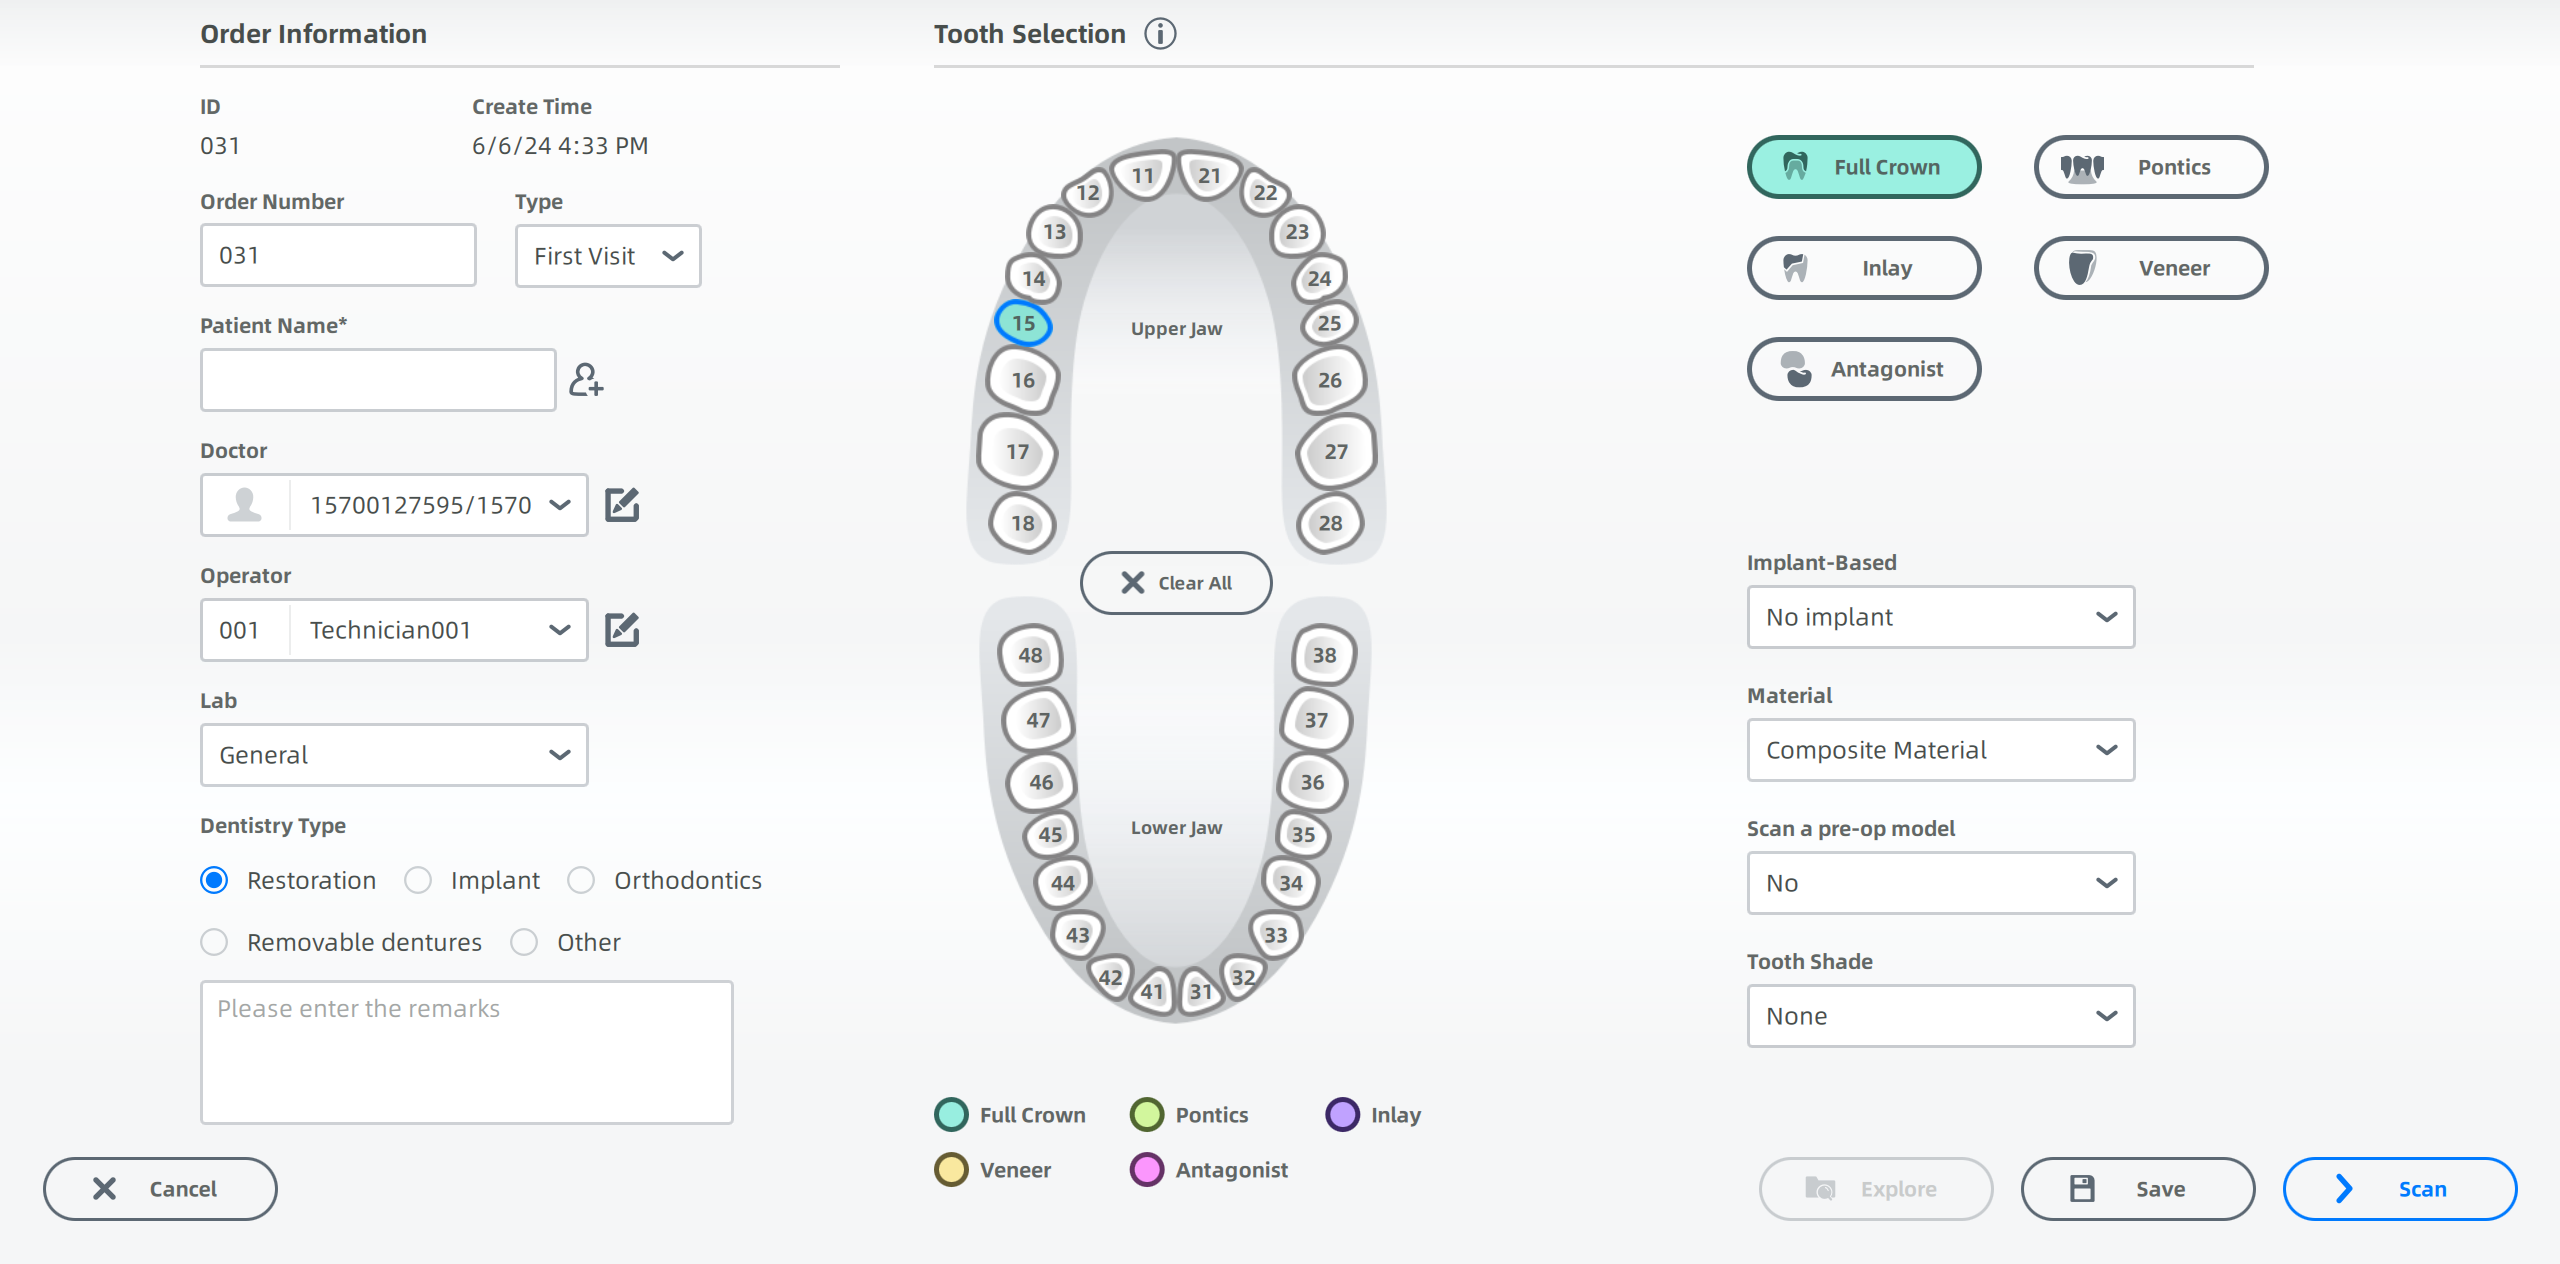
Create Order
Create different kinds of orders according to the scanning results. Orders will show the types of patients, tooth place and scanning process.

Order Information
Click to enter order information.
-
Choose the types of patients. FirstVisit or FollowUp.
-
Click
to enter required information of the patient such as name and age.
Note
If it is a followup, you can enter the patient's name directly.
-
Enter doctor's name to search the doctor. Or click
to add a new doctor: enter the doctor's name (and email or phone if needed) in the Doctor Configuration interface and click
to add the new doctor.
-
Select a dentistry type:
- Restoration: Replace or restore your missing parts of your tooth structure. The treatment types include Full Crown, Pontic, Inlay, Veneer and Antagonist, and the dentist will choose the proper types according to the situation.
- Implant: Replace damaged or missing teeth with artificial teeth. Implant treatment types include Full Crown, Bridge, Upper, Lower and Full, and the dentist will choose the proper types according to the situation.
-
Orthodontics: Deal with irregularities of the teeth and their correction. Treatment types include Fixed Ortho, Mobile Ortho and Invisible Ortho.
-
Removable dentures: Check the bite relationships of edentulous patients. The types of removable dentures orders can be Full denture, Partial removable denture or Antagonist. The Get bite record can be natural teeth bite, bite rim or old denture.
-
Other: Receive other dental examinations and treatments including Oral Exam, Caries Filling, Oral RCT and Period DontTm.
Tooth Selection
-
Based on the teeth to be treated, select the teeth directly on the teeth map.
Keyboard shortcuts Description Left-click Select one tooth or teeth. Right-click Cancel settings of a tooth. Ctrl+ Left-click Copy the last defined dental restoration type to the currently selected dental position. Shift + Left-click Copy the restoration type defined by the previous tooth position to all teeth between the selected tooth position and the previous tooth position. -
Select implant type.
Implant Type Description Custom Abutment Add the step of scanning ScanBody. Custom Abutment (manual positioning) Add the step of scanning Abutment. Screw Retained Add the step of scanning ScanBody for dental implant. Screw Retained (manual positioning) Add the step of die scanning. -
Set Material.
-
Set to open Scan a pre-op model.
Note
When selecting Orthodontics, the dentist should choose the stage.
-
Click the buttons for further operations.
Operation Description Scan Click to enter scanning interface. Save Click to save the current order for subsequent scanning. Explore Check the saved orders on the pop-up window.
Import Orders
Click Import order and select INPROJECT or DENTALPROJECT files. Supports importing orders saved by IntraoralScan software and ExoCAD orders.
When importing scanned orders and clicking Go to scan.
To load the last scanned data, click Yes. To rescan, click No.