Area Adjustment
On the interface of Area adjustment, use Brush, Transmission and other tools to manually select area to be printed.
Note
When adjusting the area, you can hold down the right mouse button to rotate models or rotate the wheel to zoom in/out, which helps in selecting the area more precisely.
| Tool/Button |
Instructions |
 Brush Brush |
- Click the button, and the button will switch to
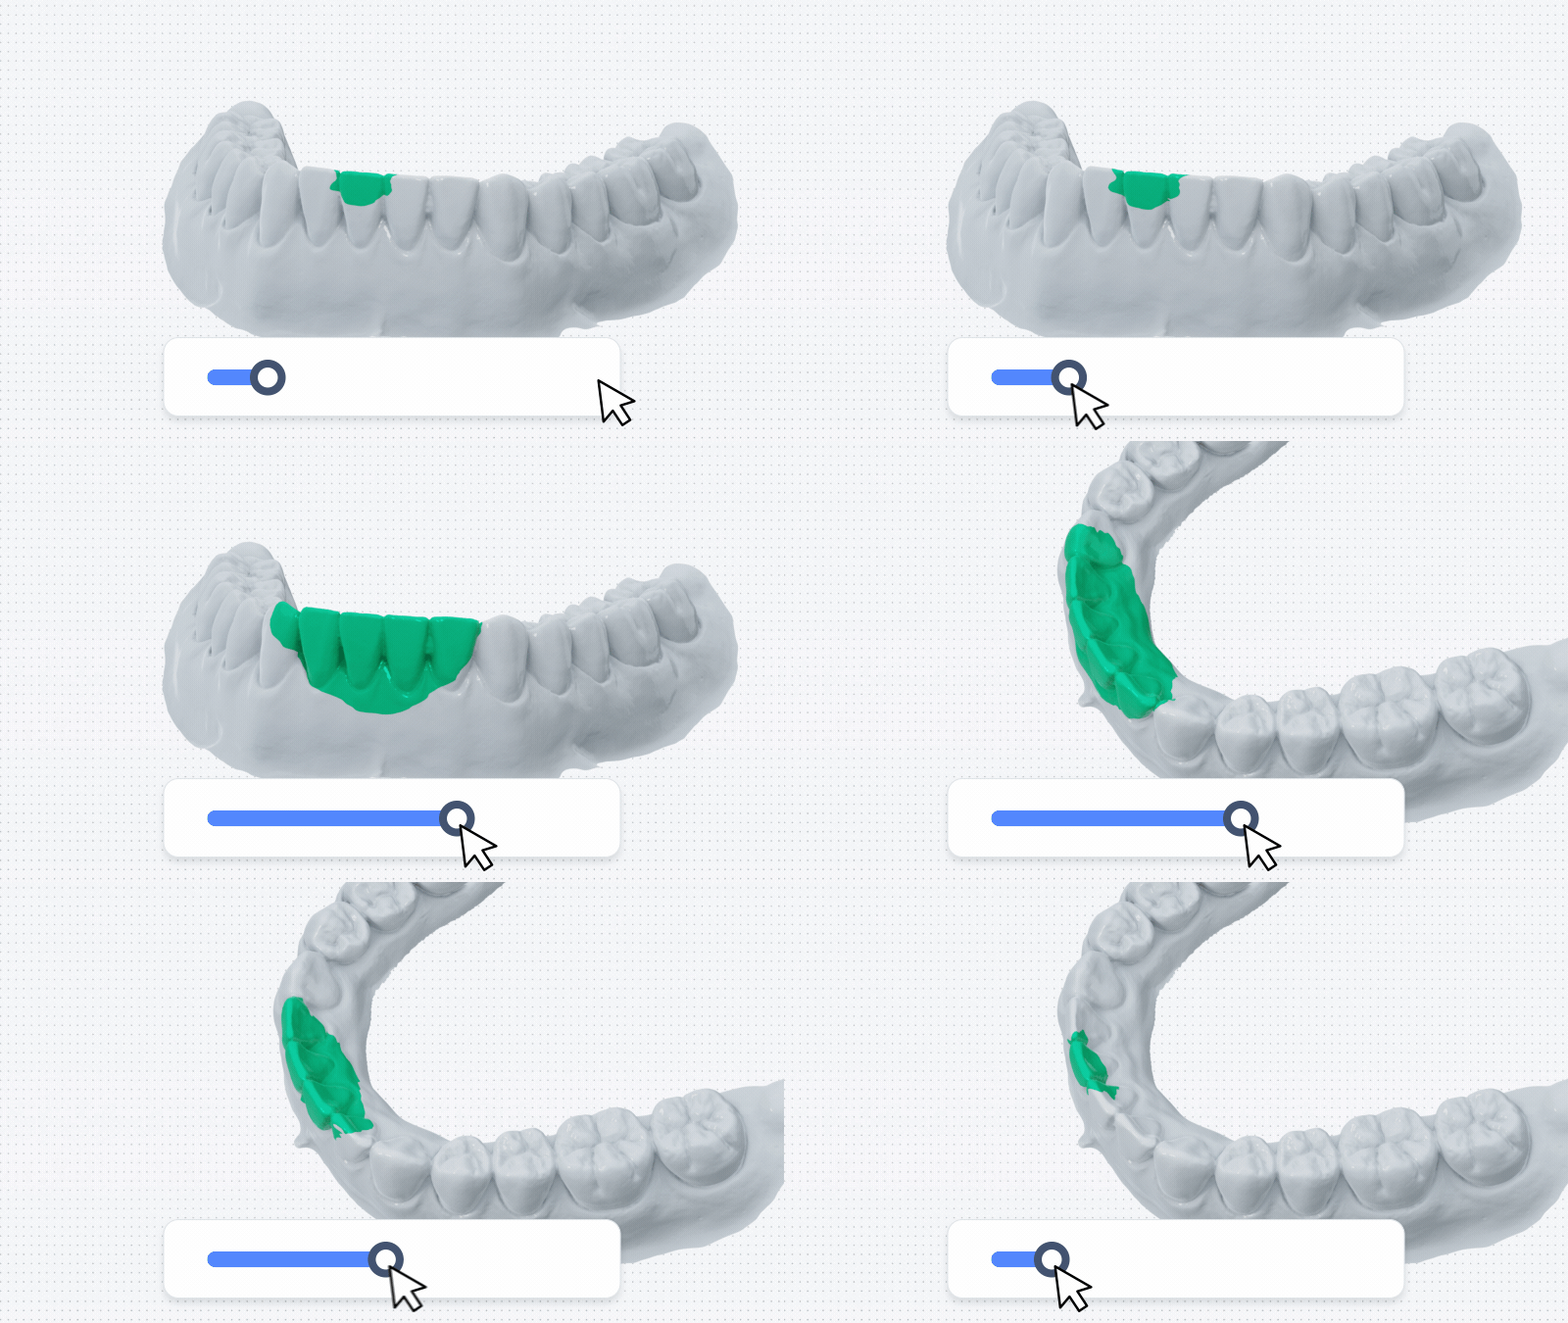
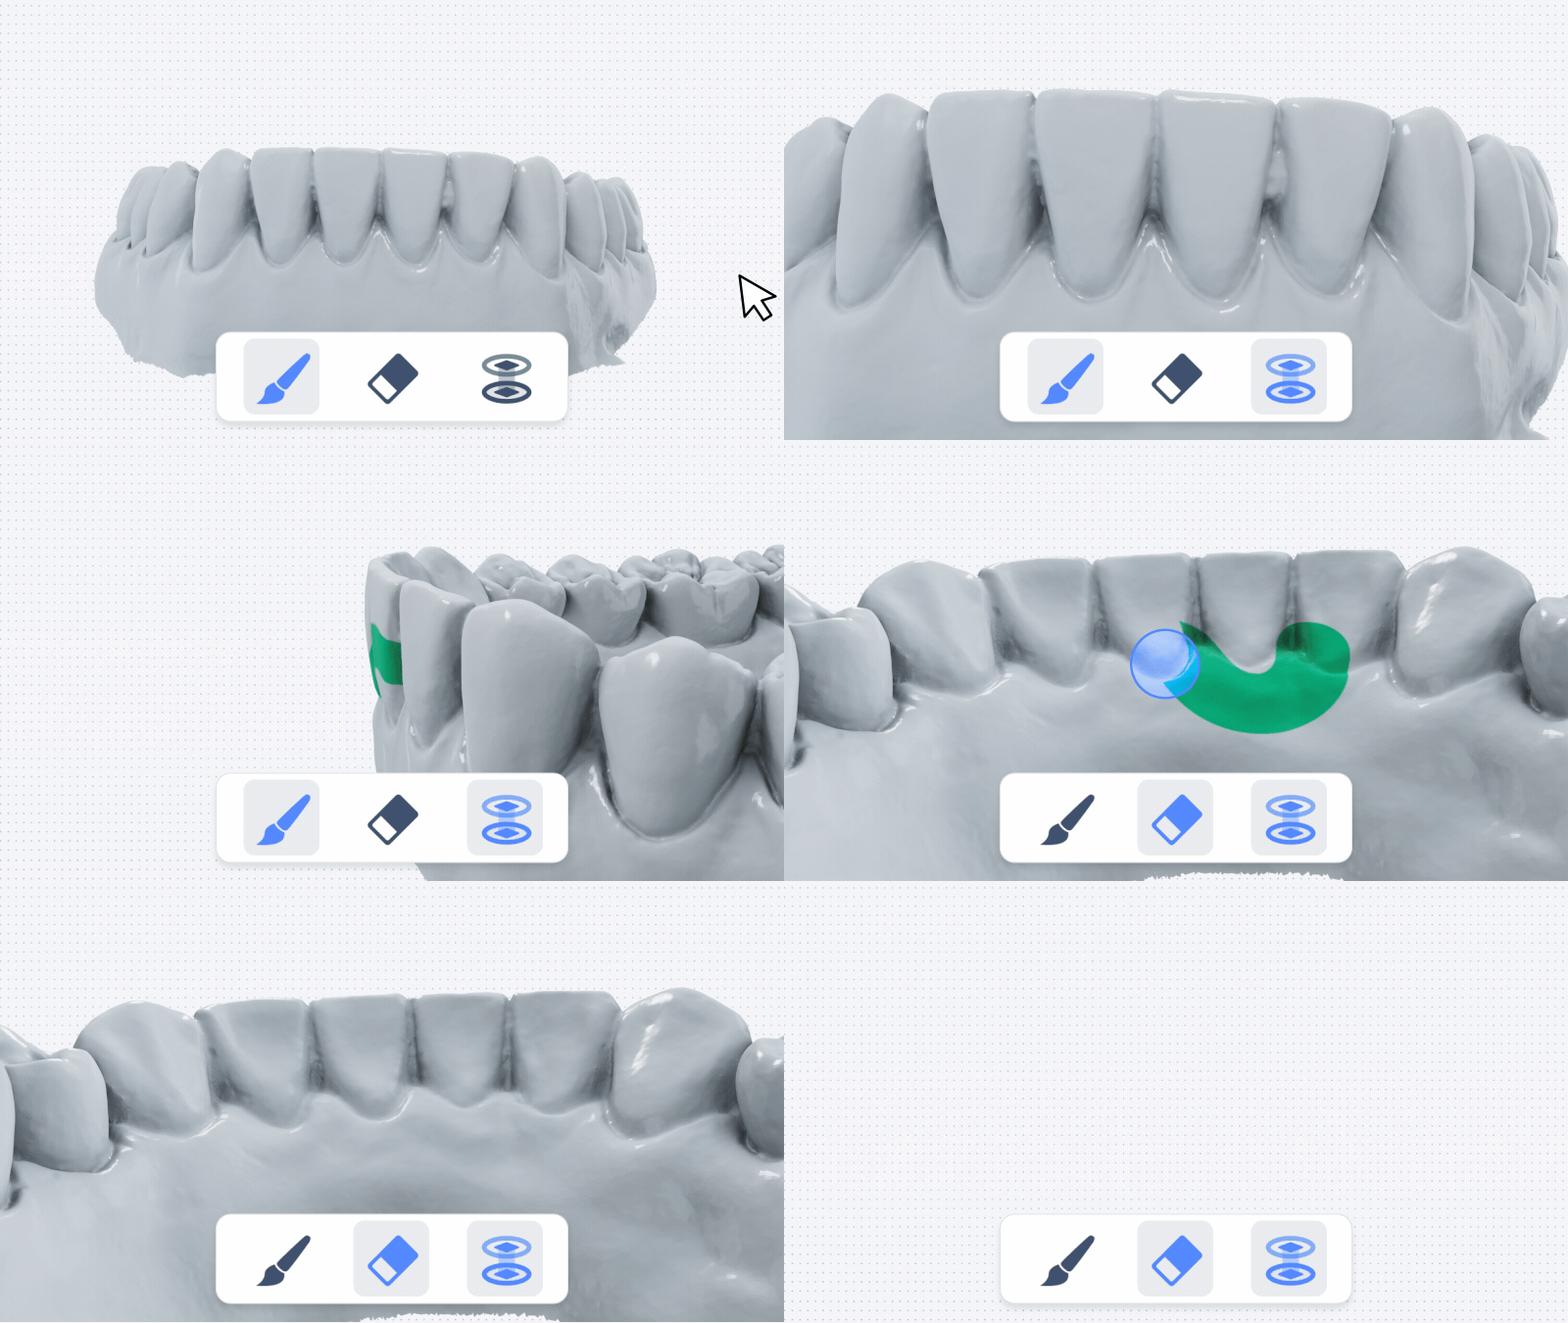
 ; in the operation interface, the dark gray circle at the cursor represents the coverage area of the brush, and you can use the slider to enlarge or reduce the size of this circle, which helps in selecting the area more precisely. ; in the operation interface, the dark gray circle at the cursor represents the coverage area of the brush, and you can use the slider to enlarge or reduce the size of this circle, which helps in selecting the area more precisely. - Move the brush to the desired area, then hold down the left mouse button to brush over it to select (highlighted in green) the outer layer data of the scanned model that has been brushed; before brushing, you can click to use the Transmission tool to select both the inner and outer sides of the jaw simultaneously.
- After selecting the area, you can use the region size adjustment slider to repeatedly enlarge or reduce the selected area's size.

|
 Eraser Eraser |
- Click the button, and the button will switch to
 ; in the operation interface, the dark gray circle at the cursor represents the coverage area of the eraser, and you can use the slider to enlarge or reduce the size of this circle, which helps in deselecting the area more precisely. ; in the operation interface, the dark gray circle at the cursor represents the coverage area of the eraser, and you can use the slider to enlarge or reduce the size of this circle, which helps in deselecting the area more precisely. - Move the eraser to the desired area, then hold down the left mouse button to brush over it to deselect the outer layer data of the scanned model that has been brushed; before brushing, you can click to use the Transmission tool to deselecting both the inner and outer sides of the jaw simultaneously.
- After deselecting the area, you can use the region size adjustment slider to repeatedly enlarge or reduce the size of the deselected area.
|
 Transmission Transmission |
- Click the button, and the button will switch to
 . . - When using the Brush or Eraser, you can simultaneously select or deselect the corresponding area on the opposite side of the jaw while brushing, which helps in quickly applying or removing the brush strokes in the desired area.

|
 Automatic filling Automatic filling |
Click the button to fill all connected regions. |
 Reset Reset |
Click the button to reset the model to its initial coordinates. |
 Undo Undo |
Click the button to undo the previous action; you can click continuously to undo multiple actions in succession. |
 Redo Redo |
Click the button to redo the previous action; you can click continuously to redo multiple actions in succession. |
 Brush
Brush Transmission
 Undo
Undo Redo
Redo
