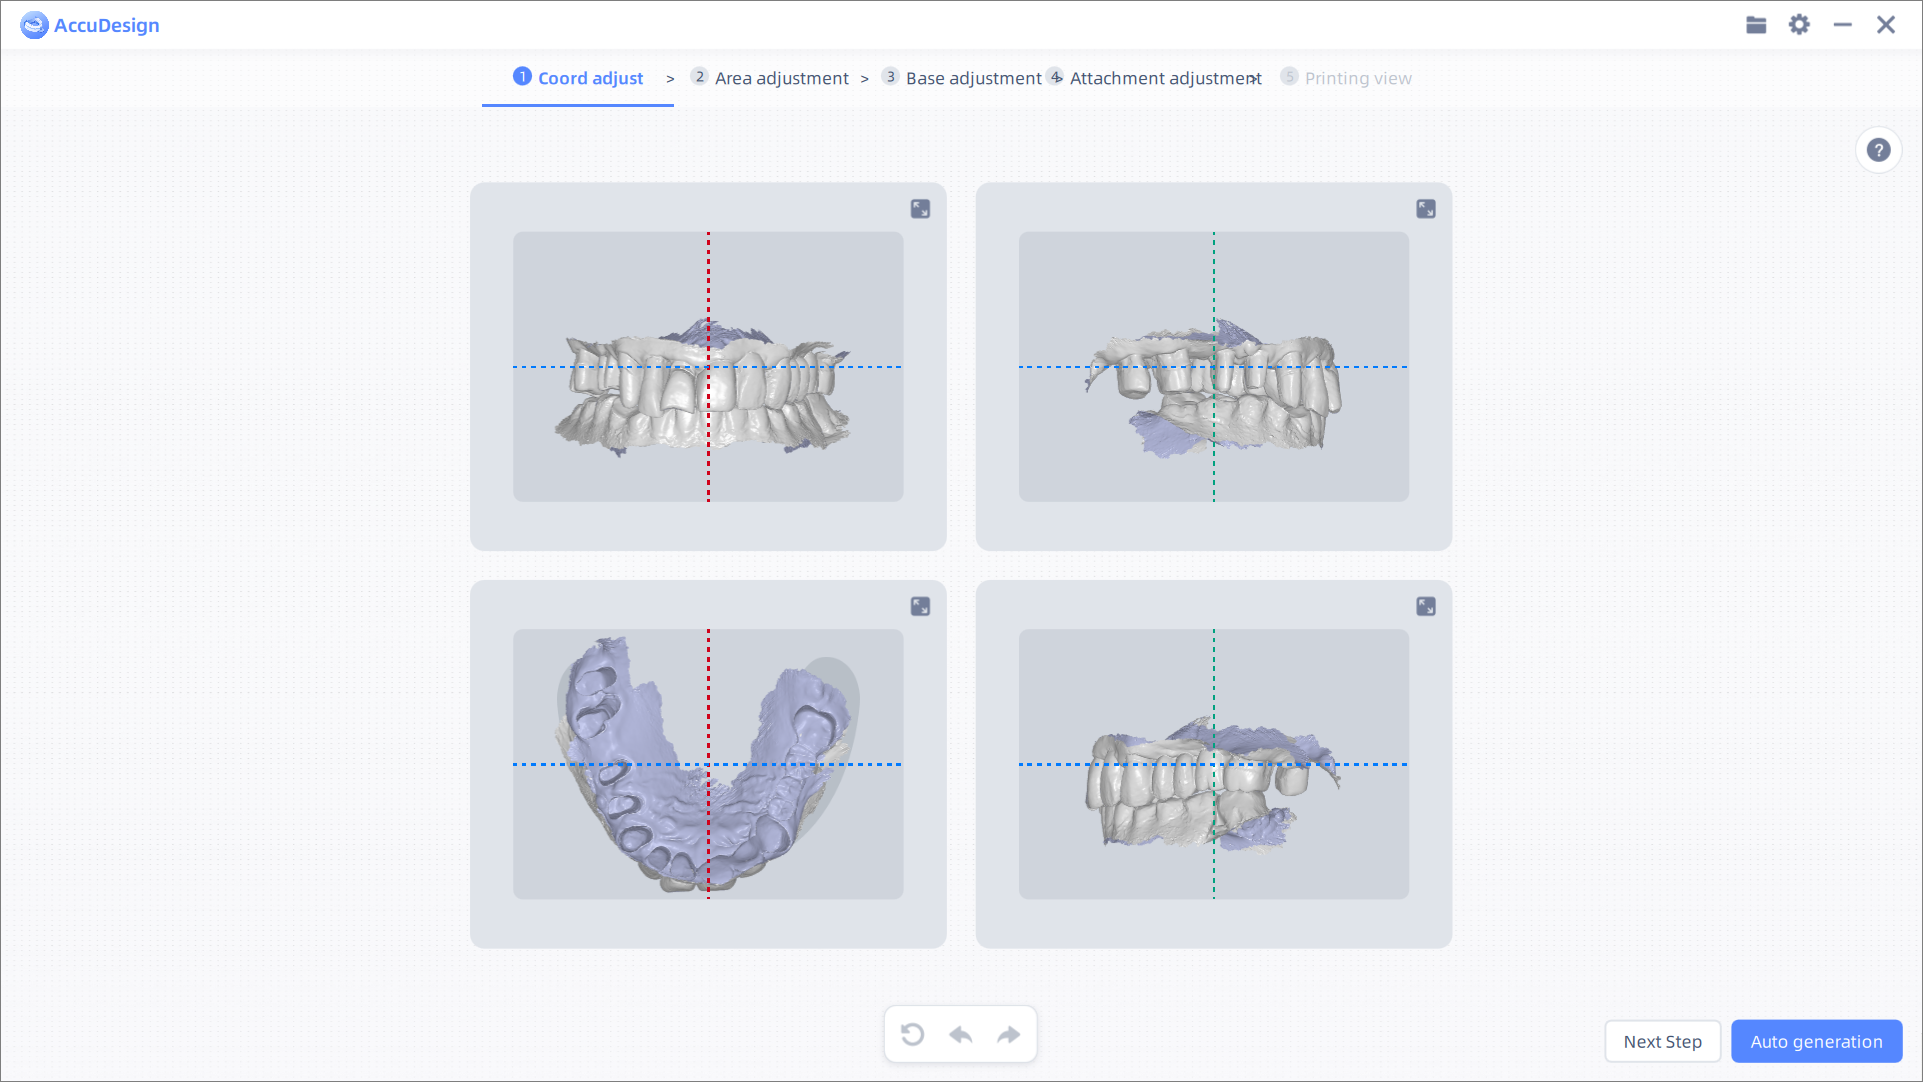
Coord Adjustment
On the interface of Coord adjust, adjust the position and the angle of model from three views (front view, top view, left and right side views) until the model is horizontally aligned in all three views, and meanwhile roughly overlaps with most darker colored shadow area on the coordinate system, to ensure the model is positioned at the center of the coordinate system.

-
 : Create new project.
 : Import project.
 : Export project.
 : Export model.
 : Options button. Click the button to expand the dropdown list.
 Note
If AccuDesign is called from other scanning software (such as IntraoralScan), the functions mentioned above are not supported.
-
 : Setting button. Click the button to open the Settings popup window, where you can Select Language, set up Model thickness and Auto pop-up guidance (switched off by default).
Note
- Support setting language as Chinese or English. If AccuDesign is called from other scanning software (such as IntraoralScan), the language corresponds with that in the scanning software and the language setting is not displayed.
- Support entering number directly or clicking
 button to increase or decrease the thickness (mm) of models, and the setting will be effective after restarting the software.
 - The instructional animated image will be displayed by default on the right side of the step interface when the Auto pop-up guidance is enabled.
-
 : Help button. Click the button to show or hide the instructional animated image.
 : Enlarge button. Click the button to enlarge the instructional animated image; and click
  in the top right corner to shrink the image.
 : Enlarge button. Click the button to enlarge three views to help for delicate operations; and click
  in the top right corner to shrink the image.
 : Reset button. Click the button to reset the model to its initial coordinates.
 : Undo button. Click the button to undo the previous action performed on the model; you can click it multiple times to undo multiple actions in succession.
 : Redo button. Click the button to redo the previous action performed on the model; you can click it multiple times to redo multiple actions in succession.
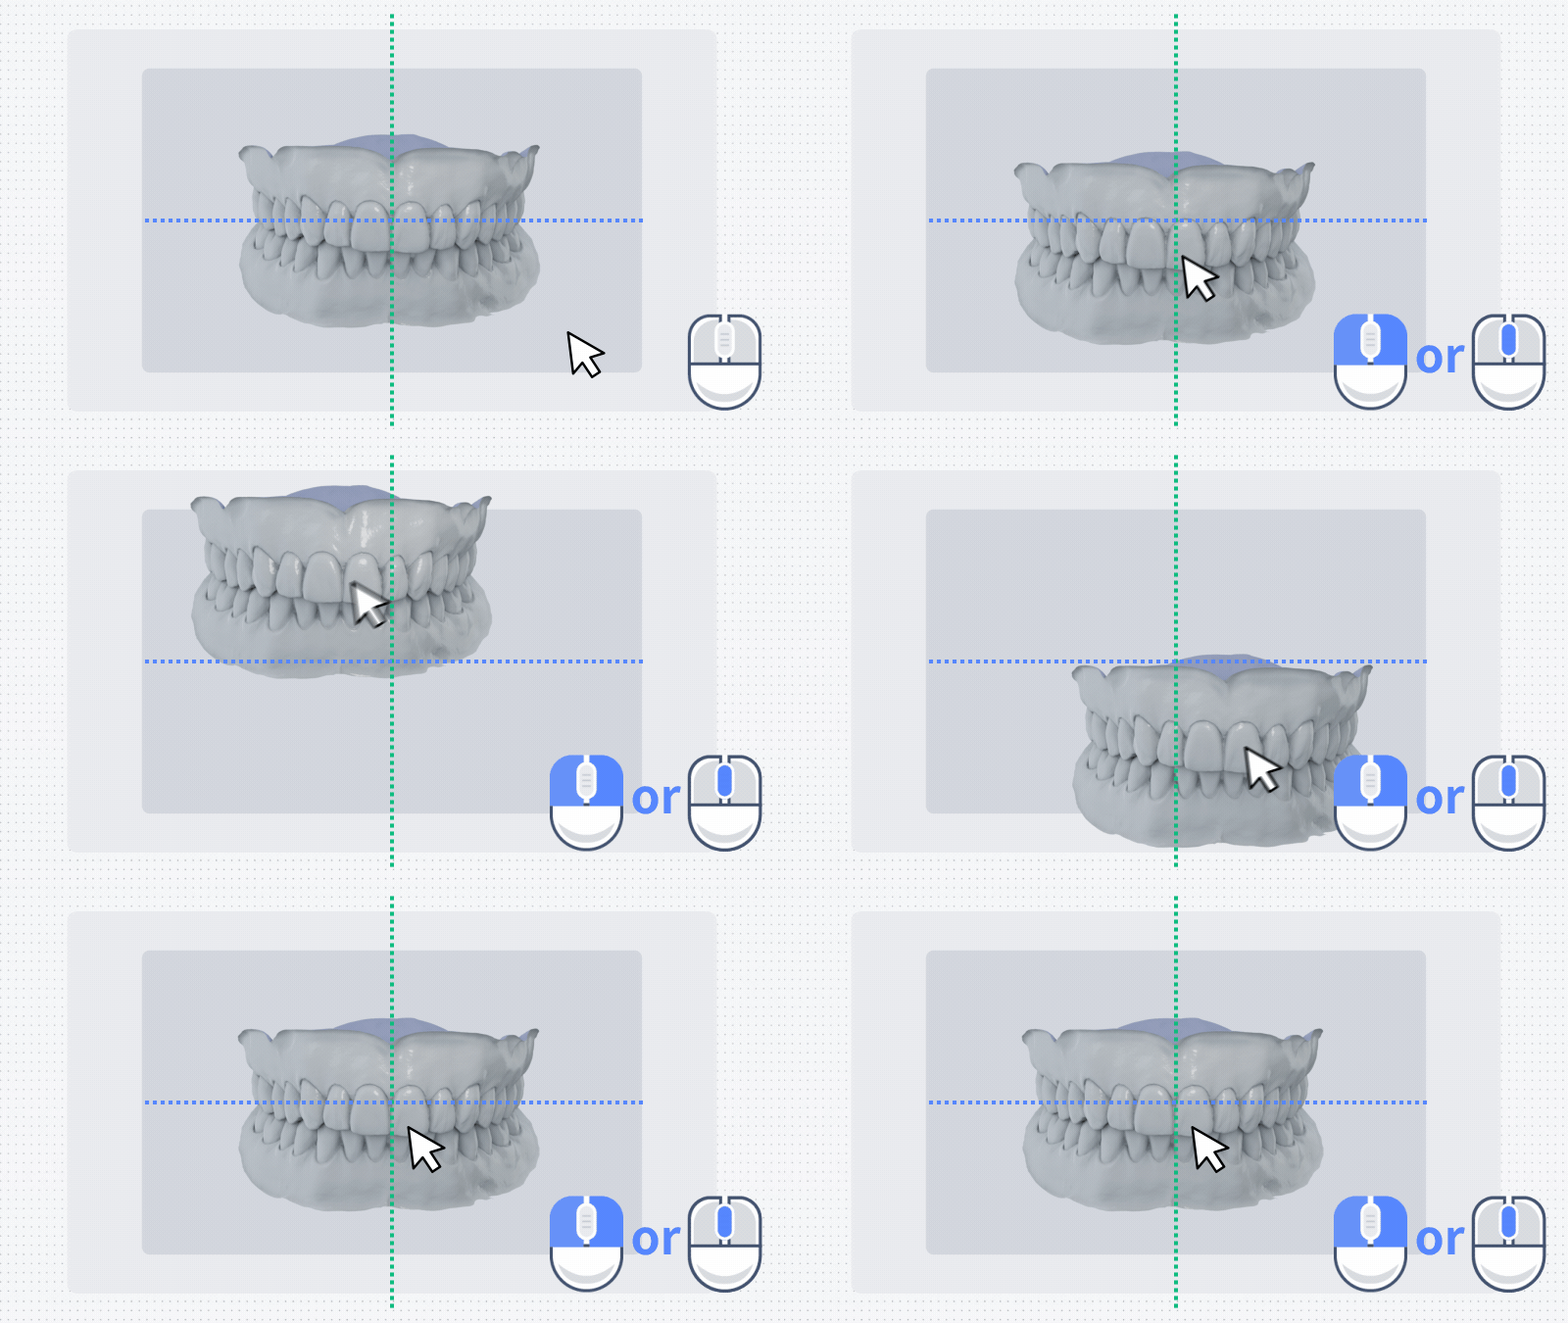
Support moving or rotating the model, as shown in the table below.
| Order | Shortcuts |
|---|---|
| Move | Move the cursor to any area of the three views, then hold down the left and right mouse buttons, or hold down the mouse wheel button, while move the cursor as shown in the following image.  |
| 2D Rotation | Move the cursor to any position within the light grey area of the three views, then hold down the left or right mouse button, while move the cursor as shown in the following image. |
| 3D Rotation | Move the cursor to any position within the dark grey area of the three views, then hold down the left or right mouse button, while move the cursor as shown in the following image. |
After the model alignment, click Next step to proceed with manual operation or click Auto generation.