Import the Model
Enter the Welcome to AccuDesign! interface, where you can choose to Create new project or Import project.
Note
If AccuDesign is called from other scanning software (such as IntraoralScan), the software will load the models from the current order. Deleting the models or importing other models are not supported; only 3D preview of the current models is available.
Create a New Project
Click ![]() Create new project, import model files (in the format of STL、PLY、OBJ or BEB) locally and select Base, Type of honeycomb, Articulator and Text.
Create new project, import model files (in the format of STL、PLY、OBJ or BEB) locally and select Base, Type of honeycomb, Articulator and Text.
- Click Upper Jaw or Lower Jaw import frame to import models.
- The imported model is displayed in the default occlusal view. You can perform operations such as translation, rotation, and scaling on the model (as shown in the table below). In addition, you can click the button to delete the model or click the button to reset the model to its initial state.
| Order | Shortcuts |
|---|---|
| Move | Move the curser while hold down the left and right mouse buttons |
| Rotate | Move the curser while hold down the right mouse button |
| Scale | Rotate the wheel up or down |
Note
- It supports importing non-segmented models, which means it can import data for a single upper jaw model, a single lower jaw model, or a model including both upper and lower jaws.
- It is recommended to import the correct upper jaw and lower models that match the diagram information within the specified frame, otherwise it may affect the automatic generation of the model.
Support three base types, namely Model with foundation (as default), Model without foundation and Orthodontic ABO; the description of three types is shown in the table below.
| Base type | Demonstration | Commons | Differences |
|---|---|---|---|
| Model without foundation | 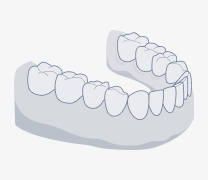 |
/ | / |
| Model with foundation | 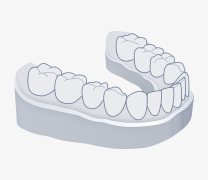 |
The base is a bottom mesh and has drainage holes, and its default thickness is 2mm |
Pull the base directly downward from the model edge to extend it. The default height of the base is 3 mm |
| Orthodontic ABO | 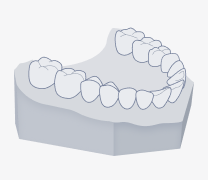 |
The default height of the base is 13 mm. A matching dental arch for the base is added, with a basal angle of 70° |
Note
You can hover the cursor over ![]() button to view the guide chart.
button to view the guide chart.
Support four types of honeycomb, namely Baseplate honeycomb (as default), Throughout honeycomb, Solid and Hollow:
Col
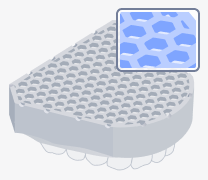 Baseplate honeycomb
Col
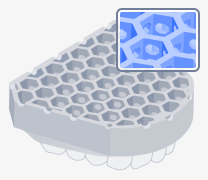 Throughout honeycomb
Col
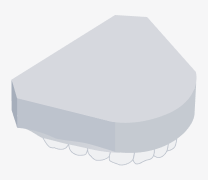 Solid
Solid
Col
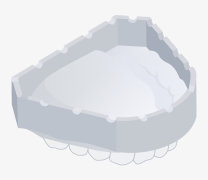 Hollow
-
The usage of print materials: Hollow < Baseplate honeycomb < Throughout honeycomb < Solid.
-
The hardness of printed model: Solid > Throughout model > Baseplate model > Hollow.
In a word, when more printing materials are consumed, the hardness of the printed models can be ensured; please select the honeycomb structure according to the actual situation.
Note
- If you select Baseplate honeycomb, you should set the printer type: Shining 3D's printers or Other printers.
- You can hover the cursor over
 button to view the guide chart.
Support multiple articulator options (the default option is Empty): large/medium/small articulator, articulator for quadrant models, etc.
Note
Articulator options can not be applied when only one model is imported.
Support customizing Text Content and Text Position (Left, Middle, Right).
Note
- The maximum chapter limit is 100.
- You can hover the cursor over
 button to preview the position of the text.
Click Auto generation, and wait for the software to automatically design and generate the digital model.
Note
- When the interface displays "Processing, please wait...", please wait until the interface finishes loading.
- If a popup window appears with the message "Generation failed, please readjust!", please follow the guidance on the right side of the interface for adjustments:
- If the automatic alignment of the model fails, then you will be automatically navigated to Coord adjust.
- If the recognition of the model area or shell extraction of the base fails, then you will be automatically navigated to Area adjustment.
- If the addition of customized text or articulator fails, then you will be automatically navigated to lease proceed to Attachment adjustment.
Import a Project
Click ![]() Import project, import project files (in the format of ACCUDESIGNPROJECT) locally.
Import project, import project files (in the format of ACCUDESIGNPROJECT) locally.
-
Click Import project will pop up a Import project dialog box.
-
Double click a project file in the dialog box, or click to choose a project file and click Open button to import the project.
Note
If the imported project has not yet proceeded with all steps, then you will be automatically navigated to the unfinished steps; or you will be automatically navigated to Printing view.