Connect/Disconnect the Scanner
Caution
-
Please follow the equipment connection diagram when connecting the devices and aware the sequence of cable interface connections. Do not use non-kit cables for connection.
-
To ensure equipment performance and safety, use only the original accessories and software provided with the device.
-
Using cables or accessories other than those provided in the package might result in equipment malfunctions, damages, or financial losses.
-
Ensure the supplied software programs are installed on your computer before the connection.
-
If the accuracy of the equipment decreases or if the equipment does not work properly, please consult technical support promptly.
-
Install the scanner in accordance with the instructions stated in the Manual.
-
Use the scanner only in dental laboratories, dental clinics, and equivalent environment.
-
Do not install, place, and use the scanner in dusty and damp environment or in the areas of temperature extremes or in direct sunlight.
-
Prepare a flat surface, e.g. your desk, for the scanner and the cradle. Do not place them on a slanted surface.
-
Before the installation is completed, do not plug the power adapter into the wall outlet or turn on the scanner until you are instructed to do so.
-
Always hold the scanner firmly when lifting from the stand or when using the scanner. Do not shake the scanner.
-
Always return the scanner to the cradle when it is not in use. Do not place the scanner in heated or wet surfaces as this can cause damage to the scanner.
-
It is normal that the scanner gets warm when in use. Do not block the ventilation holes on the bottom of the scanner. If the scanner overheats, the scanner will stop working.
-
Ensure that you use only the supplied power adapter, power cable, and USB cable.
Attach and Detach the scanner tip
Caution
- Do not place your finger(s) on the mirror of the tip when attaching as this may result in damage to the mirror.
- Do not place your finger (s) on the lens of the tip when detaching the tip to prevent damages to the lens.
- Do not attempt to clean the outer units and inner optical components on the front end of the scanner with any sharp objects or other such tools, which may result in scratches and damage to the scanner.
Follow the step below to attach the scanner tip:
Hold the scanner tip firmly with your thumb and forefinger on both sides, and then gently attach the tip facing downward to the scanner.

Follow the step below to detach the scanner tip:

Connect and disconnect the scanner
Follow the steps below to complete the connection and disconnection:
Caution
Please make sure that the scanner is charged by the cradle provided by SHINING 3D.
Follow the steps to complete wireless connection:
-
Push the scanner tip hard to the scanner body to ensure firm attachment.

-
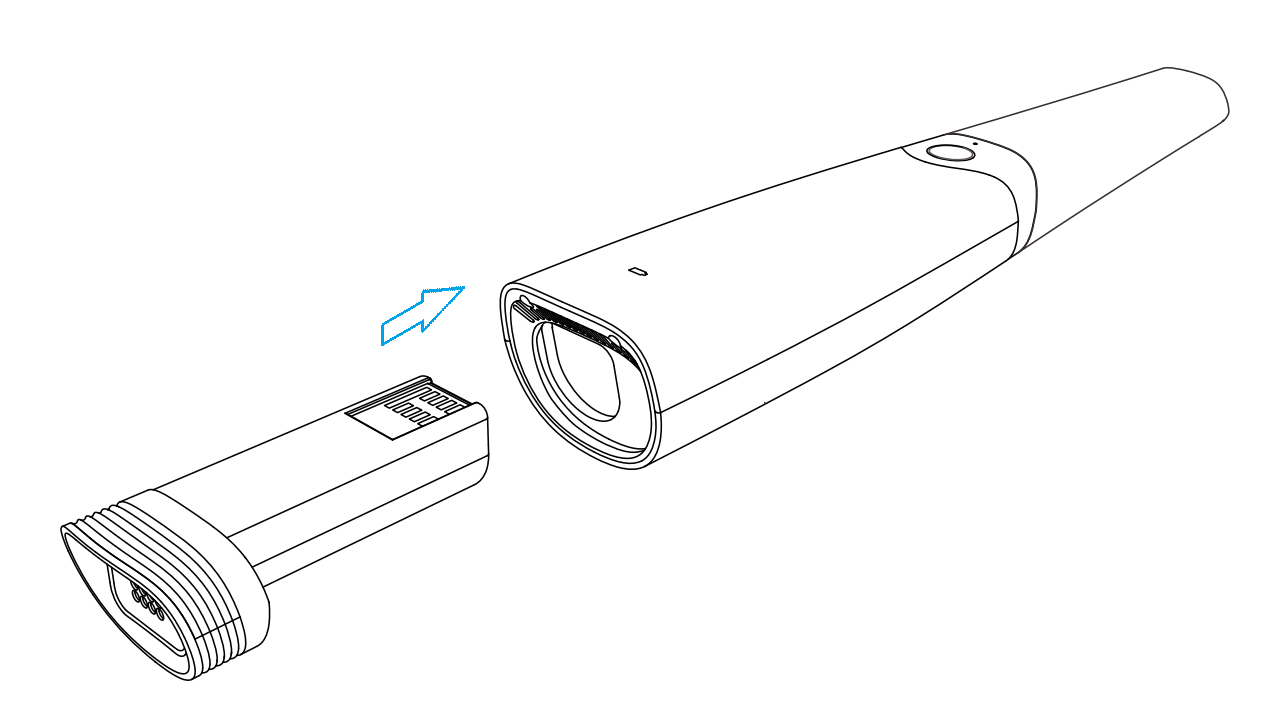
Insert the battery into the scanner from bottom.
-
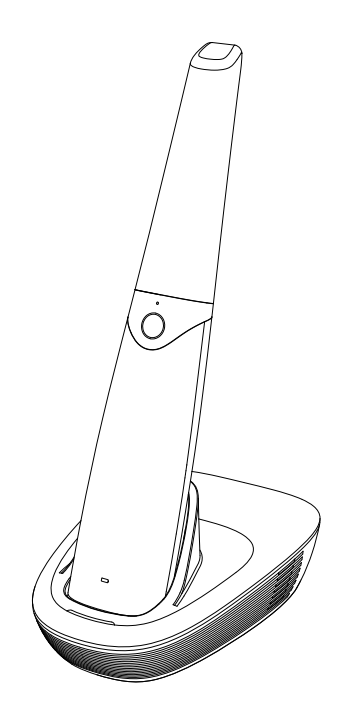
Put the scanner on the cradle.
-
Connect the cradle with the power supply. Connect the cradle with the computer where the software is installed via the USB cable.
-
Double click the software to launch it.
-
Enter the software. Connect the scanner with the software with wireless AP. For more details, please check Device Pairing.
Follow the steps to complete wired connection.
-
Push the scanner tip hard to the scanner body to ensure firm attachment.

-
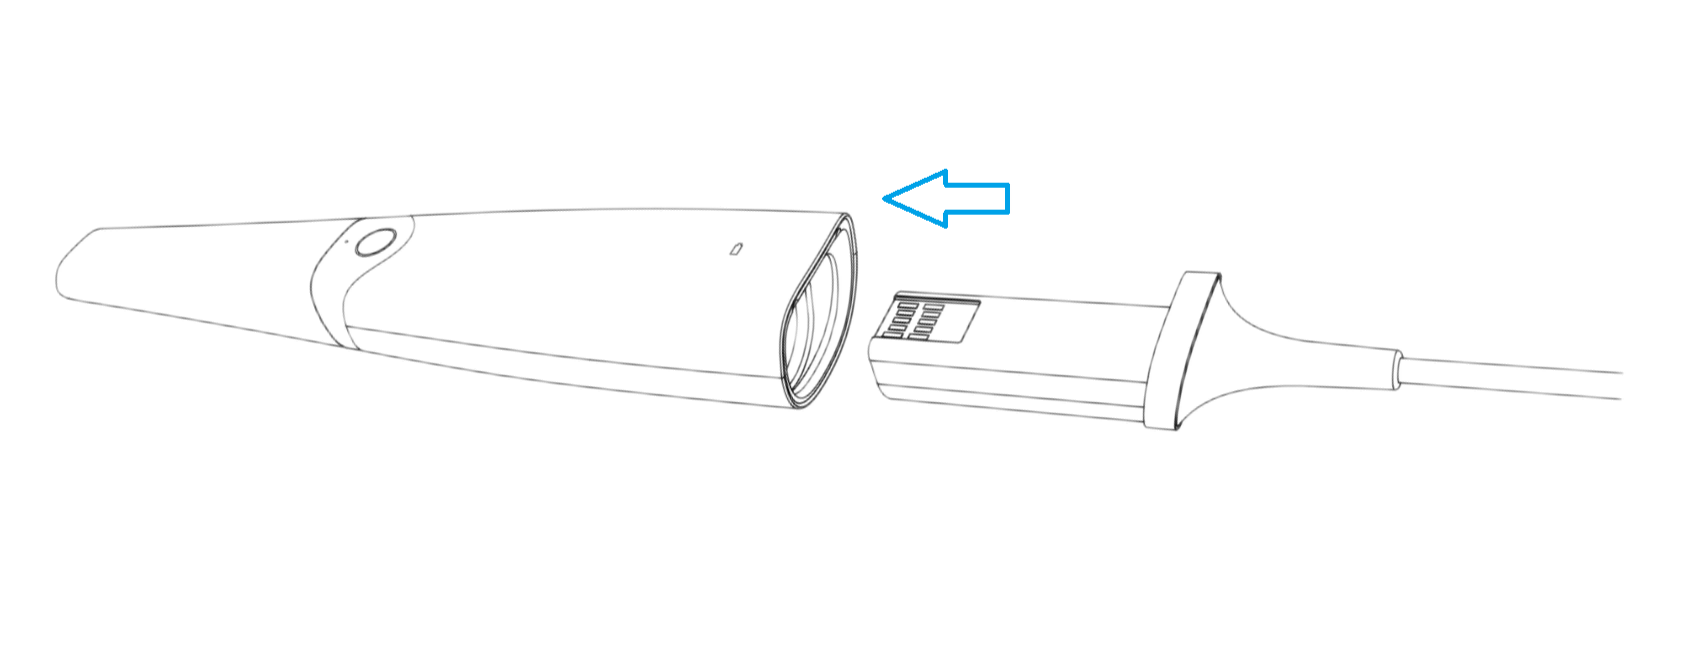
Connect the spare cable with the scanner firmly.
-
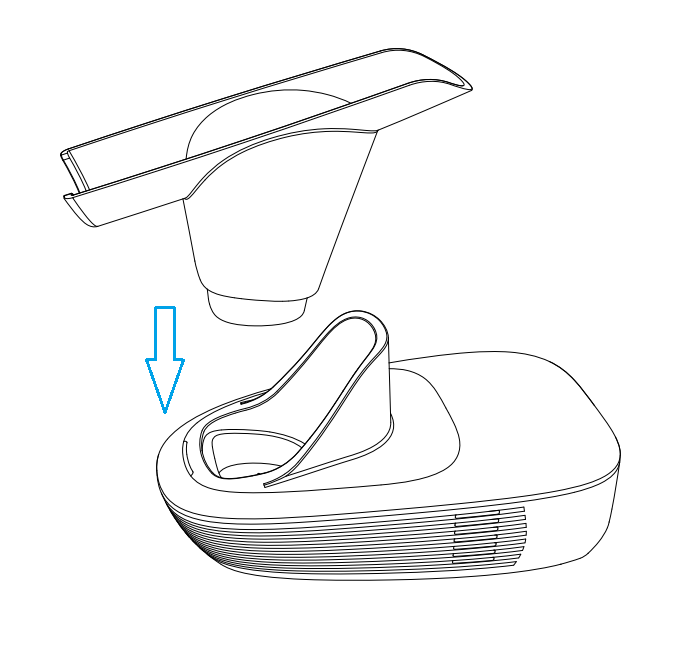
Insert the bracket into the cradle.
-
Put the scanner on the cradle.
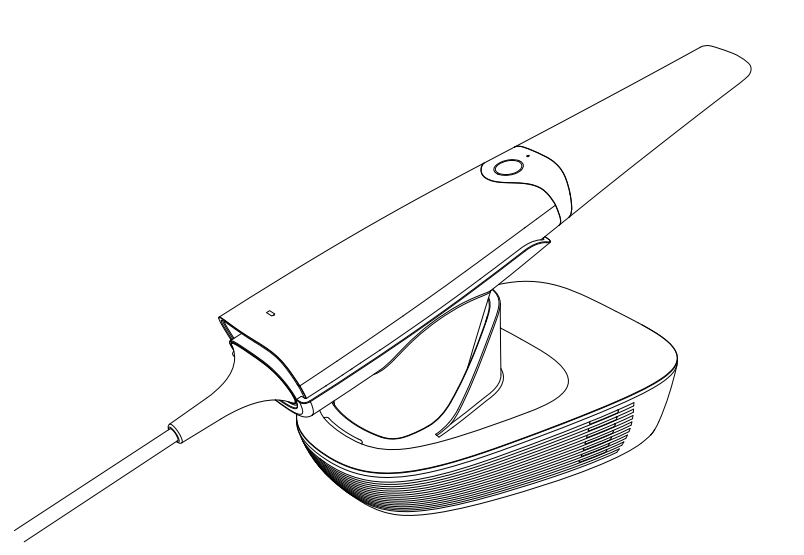
-
Connect the other end of the spare cable to the cradle. Connect the cradle with the power supply. Connect the cradle with the computer where the software is installed via the USB cable.
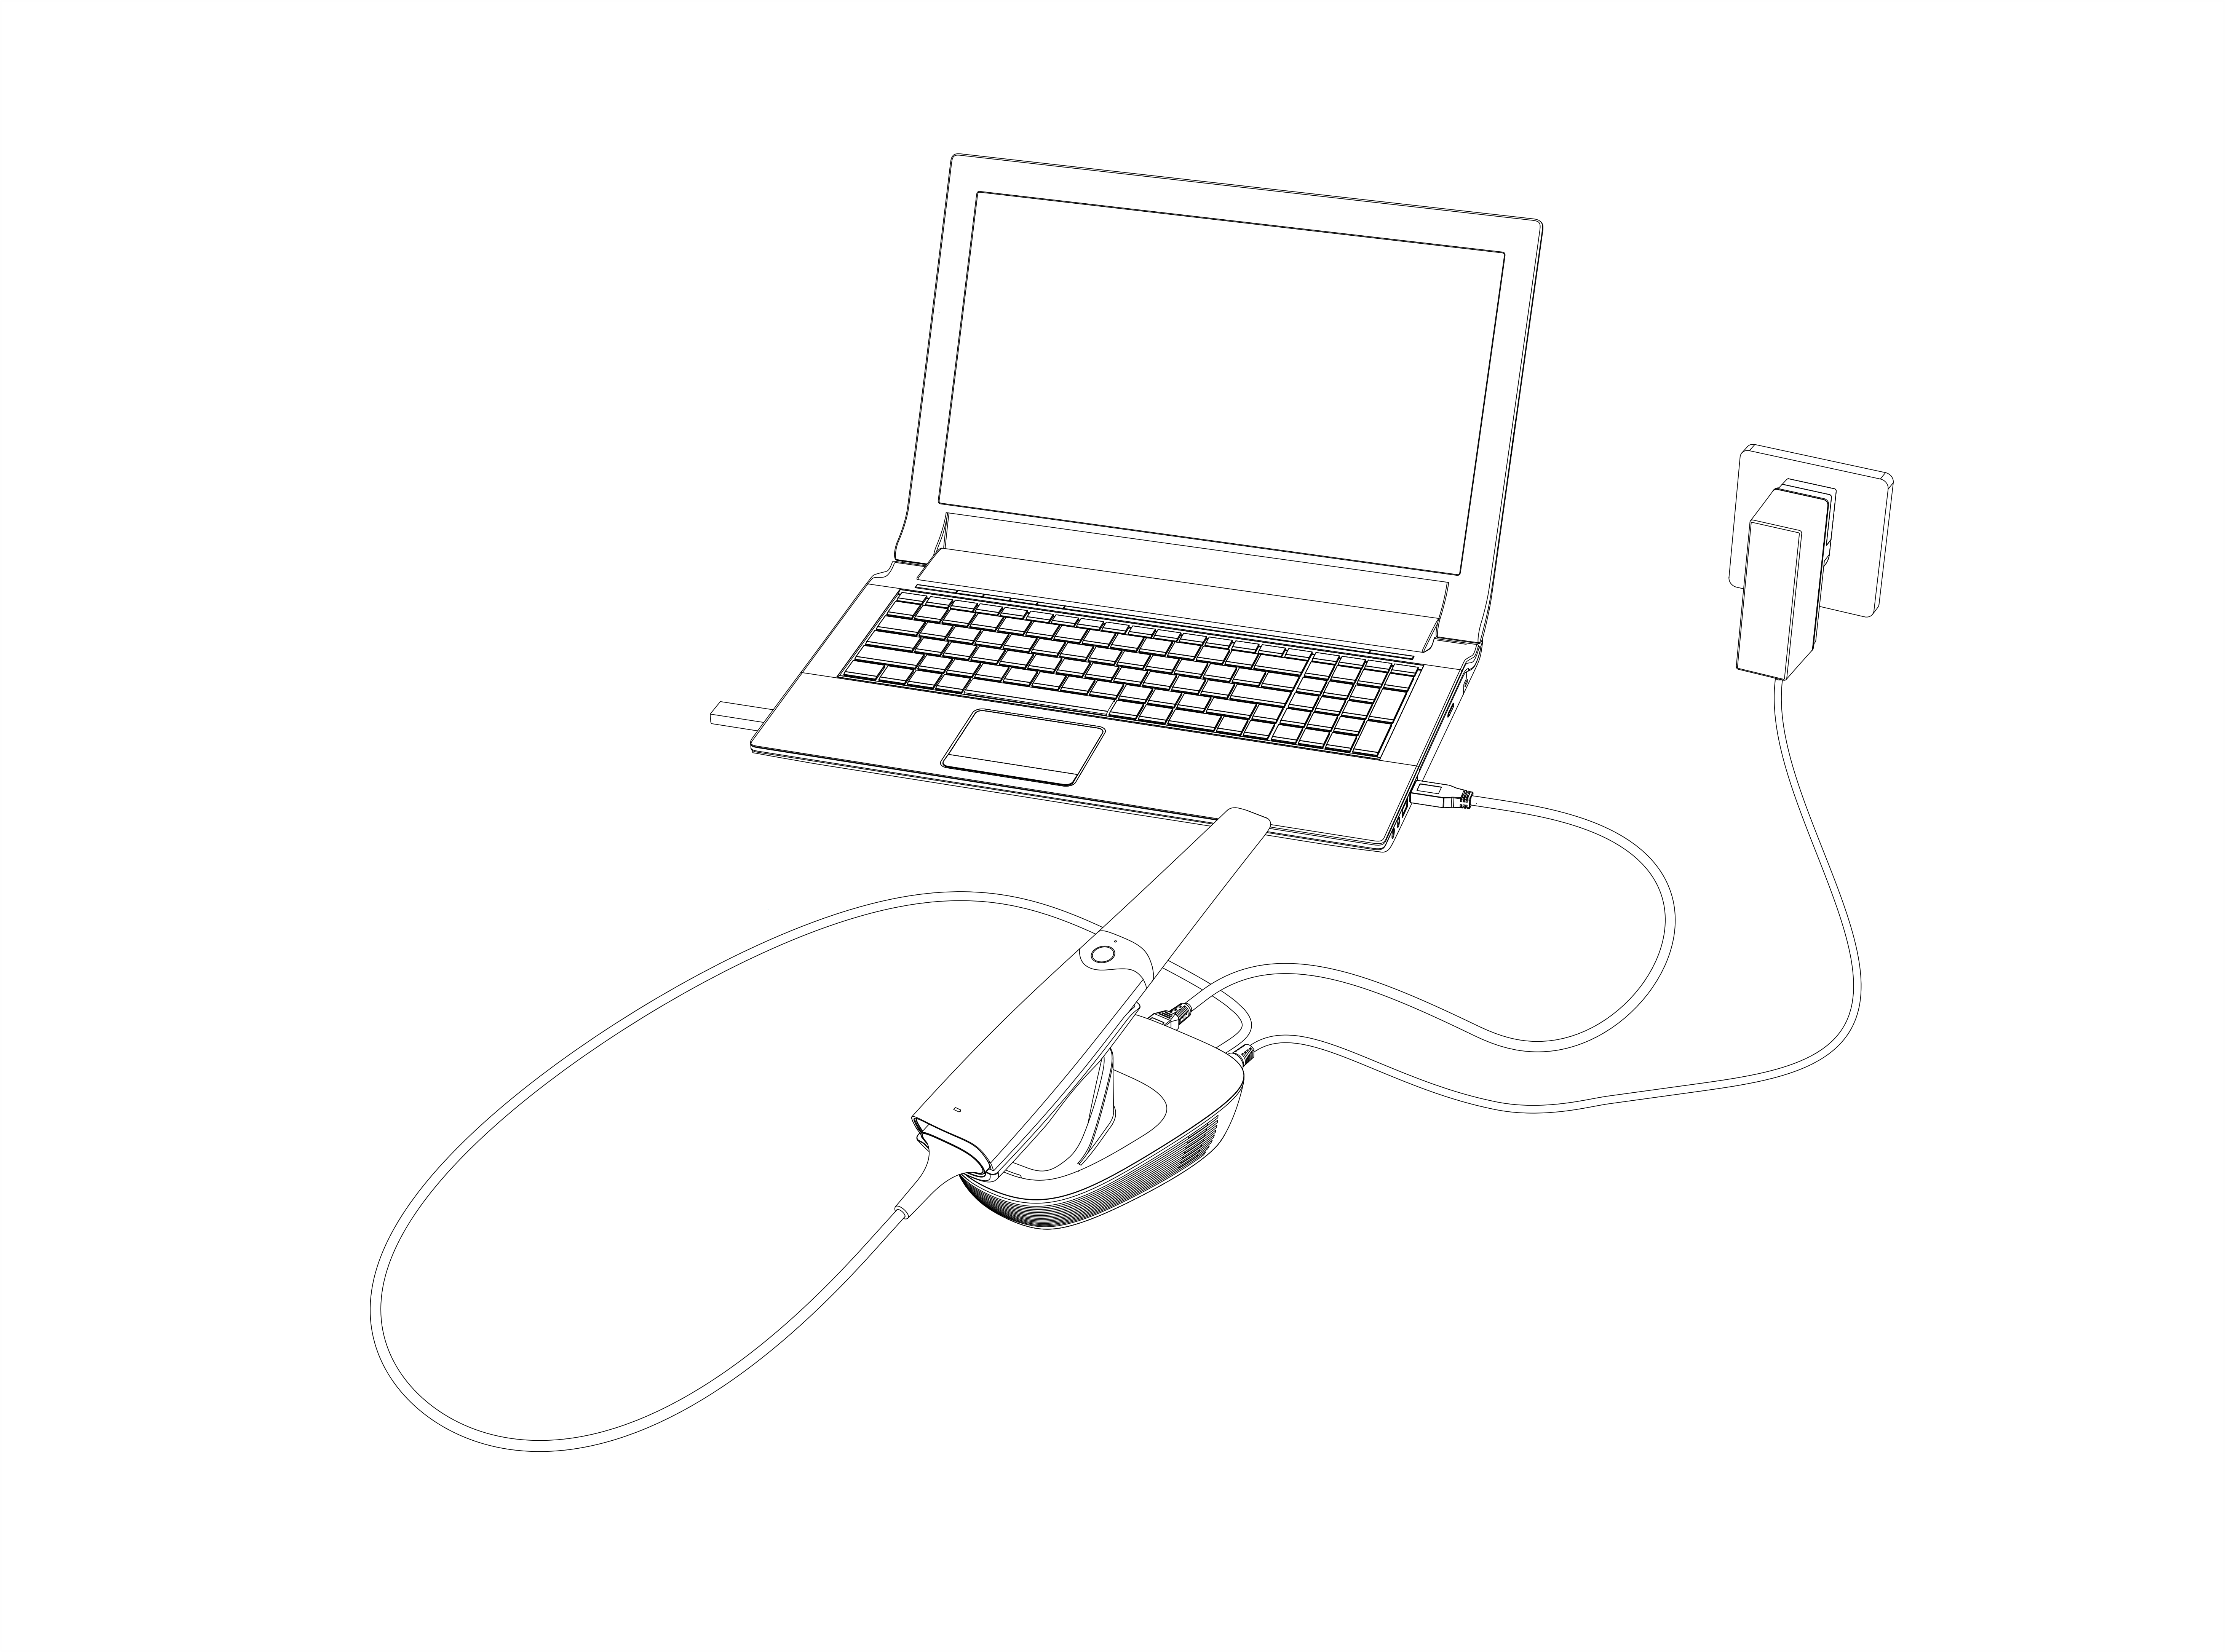
-
Double click the software to launch it.
Caution
-
Do not attempt to directly disconnect the scanner by removing the power cable and USB cable.
-
Do not roll the cable over the handle of the scanner or even create any sharp bends in the cable after you disconnect the scanner.
-
Quit the IntraoralScan scanning software.
-
In the wired connection mode, disconnect the scanner from the cradle.
-
Disconnect the cradle from the computer.
-
Right-click the Safely Remove Hardware icon on Windows taskbar and select Eject Flash Drive.
-
Unplug the USB flash drive and keep it in a safe place for future use.
-
Unplug the power adapter from the wall outlet and remove the power plug from the power port on the cradle.