Create program
When the user opens ConsulOS from IntraoralScan or FScan, the software will create the program based on the order from IntraoralScan or FScan. The user can add intraoral data in FScan.
Caution
- Select Orthodontics as the Dentistry Type to enable the orthodontic simulation function.
- Lip line should be extracted in advance in FScan. More details can be found in Lip line extraction.
There are three steps: Model adjustment, Teeth confirm and Program confirm. Change program is also supported.
Click Auto creation to start.
Note
- Click
on the top right corner to exit the window of creating program. And the original model is displayed on the main interface.
- Click ➕ on the top of the main interface again to create more programs.
- Up to three new programs can be created.
Model adjustment
In this window, the software will automatically adjust the model and show multi-views. The user can manually adjust the perspectives of models.
There are four views of the teeth model.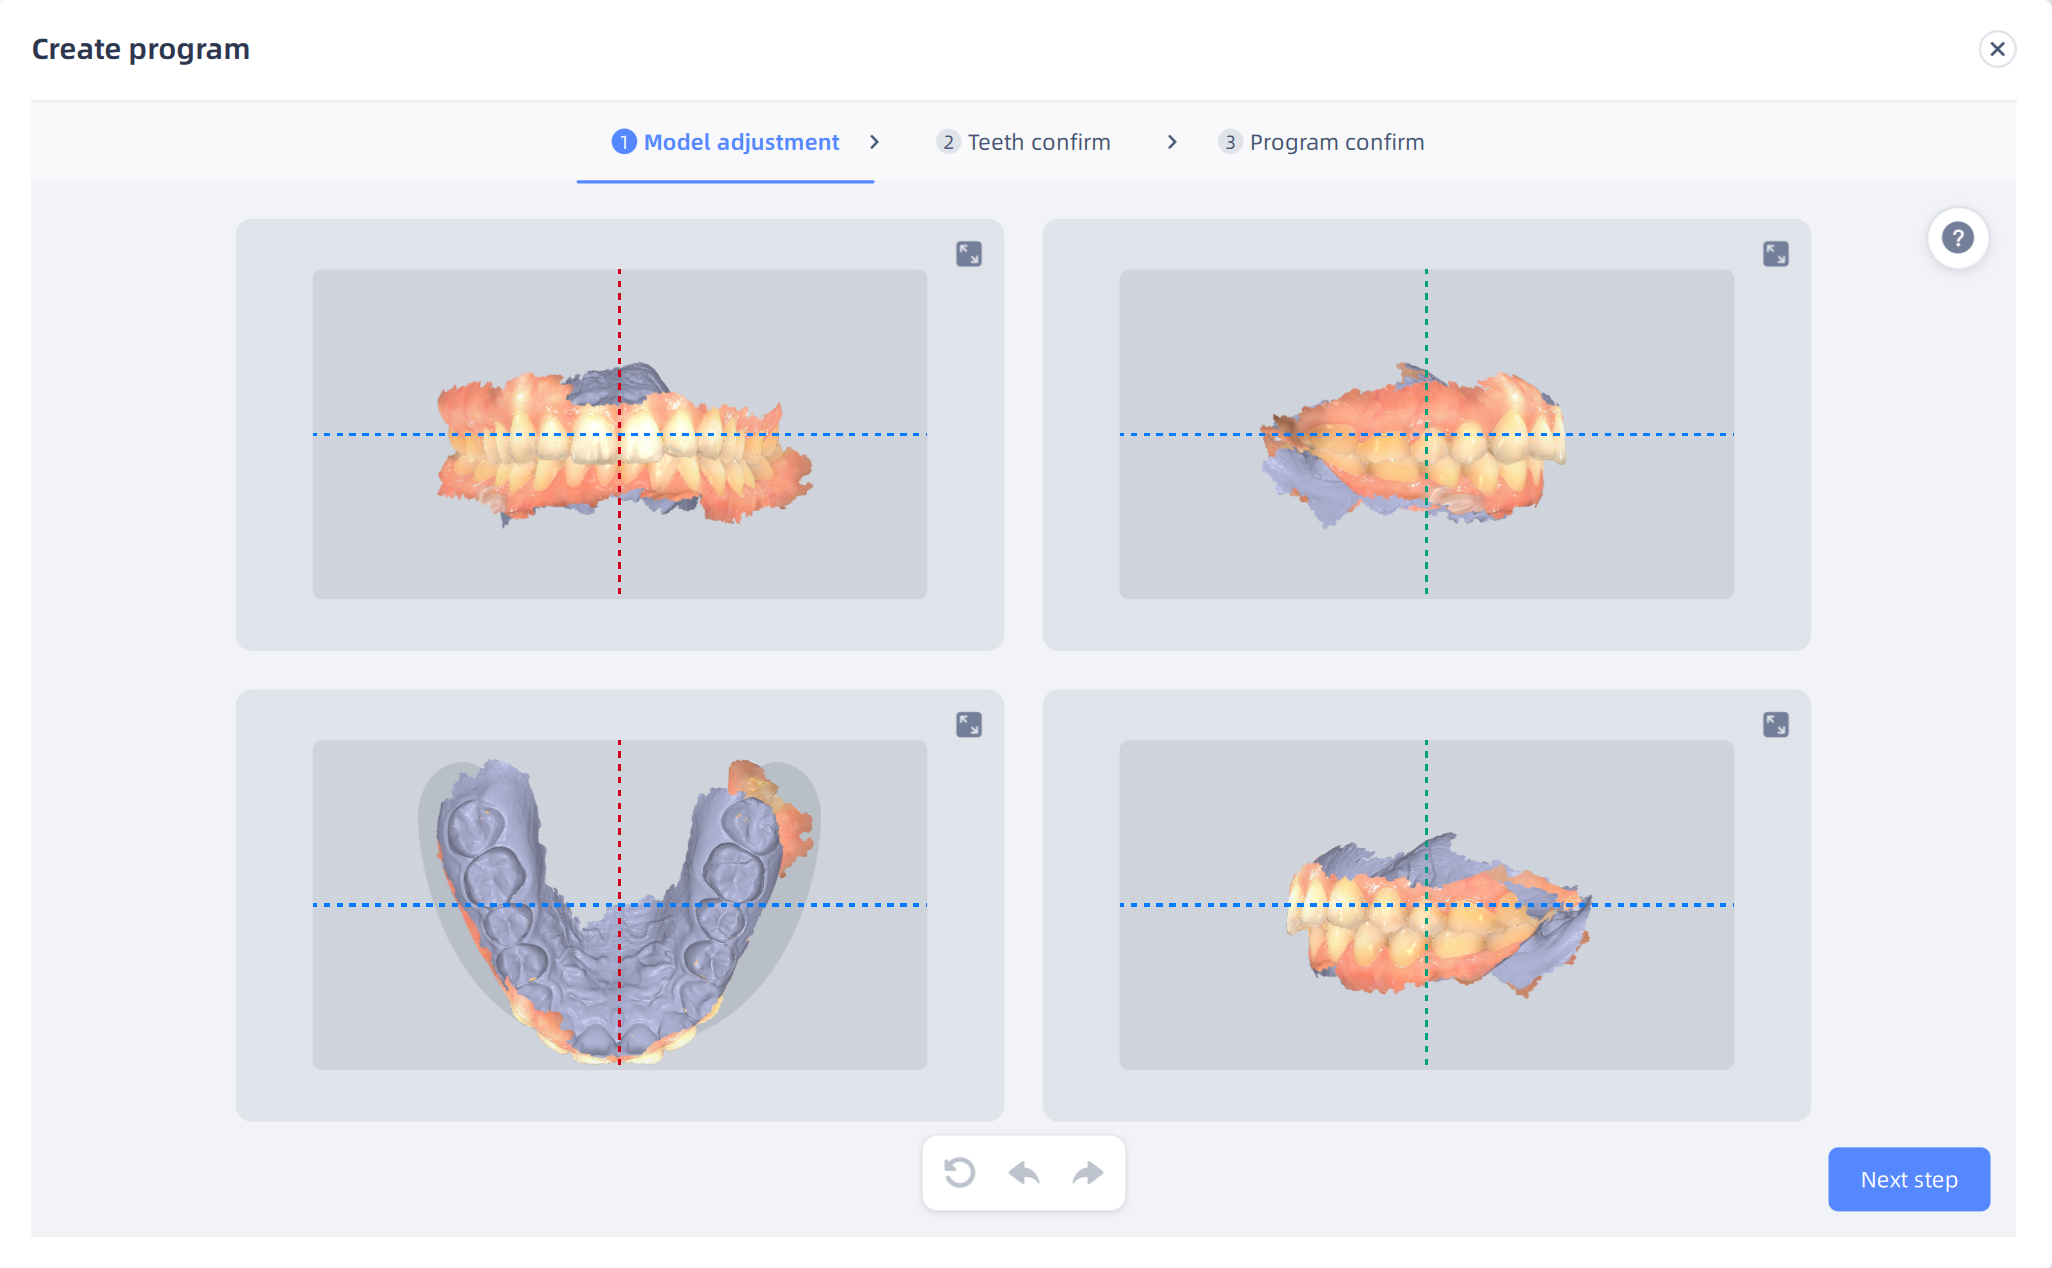 |
Operation
| Operation | Description | Operation | Description |
|---|---|---|---|
| Rotate the model | Press and hold the left or right mouse button and move the cursor. | Guidance |
Click to pop up the guidance. Click |
| Move the model | Press and hold the left and right mouse button at the same time and move the cursor. | Reset |
Click to restore the models. |
Zoom in |
Click to zoom in the view. Zoom-in can be used when importing teeth model only. |
Undo |
Click to undo operations. |
Redo |
Click to redo operations. |
Teeth confirm
In this window, models of upper jaw and lower jaw are displayed separately. The software automatically recognizes each tooth with different colors and displays teeth numbers.
Users can preview the upper jaw and lower jaw from different perspectives, check the teeth numbers, edit teeth areas, remove teeth and add teeth. Click the number on the Table of contents to check the certain function.
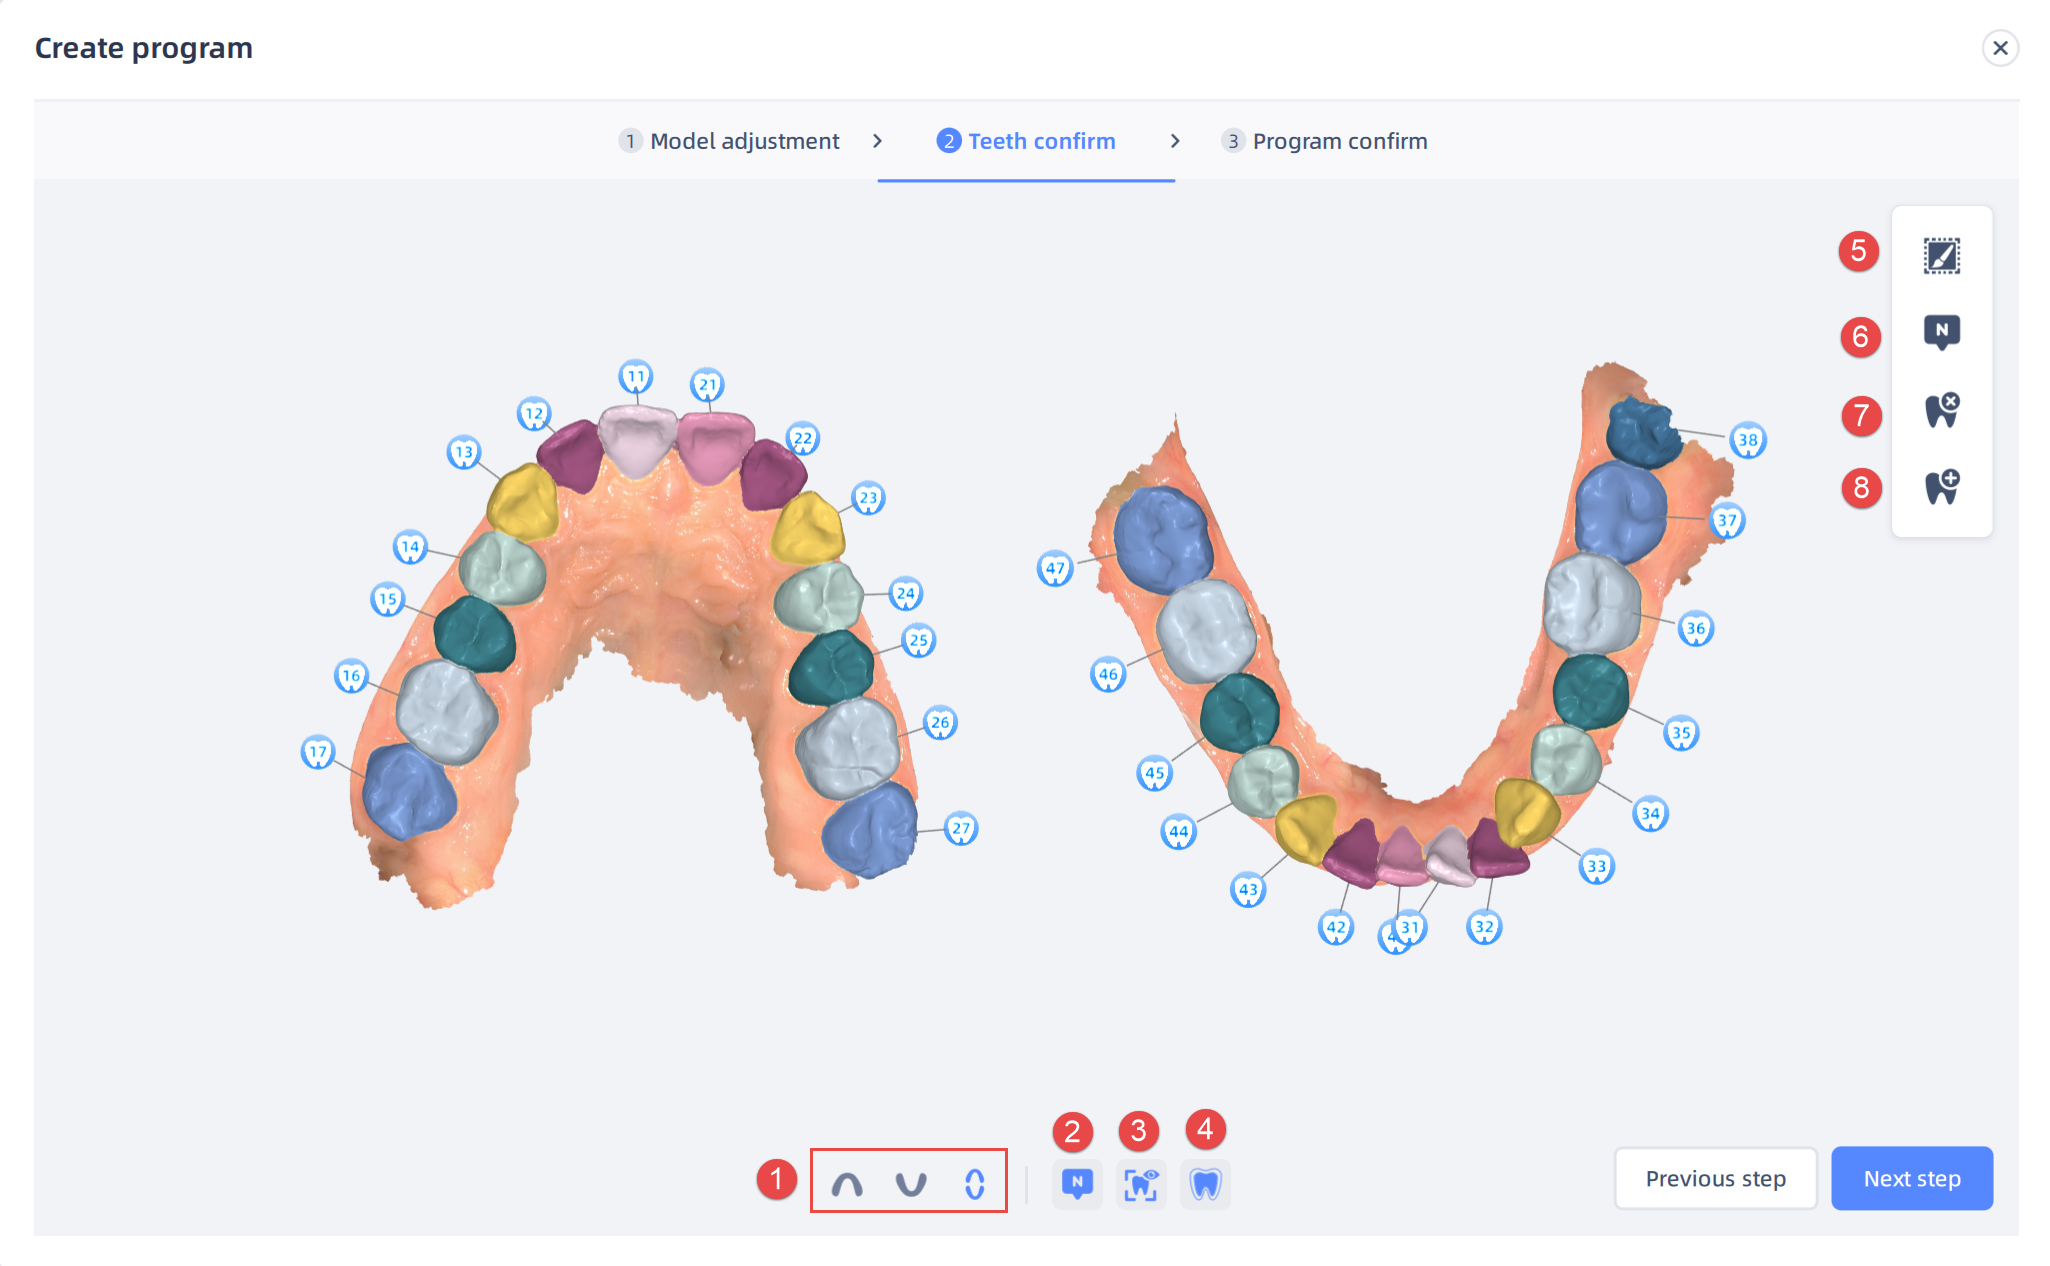
① Views
Click to change the views of the model.
②  Tooth number
Enabled by default. When enabled, the teeth numbers are displayed.
Col
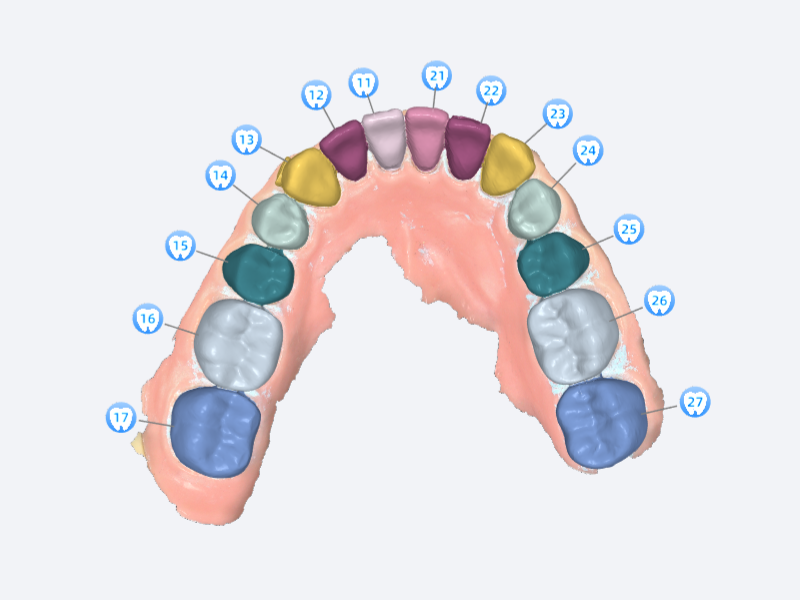 With tooth number
Col
Col
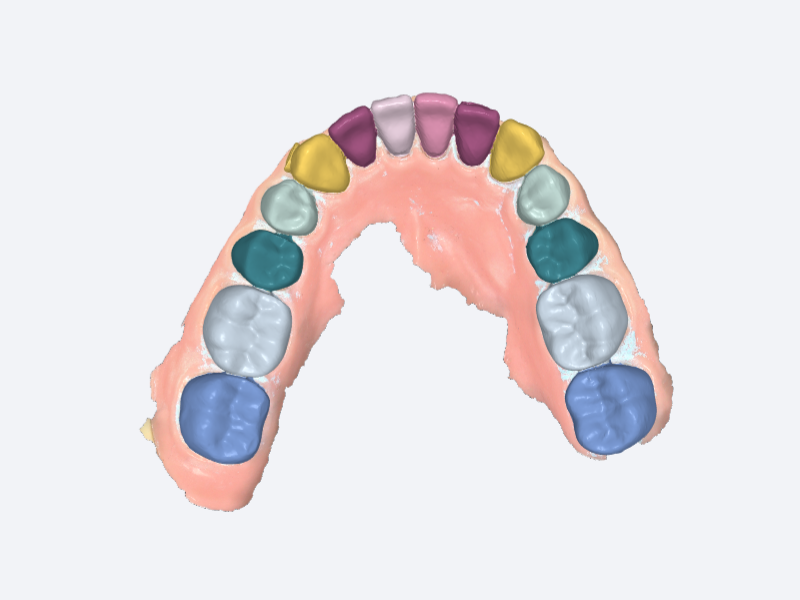 Without tooth number
③  Texture
When enabled, the model is colored.
Col
 With texture
Col
Col
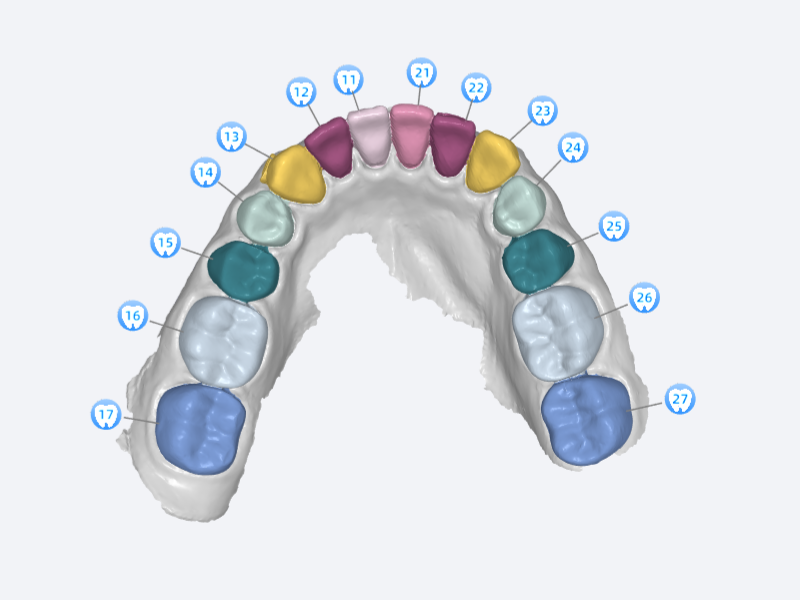 Without texture
④  Area
Area
Enabled by default. When enabled, teeth are differentiated from each other with different colors.
Col
 With area
Col
Col
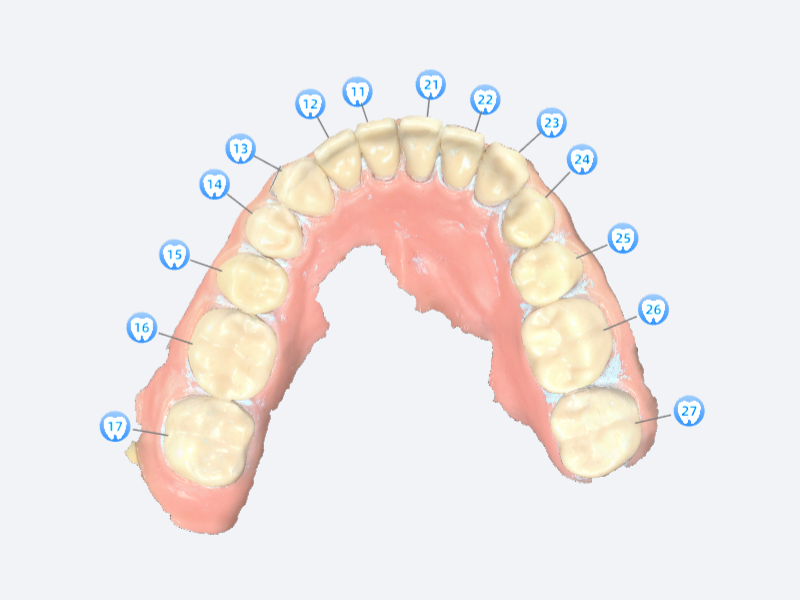 Without area
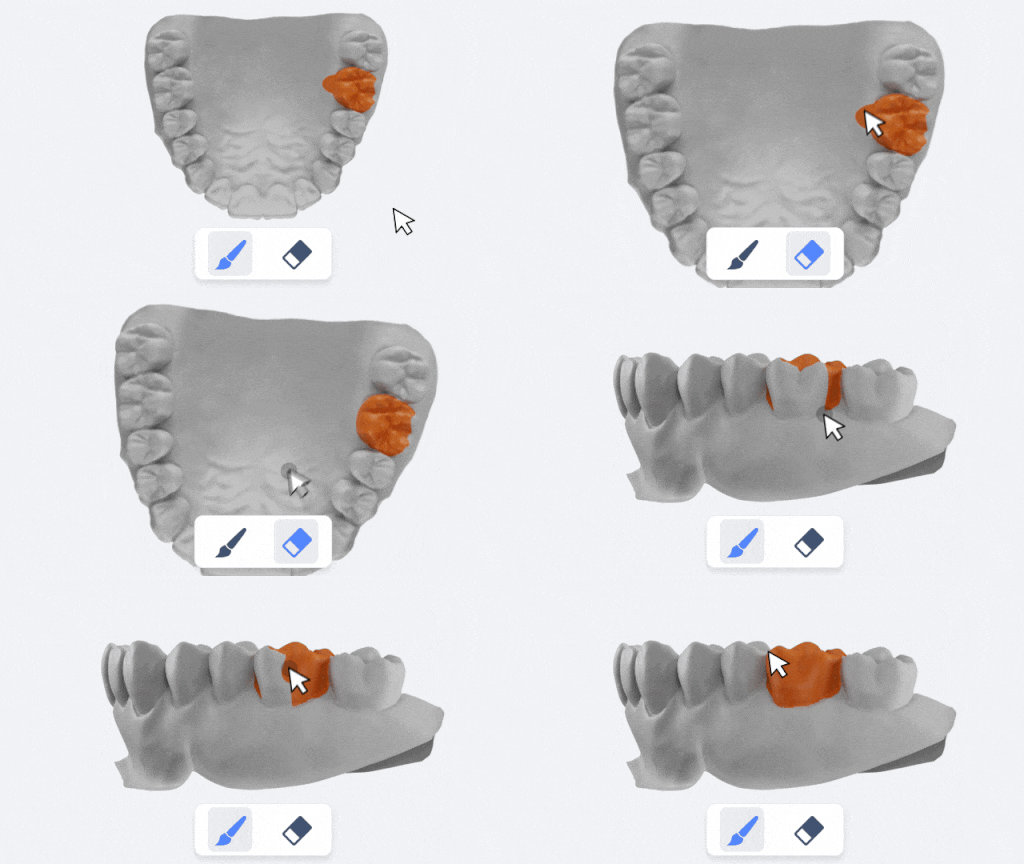
⑤  Modify Area
Click to enter the interface of tooth selection. Select a certain tooth to modify its area.
-
: Click to select the tooth area. Drag the slider to adjust the thickness of the brush.
-
: Click to delete the selected area. Drag the slider to adjust the thickness of the eraser.
-
: Undo the last operation.
-
: Redo the last operation.
-
Draft: Click to save the current operation and return to the tooth selection interface to select other teeth.
-
Cancel: Cancel all operations and exit Modify Area.
-
Confirm: Save all operations and return to the teeth confirm interface.
Note
When tooth regions are wholely erased, a tip of "Delete all teeth areas is not allowed" will pop up.
⑥  Change tooth number
Click to change tooth number.
-
Cancel: Click to cancel all operation and exit.
-
Confirm: Click to confirm and save all operations.
Notw
The red number means tooth position is repeated. When confirming, a tip will pop up.
⑦  Remove teeth
Steps
-
Click
to enter the interface of removing teeth.
-
Select the tooth which should be deleted and the tooth number is displayed in red.
-
Click
to delete it. If more than one tooth needs to be deleted, repeat steps 1-3.
-
Click Confirm to save the change, or click Cancel to cancel all operations and exit.
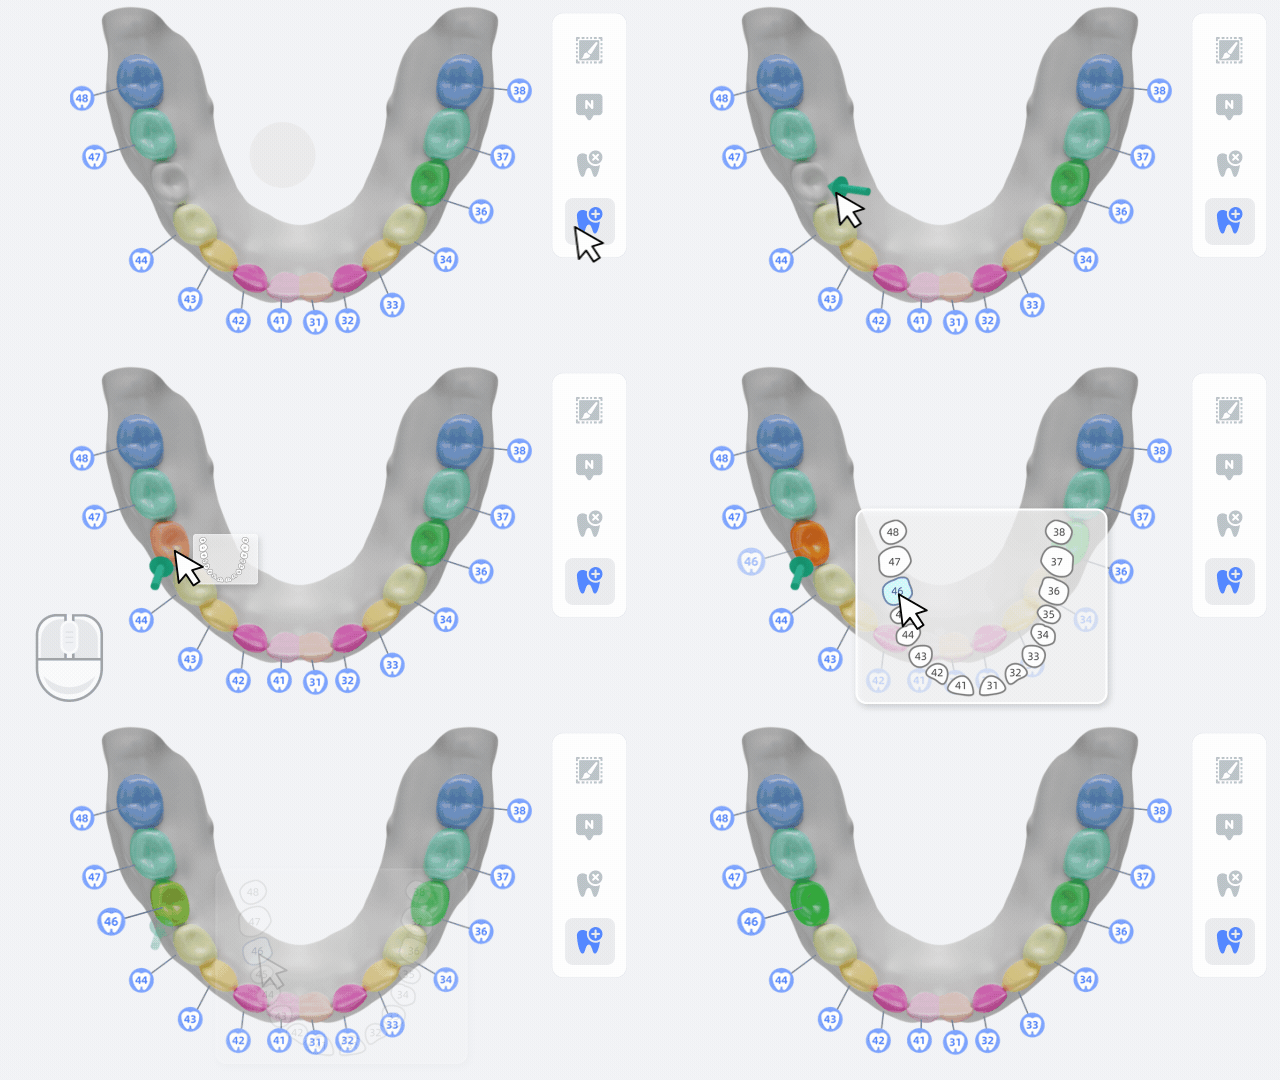
⑧  Add teeth
Steps
-
Click
to enter the interface of adding teeth.
-
Double-click the position where the tooth should be added.
-
Select the tooth number in the pop-up window.
-
Click Confirm to save, or click Cancel to cancel all operations and exit.
Repeat steps 1-4 to add more teeth.Note
The tooth number should be different.
-
If the tooth area is not satisfied, please double-click the tooth area to re-select or modify the area.
Program confirm
In this window, the user can change the program name, choose the shape of dental arch and select tooth types.
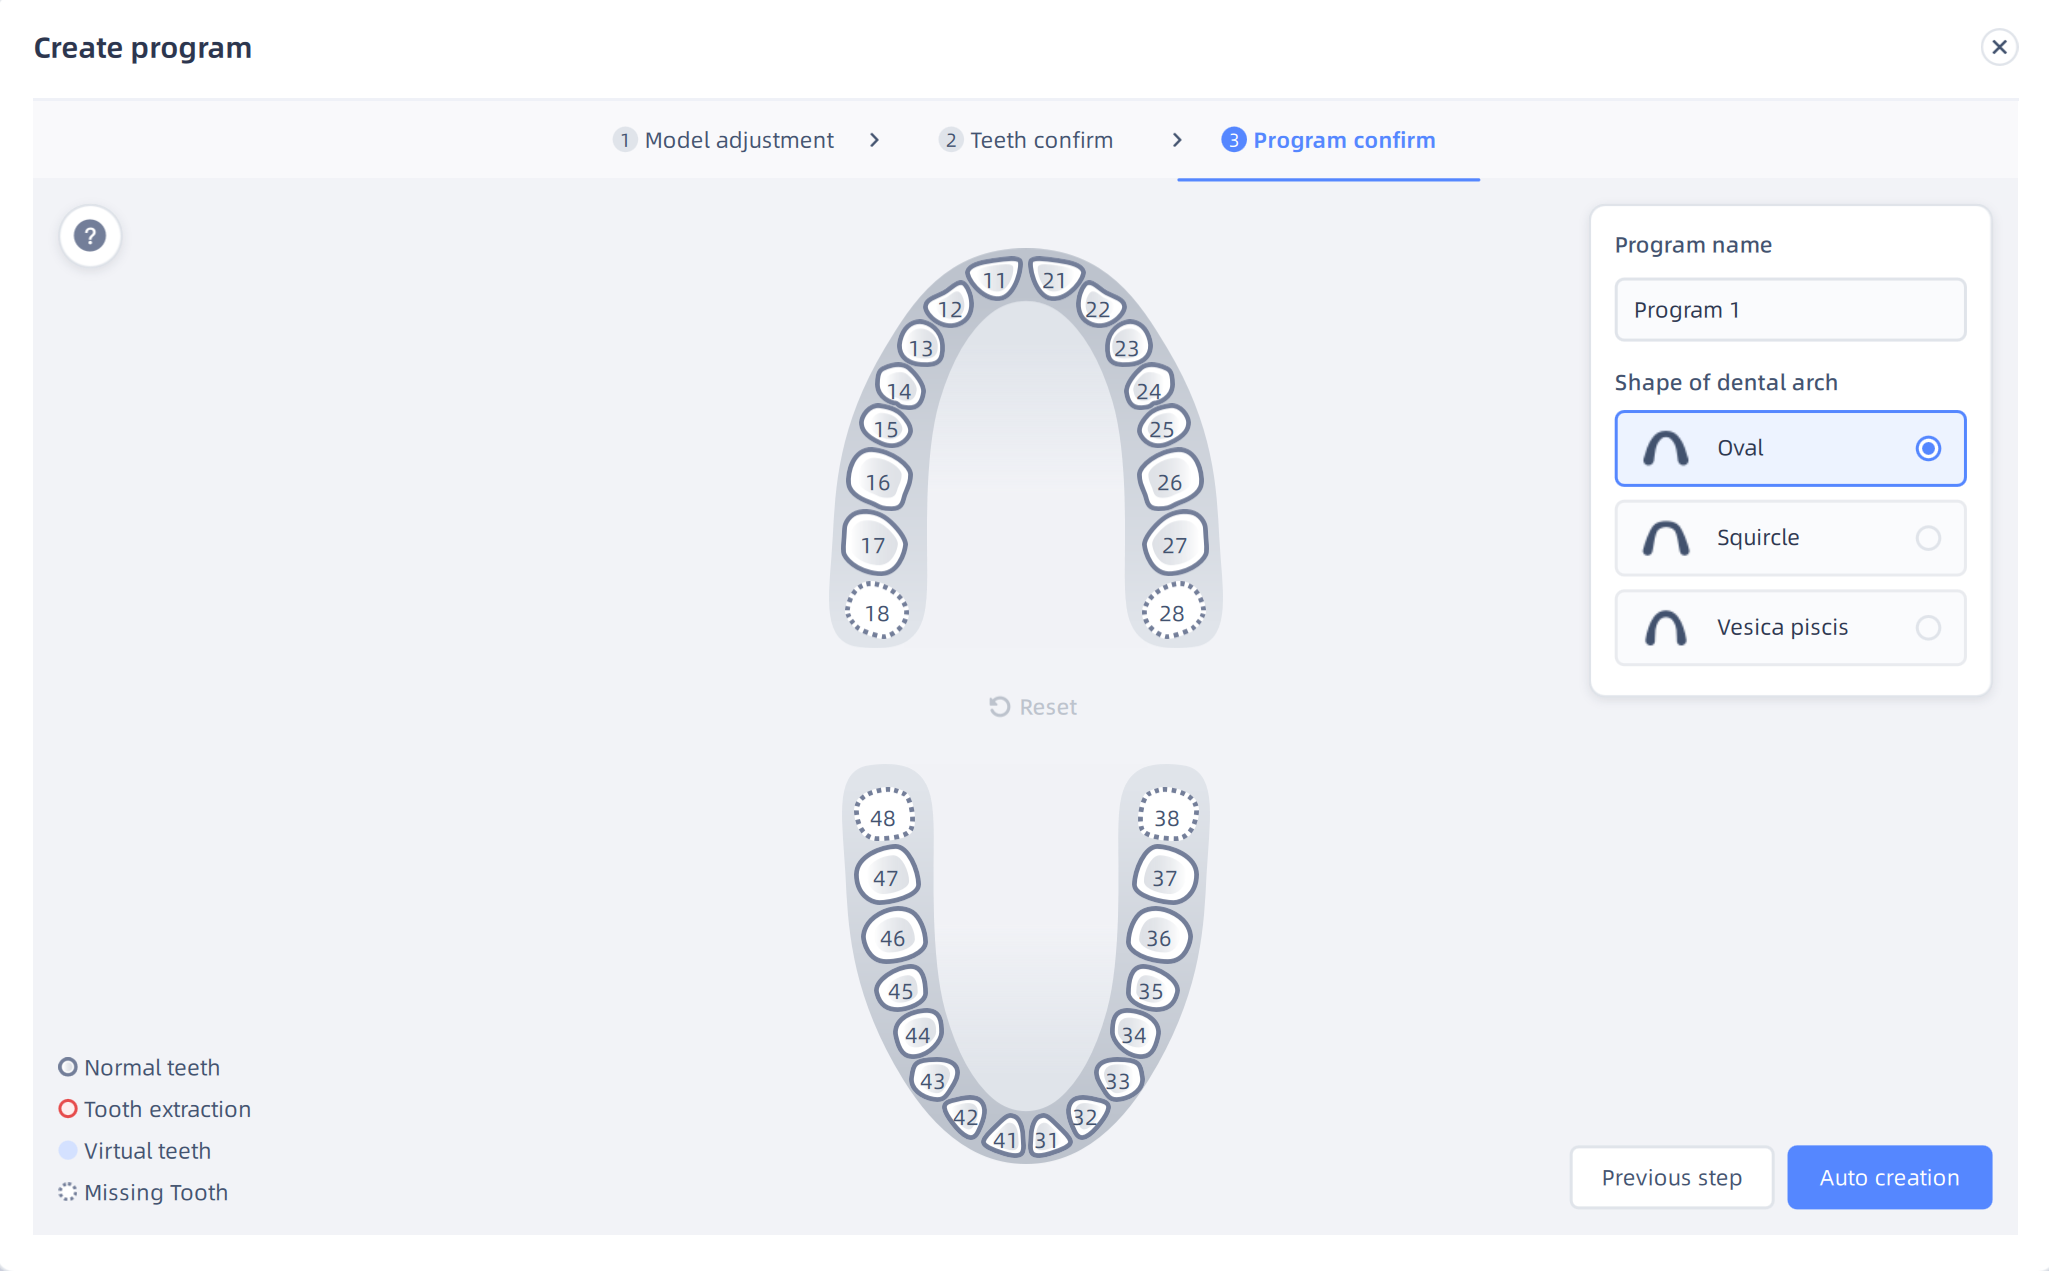
- Click the name box to change the program name.
- The shapes of dental arch are: Oval, Squircle and Vesica piscis.
-
Tooth types: normal tooth, extracted tooth, virtual tooth and missing tooth.
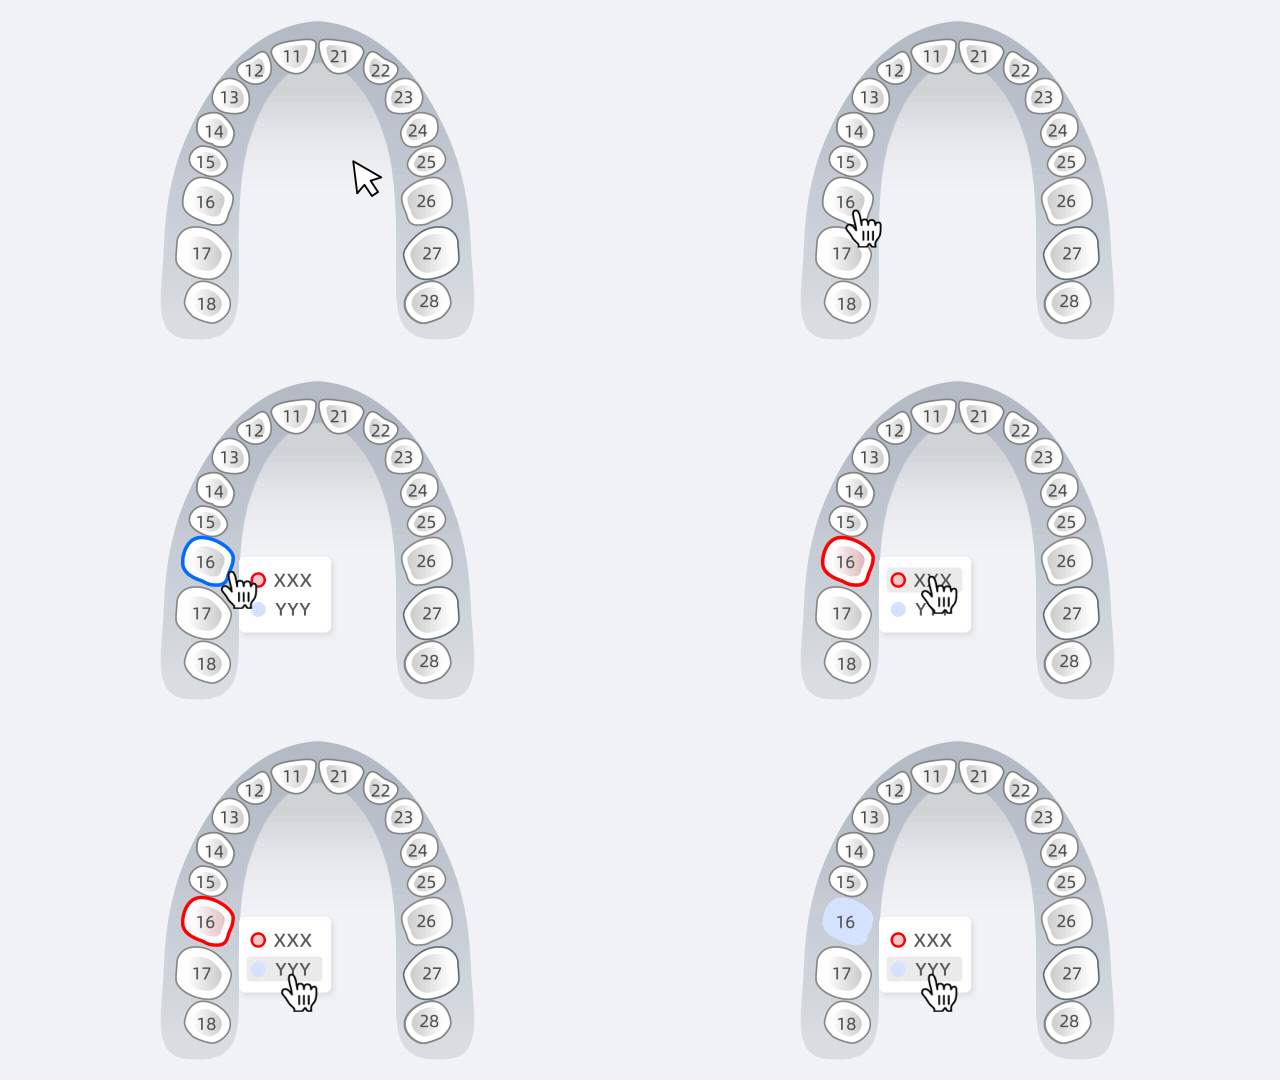
Note
Click Reset to reset all tooth types.
Change program
To change program, please click to enter the interface of Model adjustment. Click
to enter the interface of Teeth confirm.
Caution
After changing the program, the software will clear all programs and a tip will pop up. Click Continue creating to confirm the changes.