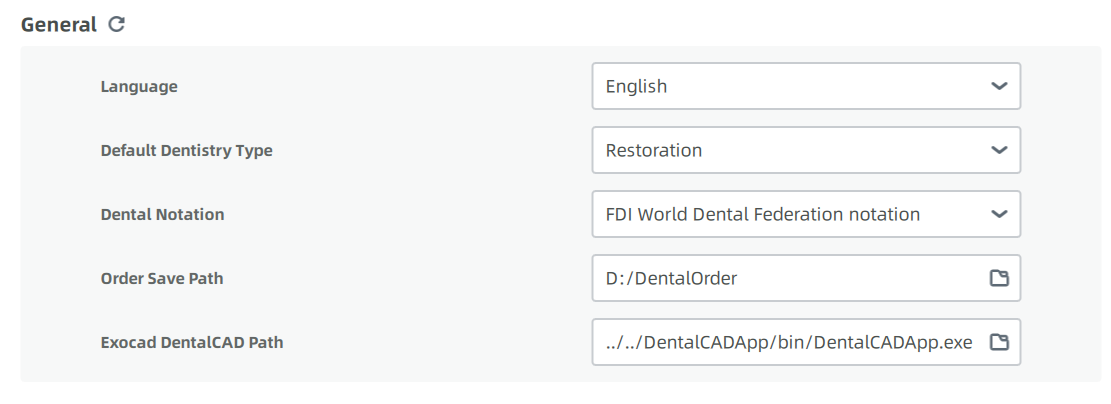
Order Settings
Click to set order parameters. To restore parameters on Order Settings interface to the default.
| Parameter | Description |
|---|---|
| Language | Users can set the software interface language: Chinese (Simplified), English and other languages. The default language is the language selected during software installation. |
| Default Dentistry Type | Select a default dentistry type from Restoration, Implant, Orthodontics, Removable Denture and Other. |
| Dental Notation | FDI World Dental Federation notation and Universal numbering system. The default is FDI World Dental Federation notation. |
| Order Save Path | Set the order saving path. The default is to save the DentalOrder file in the installation package disk. If the installation package is stored in the C disk, the software installation path is C:\DentalOrder. |
| Exocad DentalCAD Path | To combine EXO software to IntraoralScan, enter EXO software location. |

Default naming rule is "Create date_Doctor Code_Order ID". Still, you can define your own naming rule. Select wanted naming rules (order ID is a must) one after another and the final naming will be displayed in earlier selected rule > later selected rule sequence.
Note
When the order ID is checked, you can set that the ID is displayed out of order. After enabling it, the order ID number will be displayed randomly.

| Parameter | Description |
|---|---|
| Save Exocad order | The exocad order *.dentalProject is saved while saving the order. You can import the order into the EXO design software for design. The default is on. |
| Save 3rd party order | Save third-party software order when an order is finished. A third-party software order is saved while saving the order. The folder named "original order name_thirdParty" is generated under the order path, and the .xml file and the scanning result data .stl/*.ply (the coordinate system is consistent with the third-party design software) are stored. You can create an order into a third-party design software and import the data to design. The default is on. |

By setting the storage time, project files beyond the time can be deleted automatically or manually, and more space is reserved for storing newly scanned project files.
Automatic cleaning:
1. Check Automatic cleaning of historical project files.
2. Set interval time to remind and retain days within the order.
Note
After logging in, you will be prompted whether to delete historical data according to the date you set.
Manual cleaning:
1. Click immediately clean up.
2. Set the end date.
3. Click OK.
Note
- Only temporary data will be deleted.
- Data before a certain date can be cleared manually, while the data on that date can be retained.
- When the disk space for saving project files is lower than 20G, a prompt will pop up to show that clear the data immediately.
- You can choose to save data for 30 days, 90 days or 120 days.
