Interface
After logging in, you can check your orders.
Preview

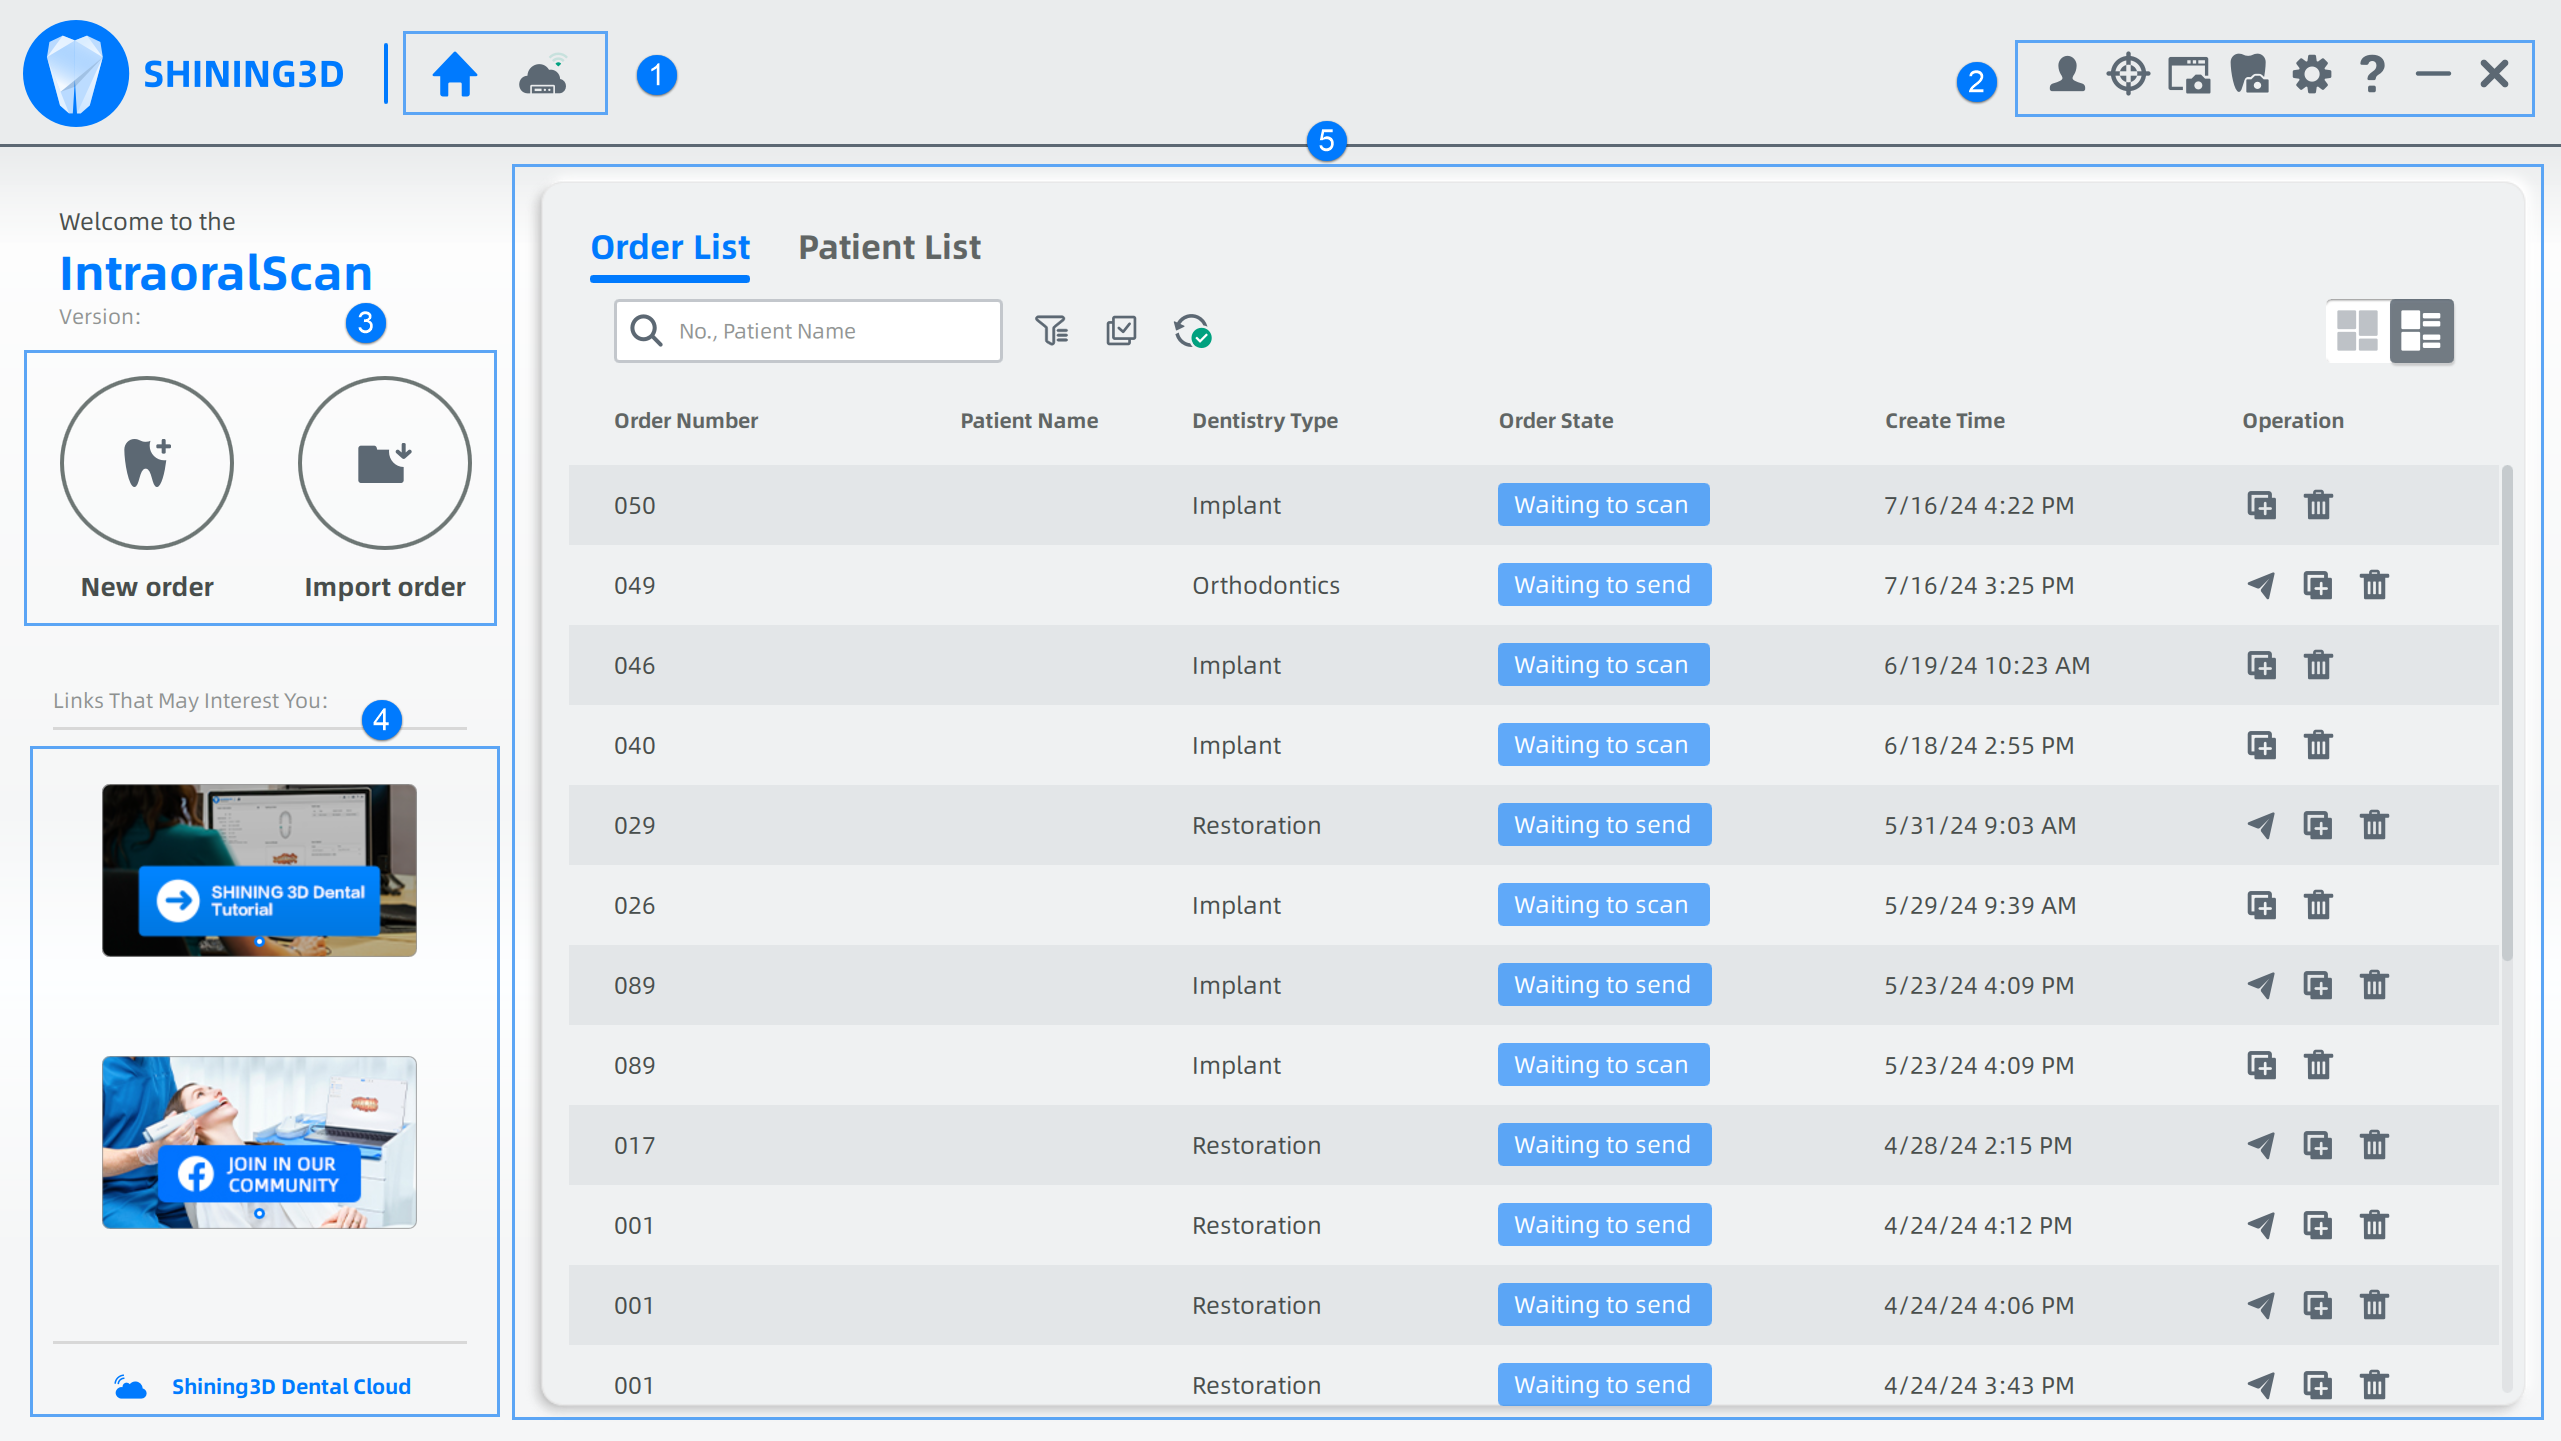
① Home and dental cloud connection
:Click to return to the homepage.
Dental cloud connection
: Normal connection.
: Failed connection.
: Unstable connection.
② Settings
Check ![]() Users information and connection,
Users information and connection, Calibration,
Record and screenshot,
Endoscope,
Order settings and
Help.
Users information and connection
Click  to check user profile and the connections.
When adding new connections, click New to search a target organization and click to send the application.
Caution
If you fail to add a new connection and a tip informing that necessary information is not completed, please log in the dental cloud to complete the relevant information, then start to re-establish the relationship.
Screenshot
Record the screen, take a screenshot and check screenshots.
- Click Screen Record to record the screen and click
to end it.
- Click Screenshot to capture the picture and you can edit the picture by clicking it displayed in the lower right corner.
- Click Find the screenshots/screen records to view the storage path.
Endoscope
With Endoscope, users can check the teeth in advance and create the corresponding orders.
Click to start Endoscope.
to take screenshots and click
to check the path where the screenshots are stored.
Caution
Please connect or wake up the scanner when using Endoscope.
Help
Click Help for the User Manual, Shortcut Instructions, User Guide (Enabled by default), Support Center, Remote Assistance, Feedback, Official Account Customer Service and Information.
- Support Center: Check our technical support.
-
Feedback: Submit your issues, suggestions or requirements or others.
Please fill in your contact information and the device serial number, and describe what problems you encountered. You can upload attachments for better description.
-
Official Account Customer Service: Scan the QR code to follow our official account.
- Information: Check new functions and other information about the software.
③ Create/ Import Orders
:Click to create a new order, as well as a scanning order. Details in Create/Import Order.
 :Click to import an order from ExoCAD and IntraoralScan.
④ Advertisement
See information of other productions.
Click Dental Cloud to enter cloud platform.
⑤ Orders
Including Order list and Patient list.
Order list
| Icon | Description |
|---|---|
Search |
Enter order number or patient's name for searching. |
Filter |
|
Multi-selection mode |
Process the duplication or the deletion of multiple orders. Click |
Sync information |
Synchronize the cloud order to the software. |
Card Mode &Table Mode |
Switch arraying methods between card & table. Check order information (e.g. patient's information, order status and creating time). Open a certain order by double-clicking it. |
Send |
Send order information and scanning data to other labs. |
Duplicate |
Create a new order identical to the current one and re-scan. |
Delete |
Delete the selected order(s) from the list. Delete the file and scanning data permanently by checking Delete File and Scanning Data. |
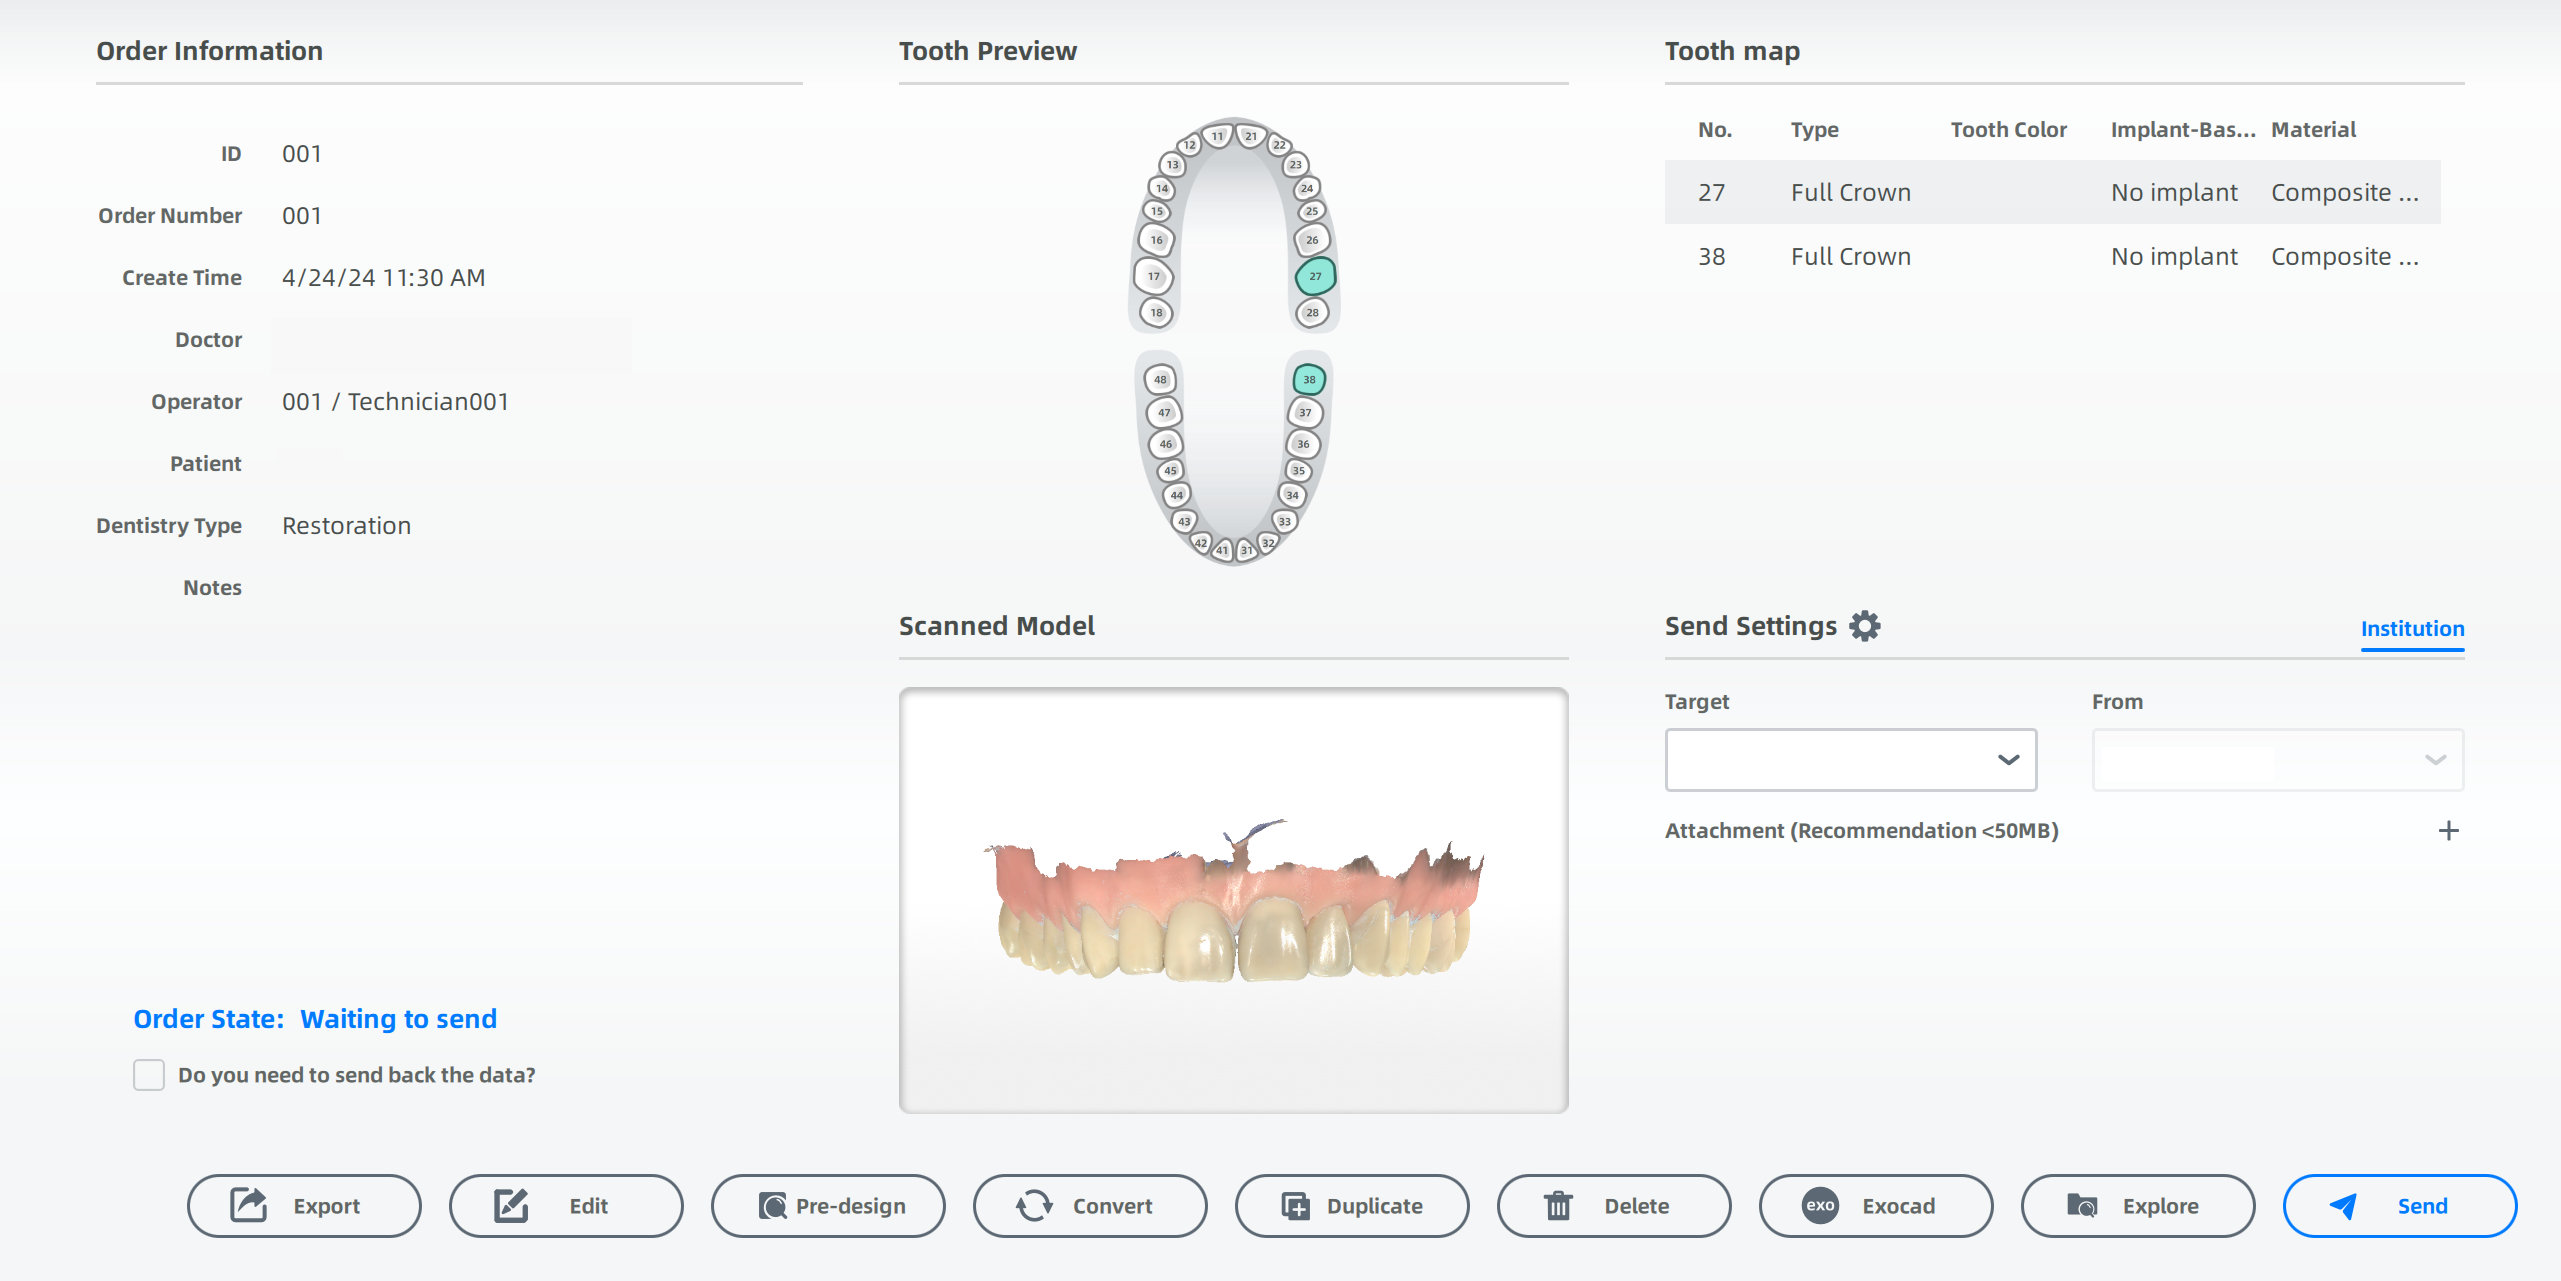
Order details
Click one order to check details, including its order information, the tooth map and the scanned model. Users can change send settings as well.

-
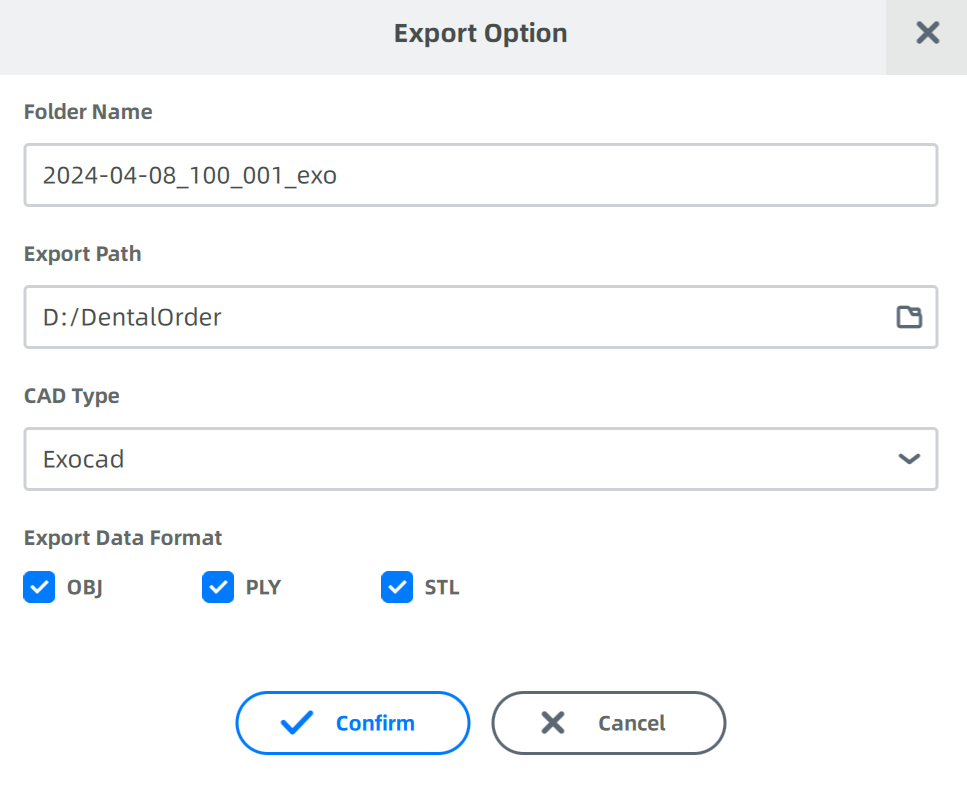
Export: Click
to save the order to the local path.
The users can change the folder name, export path, CAD type and the data format. After changing, click Confirm to check the local path.

-
Edit: Click
to edit order information again, including changing information of the patient and the doctor, and editing notes.
- Pre-design: Click
to enter the interface of pre-design.
-
Convert: When the dentistry type is Restoration or Other, converting the order is supported. The users can enable pre-op scanning when converting the order.
Note
If Pre-op is already enabled, converting the order is not supported.
-
Duplicate: Create a new order identical to the current one and re-scan.
- Delete: Delete the selected order(s) from the list. Delete the file and scanning data permanently by checking Delete File and Scanning Data.
- Exocad: Enter Exocad to design the model.
- Explore: Click
to explore the current local path where the order is saved.
- Send: Click
to send the order. More details can be found in Send Order.
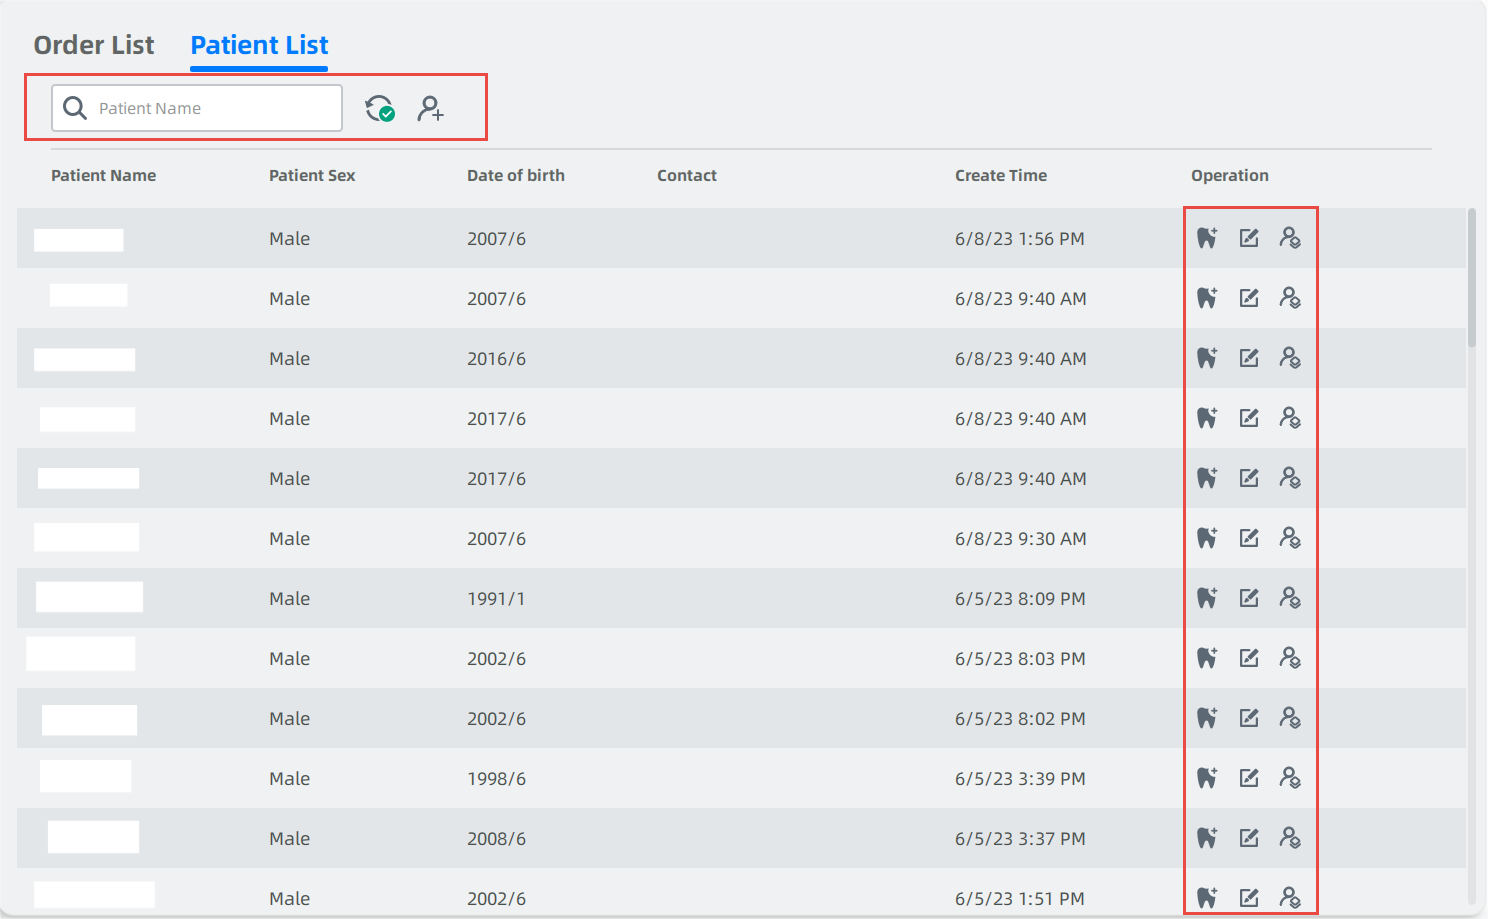
Patient list

| Icon | Description | Icon | Description |
|---|---|---|---|
Search |
Enter patient's name to search orders. | Sync information |
Synchronize the cloud order to the software. |
Add a patient |
Click the button to enter the New Patient window. Enter name, gender, age and other necessary information to add a new patient. | Create an order |
Create a new order based on the certain patient. Relative information will be filled automatically and can be edited. More details can be found in Create/Import Order. |
Edit patient |
Click to edit relative information of the certain patient. | Merge patient |
Merge the same patient for better patient management. More details can be found in Patient Merge. |
Note
- If the user edits patient information, creates new orders or adds a patient when the computer is not connected to the network, the relative information will be synchronized to the cloud.
- Only institution manager can merge patients.