Scan Interface Introduction
Function preview

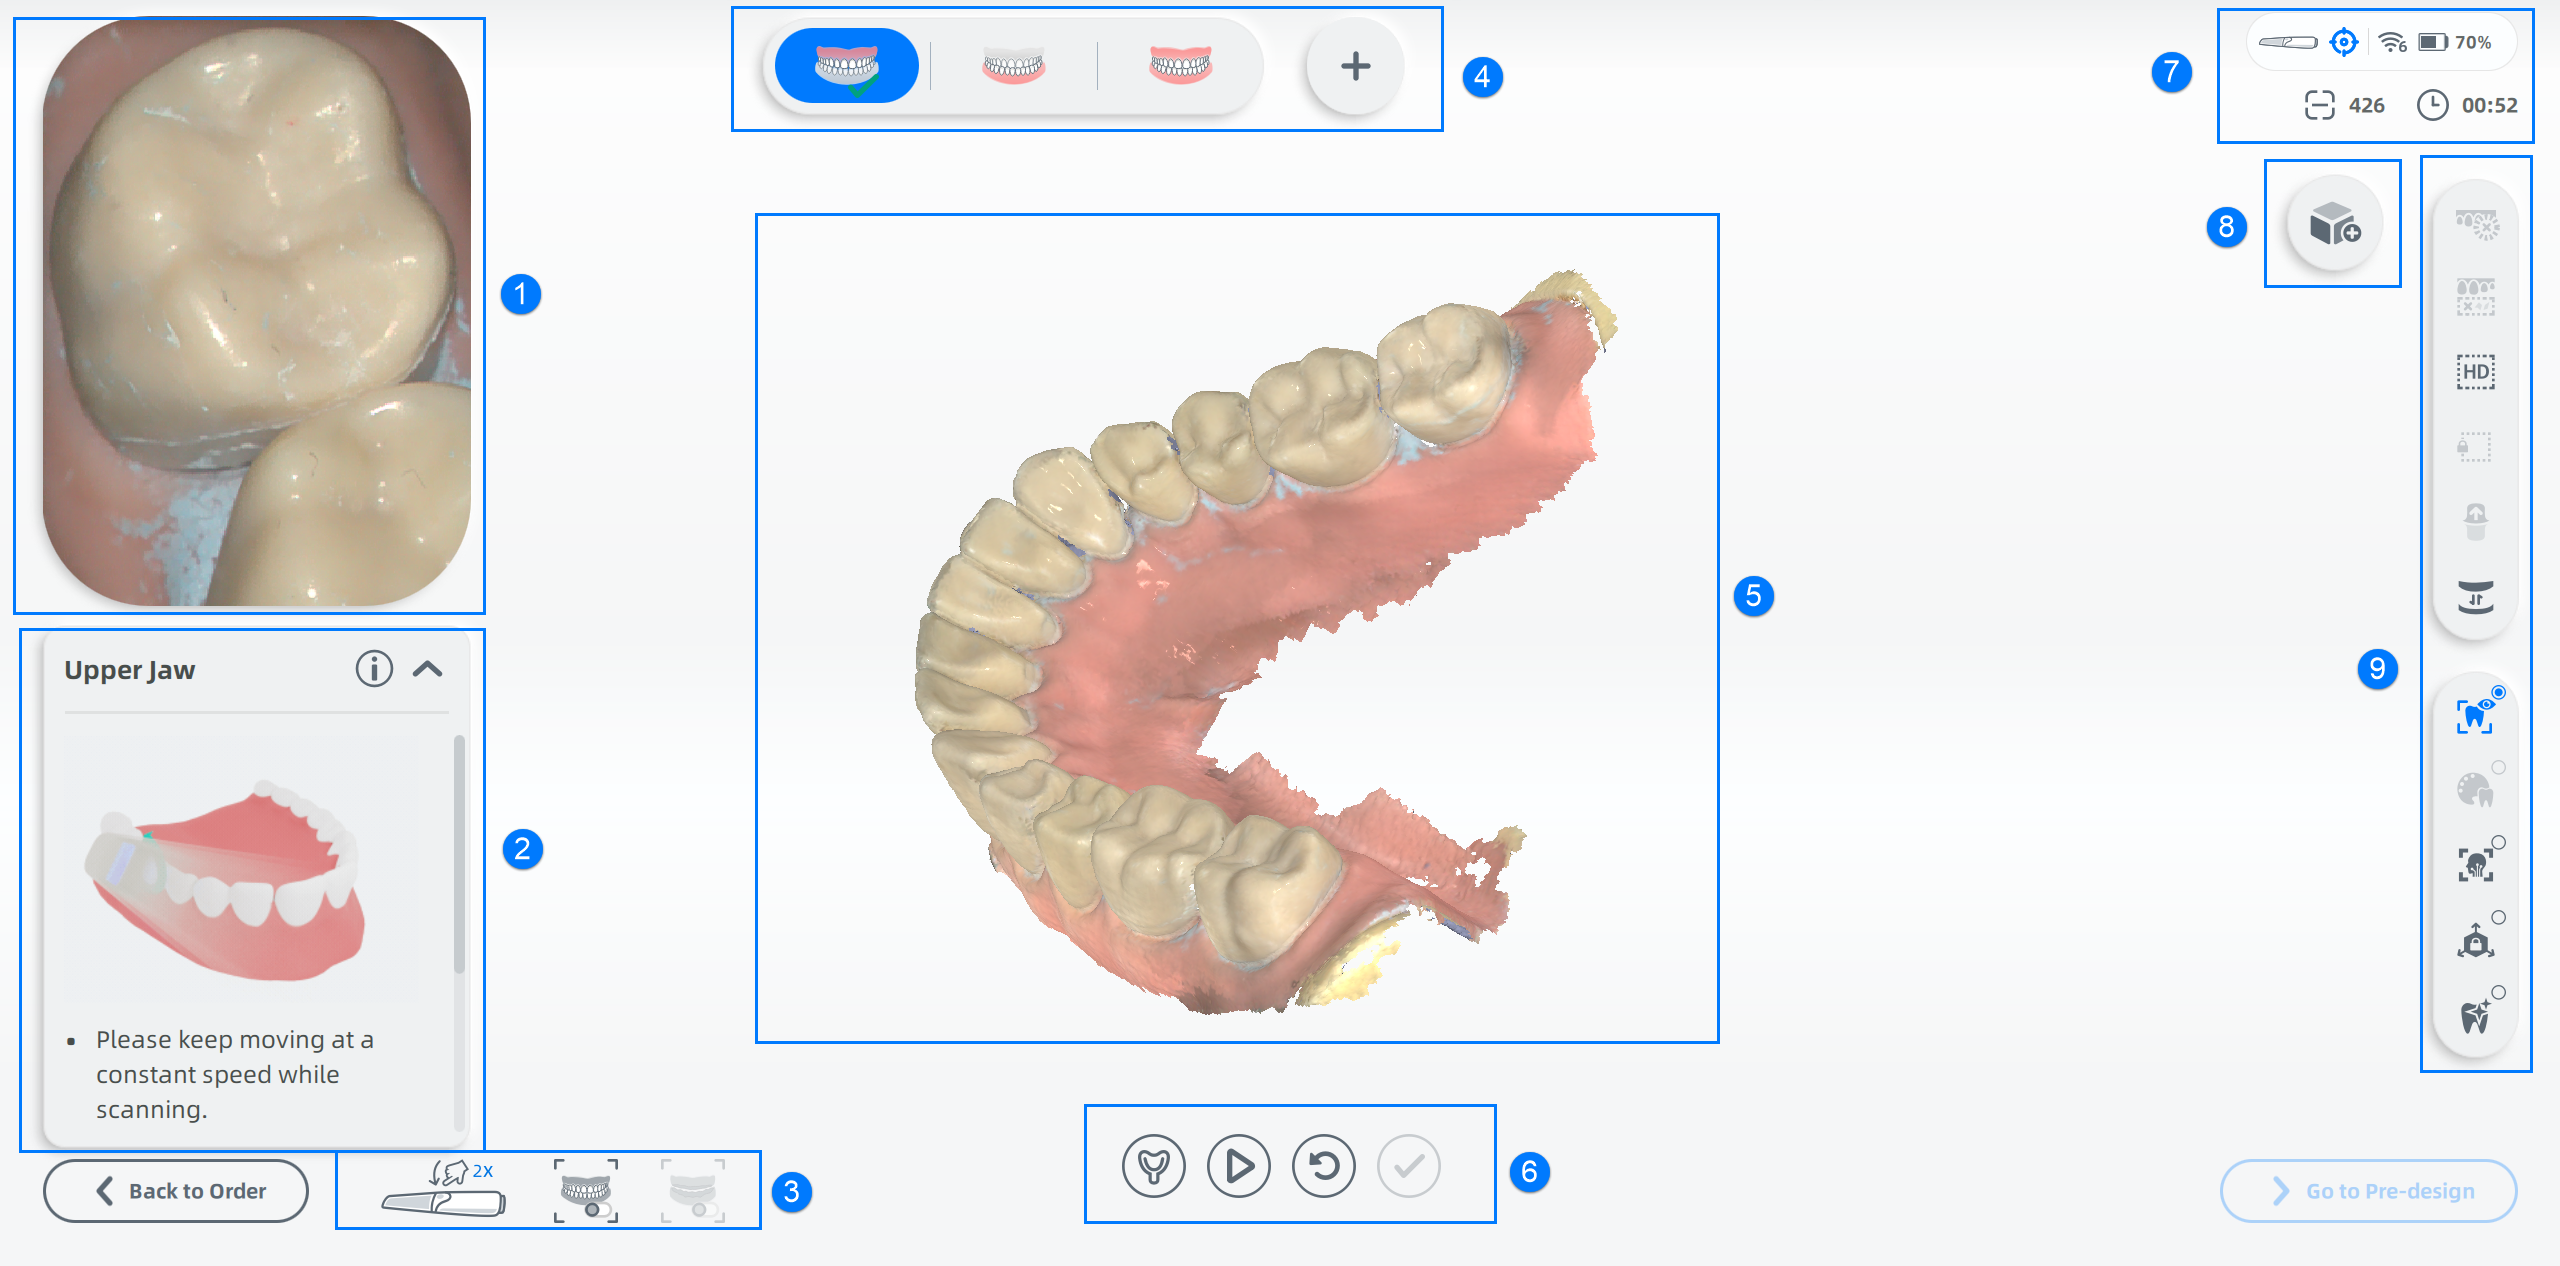
① Camera Window
Displays the real scanning scenarios and supports to set camera parameters.
Move the mouse within the image window to adjust the camera parameters.
| Icon | Description | Icon | Description |
|---|---|---|---|
Endoscope |
Click to enlarge the image window, and click again to restore it to the default size. | Screenshot |
Take a screenshot of the current image in the image window, and save the image in the "EndoscopeImg" folder under the current order directory. |
Mask |
Scanning indication switch. Disabled by default. When turned on, the camera window displays the current unscanned data area in purple when scanning. | Find screenshot |
After taking screenshots, click it to open the path of saved screenshot. |
② Guide
Contains the current process, operating diagrams and detailed tips.
③ IMU menu/Intraoral scan/Edentulous scan
-
IMU menu:Double-press the button on the scanner to open the IMU menu. Move the scanner tip and stop on the options for several seconds to go to the next step/former step/view the model/start scanning.
IMU menu is enabled by default. To disable this function, please click
Scan Settings General IMU menu.
-
Intraoral scan: Checked by default, applicable to intraoral scanning. It is recommended to leave this checkbox unchecked when scanning dental models.
- Edentulous scan: It can be checked after checking Intraoral scan. If it is checked, scanning process for edentulous patients will be speeded up.
④ Progress Bar
Displays the current position within the whole progress.
To view the other processes, click •••.
To add extra processes, click ✚.
The progress bar includes upper jaw, lower jaw, bite, additional scan and so on.
Additional scan
Additional scanning is used for scanning groups of additional models for extra information.
-
: Click to add additional scan.
-
: Click to rename the additional scanned model.
-
: Click to delete the additional scan.
Note
-
When adding another group of additional scan, the user should finish the former one.
-
The disk memory must be at least 25 GB when adding additional scan.
⑤ Preview
Supports previewing the scanned data. To gain a comprehensive view to the model, details can be found in Operation Skill.
⑥ Operations
Including scan operations.
-
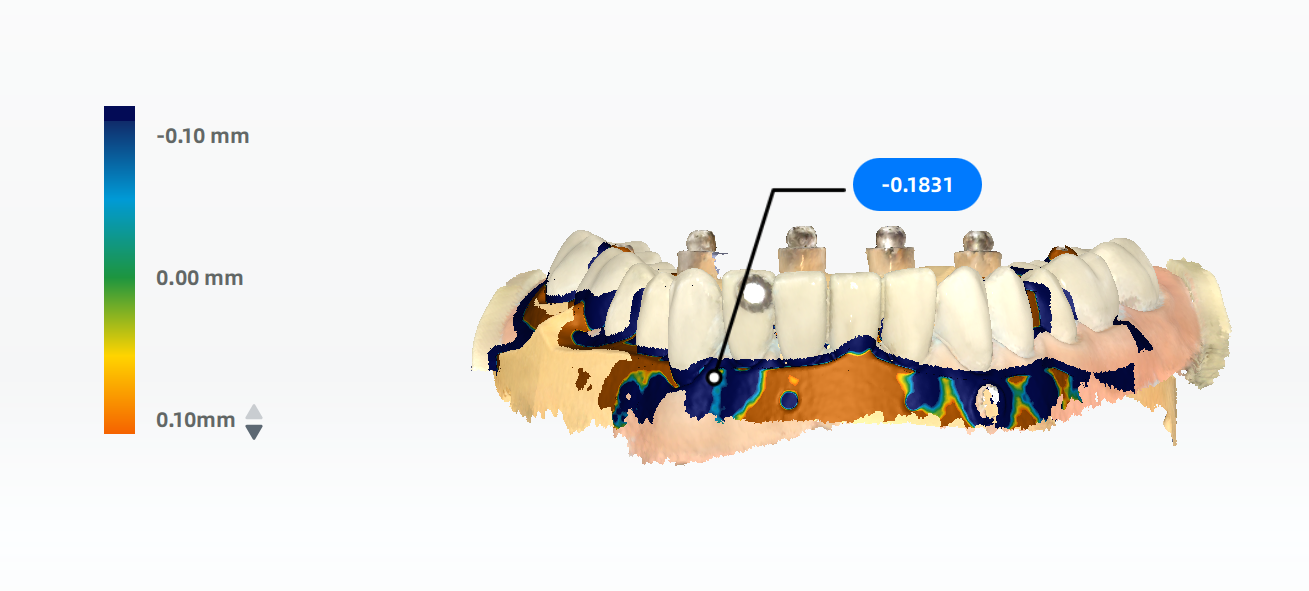
View ribbon: After alignment, the model will be colored to show the alignment deviation. And a color bar will be displayed on the left side of the model. You can click the arrow to adjust the range of the color bar. Move the cursor to check the accuracy value.

-
Impression scan: Combine the impression scan with the main data. During this scanning process, user can edit the data, remove the isolated data and so on.
-
Static align: Statically align the models.
Manual align: Manually align the models.
/
Start/Pause: Click to start or pause the scanning.
Reset: Reset current scanning data.
Finish: Finish scanning and save the current scanning data.
⑦ Scan frames and time
Show the number of scanned frames, scan and data processing time, signal strength, battery power and the scanner status.
Scanner status
| Icon | Description | Icon | Description |
|---|---|---|---|
 |
Connected. |  |
Not connected. |
 |
Connecting. |  |
Wrong connection. |
 |
Without scanner tip. |  |
Overheated. |
 |
In standby status. |  |
In scanning status. |
⑧ Extra match
Extra-match can align the scanned data with third-party accessories for checking multiple sets of data.
More details can be found in Extra match.
⑨ Tools and additional functions
Tools and additional functions can be used for better scanning and previewing the model. More details can be found in Scanning tools and Additional functions.