Preview Edit
Observe the scanned model from different angles and then optimize scanning data.
Intraoral data
-
Change the opacity and switch the viewing angle to edit the stereoscopic data.
-
If multiple bites are added and scanned, you can switch between different groups of multiple bites to check the models.
| Icon | Name | Description |
|---|---|---|
| Upper Jaw | Check the option to view the upper jaw data. Drag the slider to change the upper jaw opacity value. |
|
| Lower Jaw | Check the option to view the lower jaw data. Drag the slider to change the lower jaw opacity value. |
|
 |
View from Different Perspectives | Check the view of the model. |
Application list
- Click More Applications to check more on the pop-up window.
-
Click Adjust sequence to adjust the sequence of applications showing in the interface.
(1) Drag the icon of an application to adjust the sequence.
(2) Click Apply to save the adjustment.
-
The last used application will be displayed before More Applications by default.
 Edit
Edit
Click to edit the model with the following tools.
-
 Rotate: Click and move the cursor to adjust the view of the 3D model.
 -
 Through: When Through is enabled and use Brush to paint on the model, all data within the brush range will be deleted, including underlying data that is blocked from view. It allows you to delete multi-layer data simultaneously.
When it is disabled, using the brush will only delete the surface data.
-
 Brush:
- Click and the cursor becomes a blue brush. Drag the slider to change its size.
- Move the brush to the areas you want to delete.
- Press and the area covered by the blue circle will be deleted.
- Click
-
 Free selection:
- Click .
- Move the cursor and press the left mouse button to draw a closed curve.
- Release the mouse and the selected areas will be deleted.
- Click
-
 Undo: Undo the last operation. Multi-clicking for undoing multi-operations.
  Redo: Restore the operation that has been undone. Multi-clicking for redoing multi-operation.
 Cancel: Cancel the operation.
 Confirm: Confirm the operation.
 Remove isolated data
Remove Isolated Data can quickly delete small data isolated from the main model.
Fill holes
Steps
-
Click the icon
 to enter the Fill Holes interface.
 -
Drag the slider to adjust the application range.
-
Click ✔ to confirm the operation and exit; click ✖ to discard the process and exit.
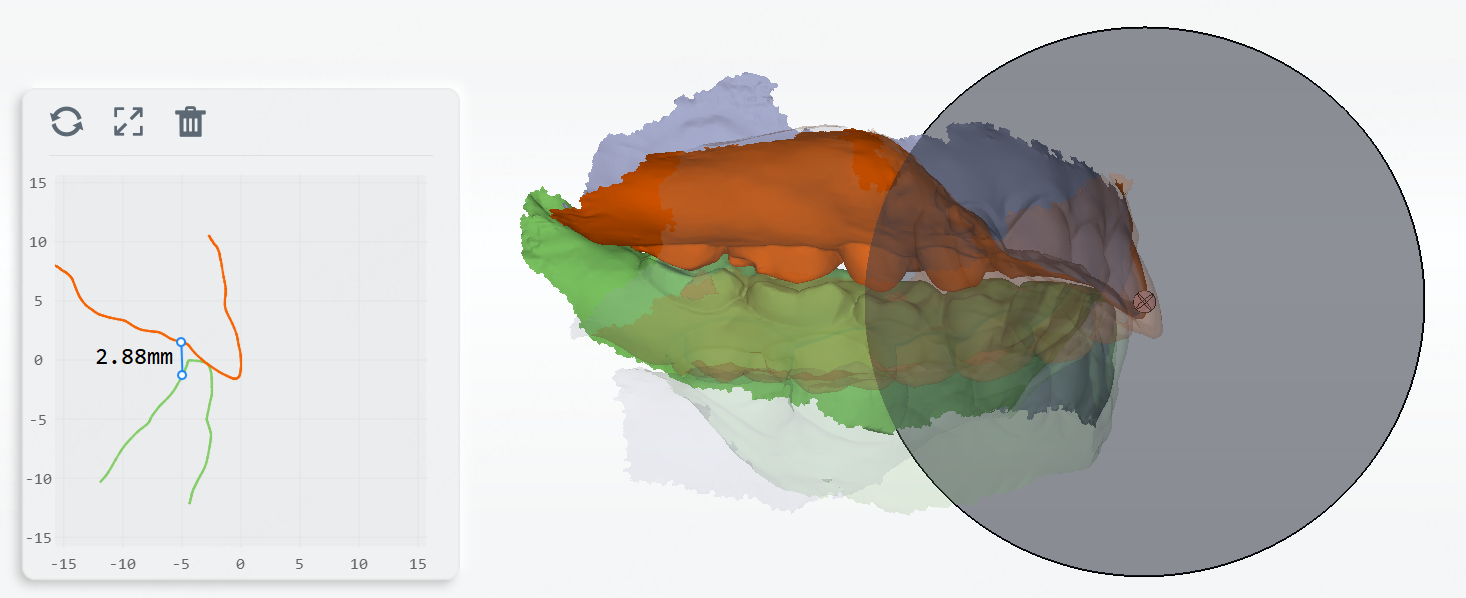
 Sectional mode
In Sectional Mode, you can check the relationship between models and measure their distance.
Select models in the list of intraoral data and click ![]() Sectional Mode. A profile will be shown. Move the profile to the model and click to generate.
Sectional Mode. A profile will be shown. Move the profile to the model and click to generate.
The 2D window in the lower left corner shows the corresponding intersecting parts between the profile and the model.
Note
- Profile Mode is supported when selecting intraoral models (except the total jaw model) and data of additional scanning.
- No more than 4 models can be selected.
| Profile operation | Description |
|---|---|
| Move the profile | Press the pink ball on the middle of the profile and move the cursor. |
| Rotate the profile | Press any point of the profile (except the pink ball) and move the cursor. |
| 2D Window operation | Description |
|---|---|
| Reset | Click |
| Zoom in/out | |
| Measurement |
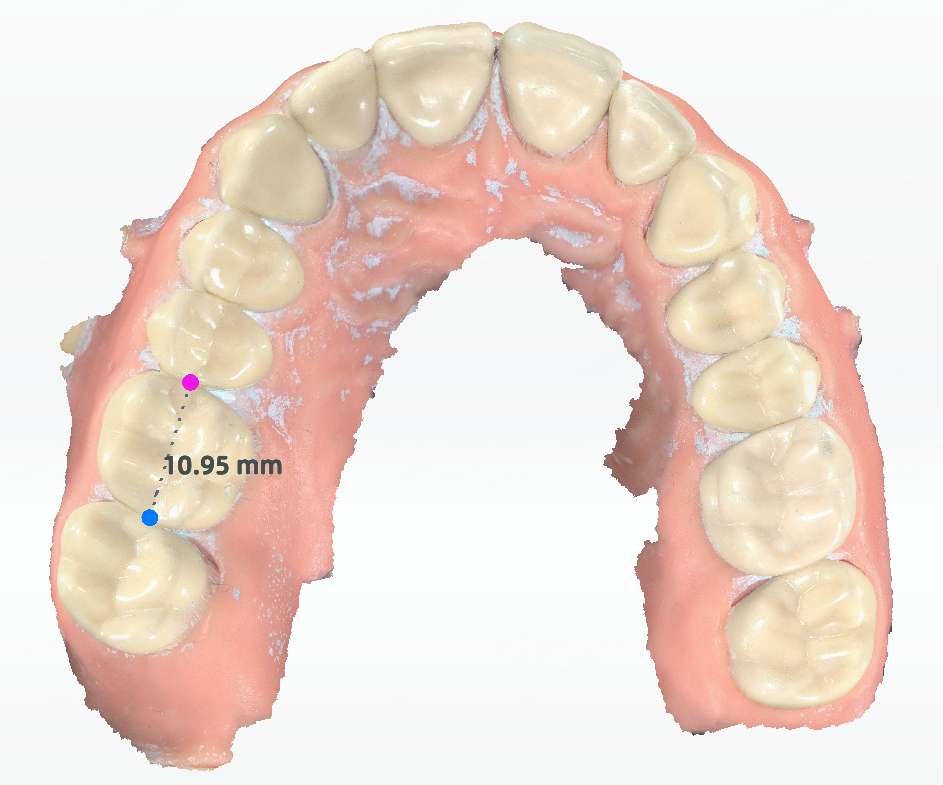
 Free measurement
![]() Distance Measurement and
Distance Measurement and ![]() Angle Measurement are supported.
Angle Measurement are supported.
Distance Measurement can be used for measuring the tooth width, measuring the gap of a missing tooth and so on.
Rotate the model to a proper position and select 2 points on the model. The distance between the 2 points is measured automatically.
Angle Measurement can be used for measuring the inclination of a tooth or a tooth cusp.
Rotate the model to a proper position and select 3 points on the model. The angle generated between the 3 points is measured automatically.
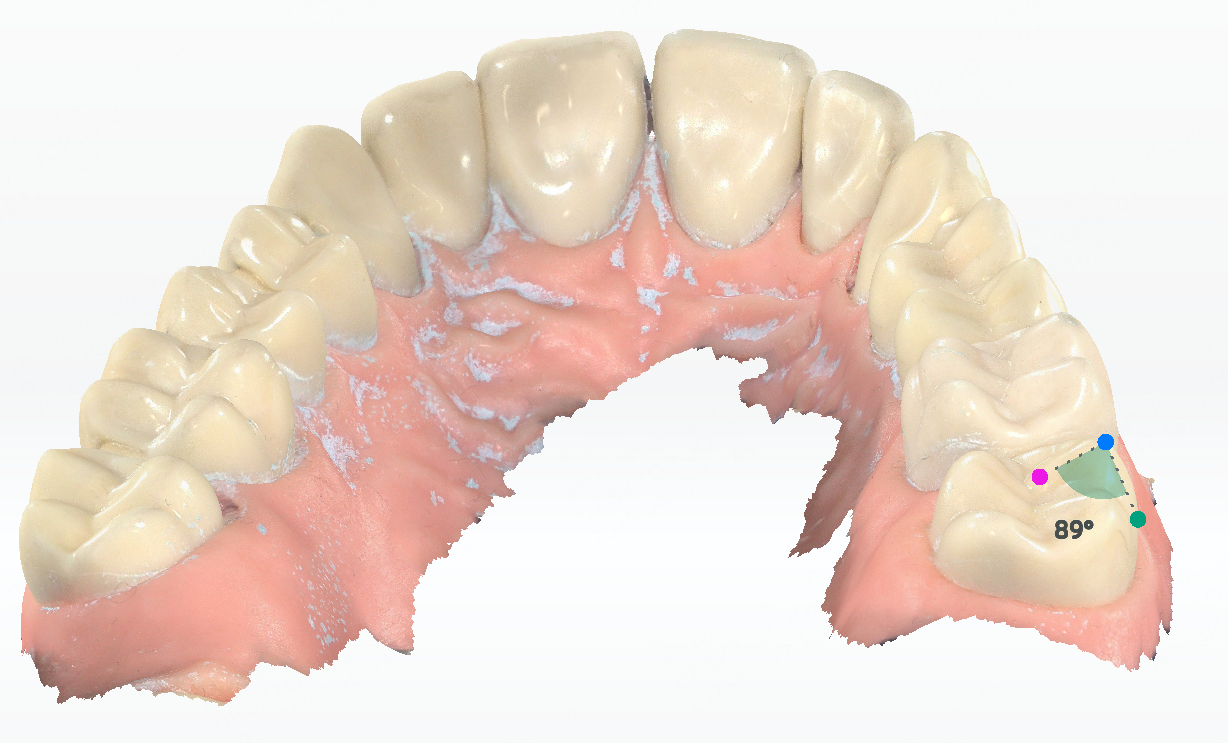
After measurement, click to exit.
 Quick Plaque Sense
In Plaque Calculation, the areas with plaque will be colored in red. You can check the plaque percentage on the left.
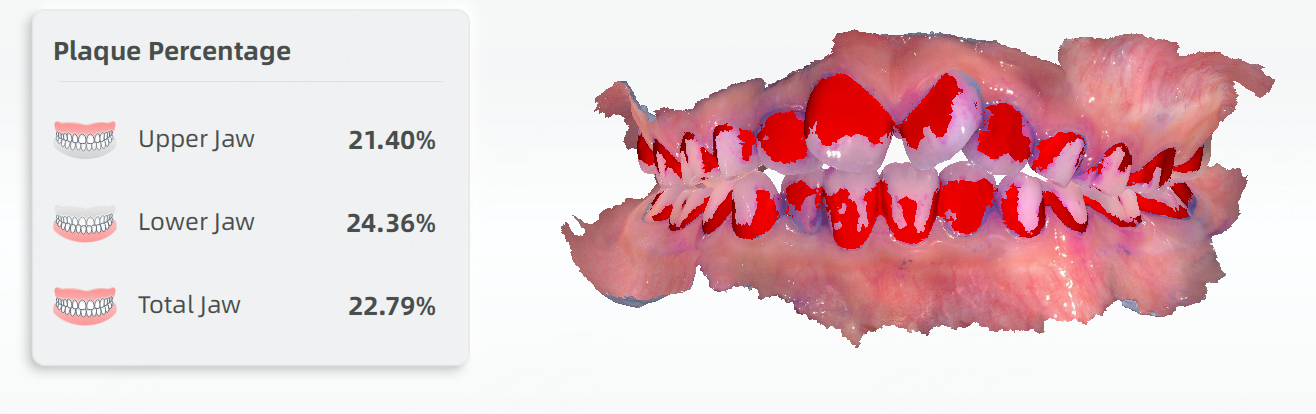
After calculation, you can click ![]() to exit.
to exit.
 Texture
Enabled by default. When enabled, the model will be colored.
Col
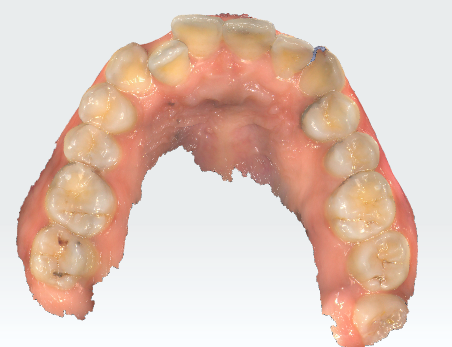
Enabled
Col
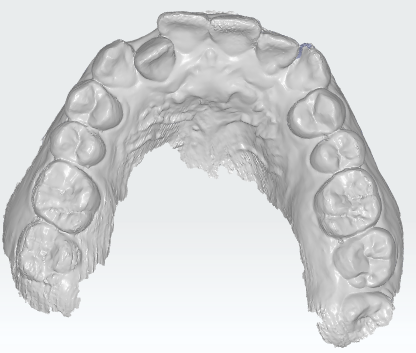
Disabled
 Smooth
Click to reduce noise and improve the quality of the model.
Fit view
Click  to adjust the size of the model to be adaptive to the interface.