Model Comparison
Model Comparison is a tool that can compare and analyze the differences in a patient's intraoral data at different times. It can monitor multiple sets of tooth position changes and intraoral tooth wear data for orthodontic treatment.
Click  to enter the model comparison interface.

Model alignment
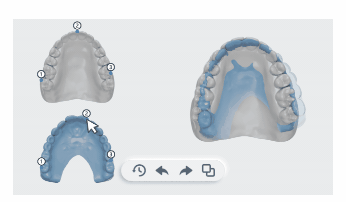
The models from different treatment periods are aligned according to the feature points, both automatically and manually.
Click  and
and  at the upper right corner of the interface to select the jaw-plane view of the upper/lower jaw.
Note
In the model comparison interface, the upper jaws or the lower jaws will be automatically aligned and displayed by default.
Manual Alignment
- Click on the model to add a new point. You can press the point to move it.
-
After adding corresponding points at the same position of the two models, click
 to manually align the two models. The overlay effect of two models will be displayed.
Click
 to reset the positions if needed, leaving only the default three points remaining.
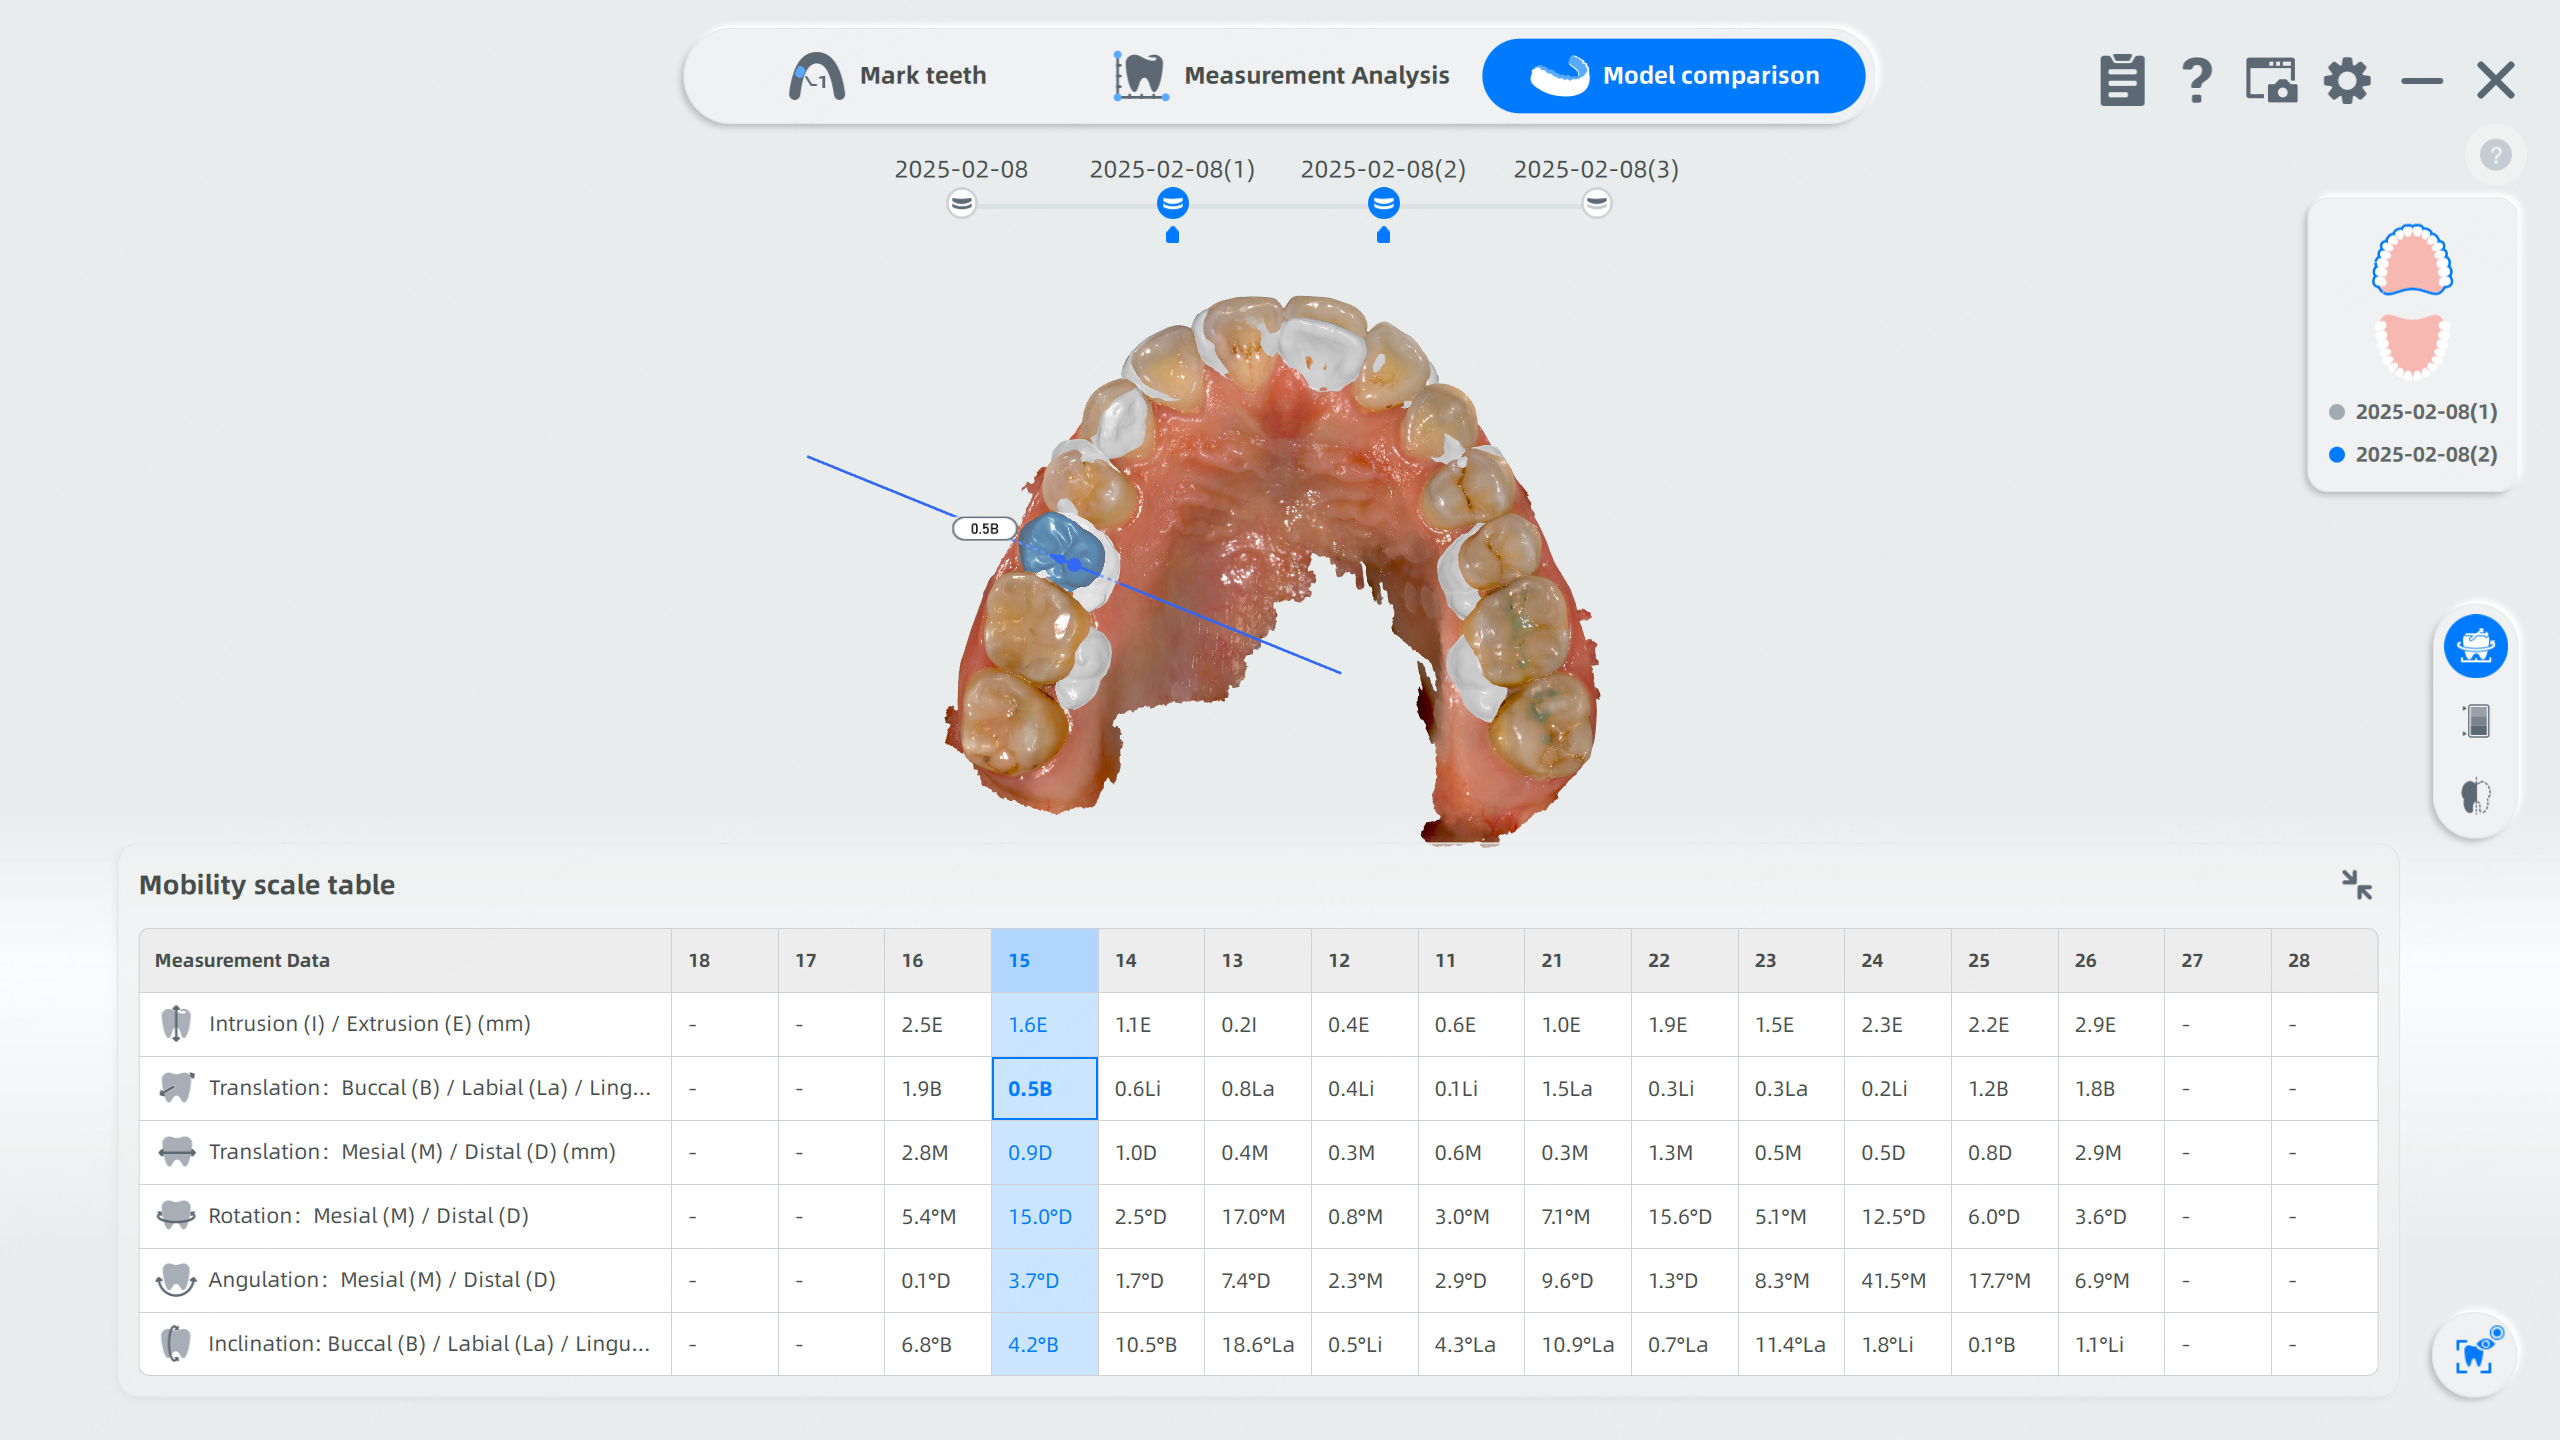
Teeth movement analysis
Click  to enter Teeth movement analysis. Overlaid effect of the two models and the mobility scale table is displayed.
When you select one tooth on the model, the corresponding data on the mobility scale table will be highlighted.
When you select a specific measurement value on the mobility scale table, the corresponding tooth and its movement reference line will be highlighted.
Note
The movement value of new teeth and dental implants cannot be measured.
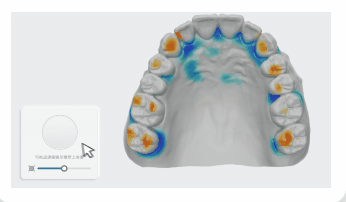
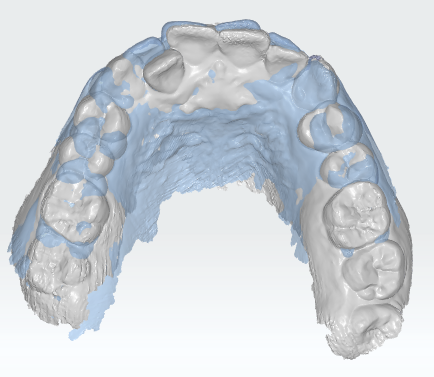
Color map
- Click
 to view the color map for teeth comparison. You can switch the comparison area: Tooth, Jaw or Gingiva.
 -
Drag the slider at the right bottom corner to set the range.

Note
- The movement variables of the teeth in the new data are compared with the scanned data from earlier times.
- Positive values are set to red, which indicate a shift toward the cheek; negative values are set to blue, which indicate a shift toward tongue.
- The function of ribbon chart and sectional view cannot be enabled at the same time.
-
Click on the model and its numerical value will be shown in detail.
-
The photoscope can be dragged to the model for viewing. Left-click the photoscope to display the magnification effect of Model 2. Otherwise, the photoscope will display the magnification effect of Model 1.
Note
Colors in the photoscope indicate the differences between Model 1 and Model 2 in this target area. The darker the color, the greater the difference.
Sectional view
Click ![]() Sectional View and a screenshot plane will be automatically created on the model.
Sectional View and a screenshot plane will be automatically created on the model.
The 2D window at the lower right corner shows the corresponding intersecting parts between the plane and the model.
You can switch the comparison area: Tooth, Jaw or Gingiva.
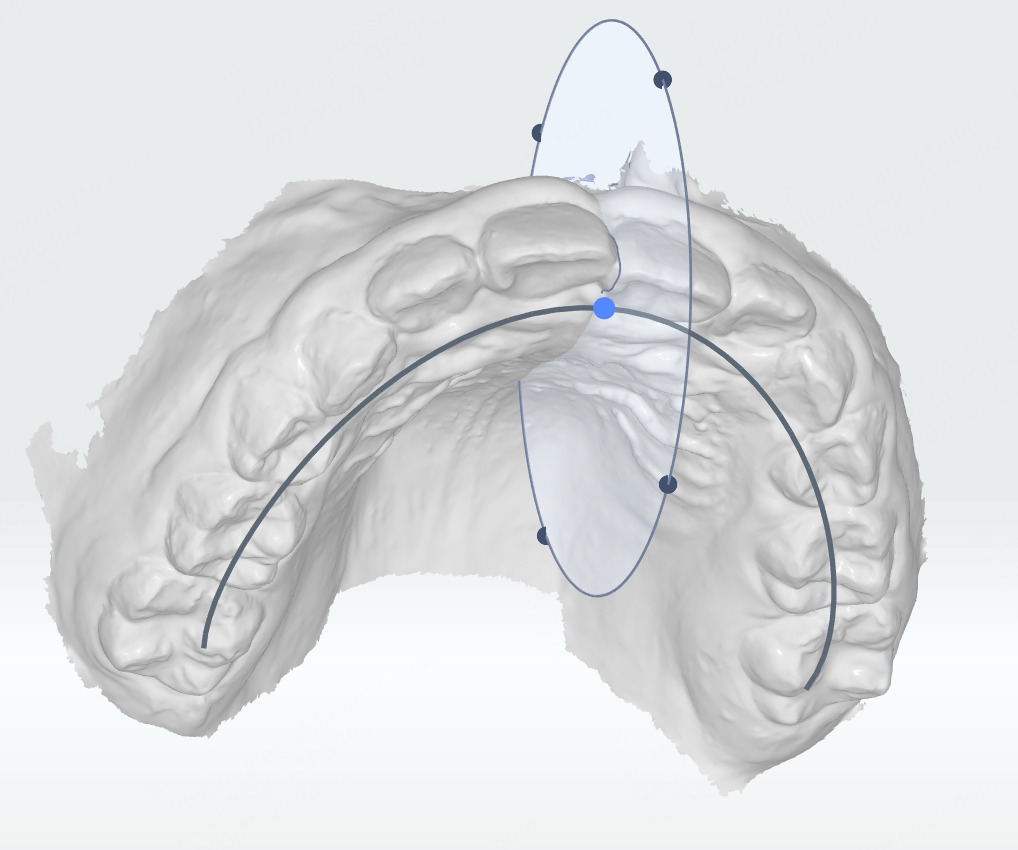
| Plane operation | Description |
|---|---|
| Move the plane | Press the ball in the middle of the plane and move the cursor. |
| Rotate the plane | Press any part of the plane except the ball and move the cursor. |

| 2D Window operation | Description |
|---|---|
| Vertical to dental arch | Click |
| Draw a section | Click Press and hold the left mouse button, then drag to draw a line to generate a section. |
| Reset | Click |
| Zoom in/out | |
| Measurement | 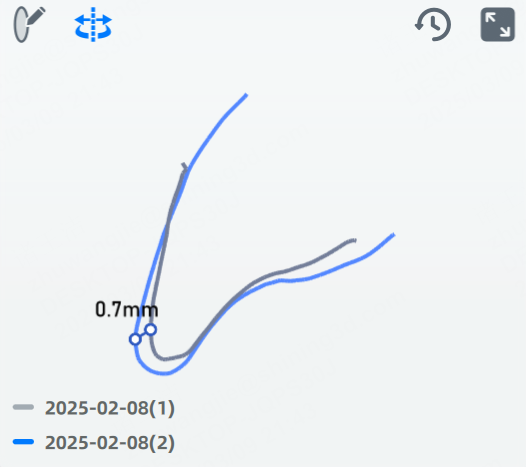 |
Display effect
![]() Overlay
Overlay
Enabled by default. When enabled, one model will be overlaid on the other model.
Col
Show Overlay
Col
Hide Overlay