Oral Health Report
Create an oral report
Steps
-
On the Pre-design interface, click
 .
.
Note
A beta version is available. Click Enter beta version to get new features. More details can be found in ConsulReport.
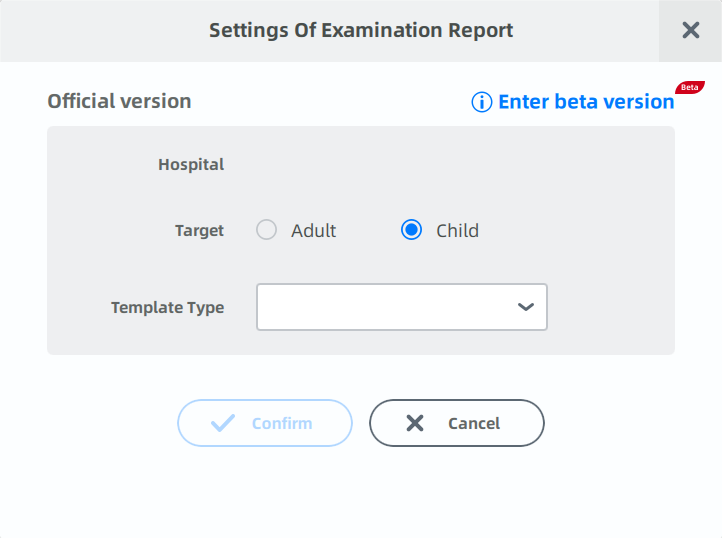
-
Select a hospital, a target (Adult/Child) and a template type.
- Click Accept to edit the oral report.
Note
- When enabling Assist Mode, the software will start assistant identification automatically before editing the oral report.
- Assist Mode is only available when the target is adult.
Edit the oral report
-
When enabling assistant mode, click Accept to enter the main interface to edit the oral report.
-
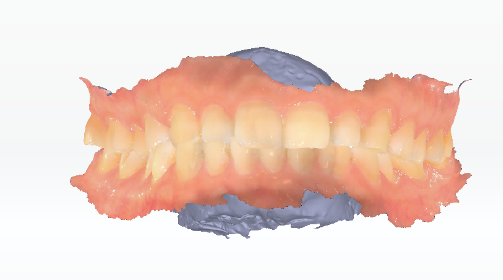
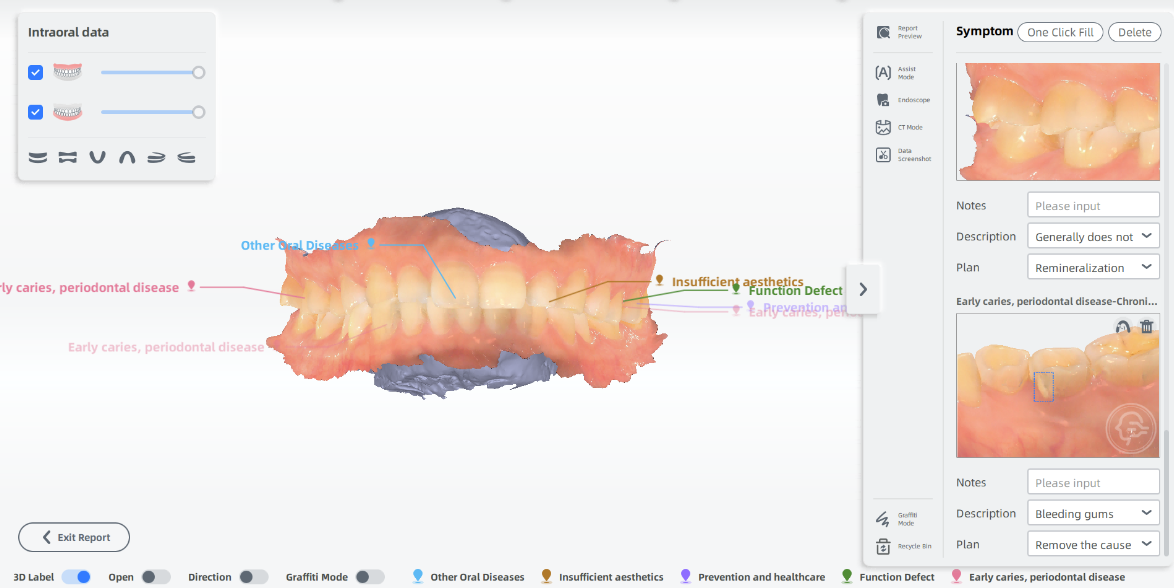
The main interface displays the bite status of the jaws. Click the picture of a symptom and the model will show the position of the symptom.
Note
-
Import an order which was created in the software with lower versions and click oral report, and then a tip pops up to confirm whether to generate a new report. Click Yes to clear operations and enter the interface of editing a new report. Click No to preview the report.
-
Assistant mode is not enabled for preview-only reports.
Assistant mode
The identification results are shown in the Issue window and you can click the picture to zoom it in.
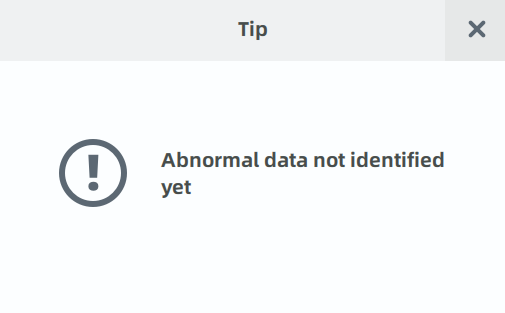
A tip of Abnormal data not identified yet pops up when the software can't identify diseases.
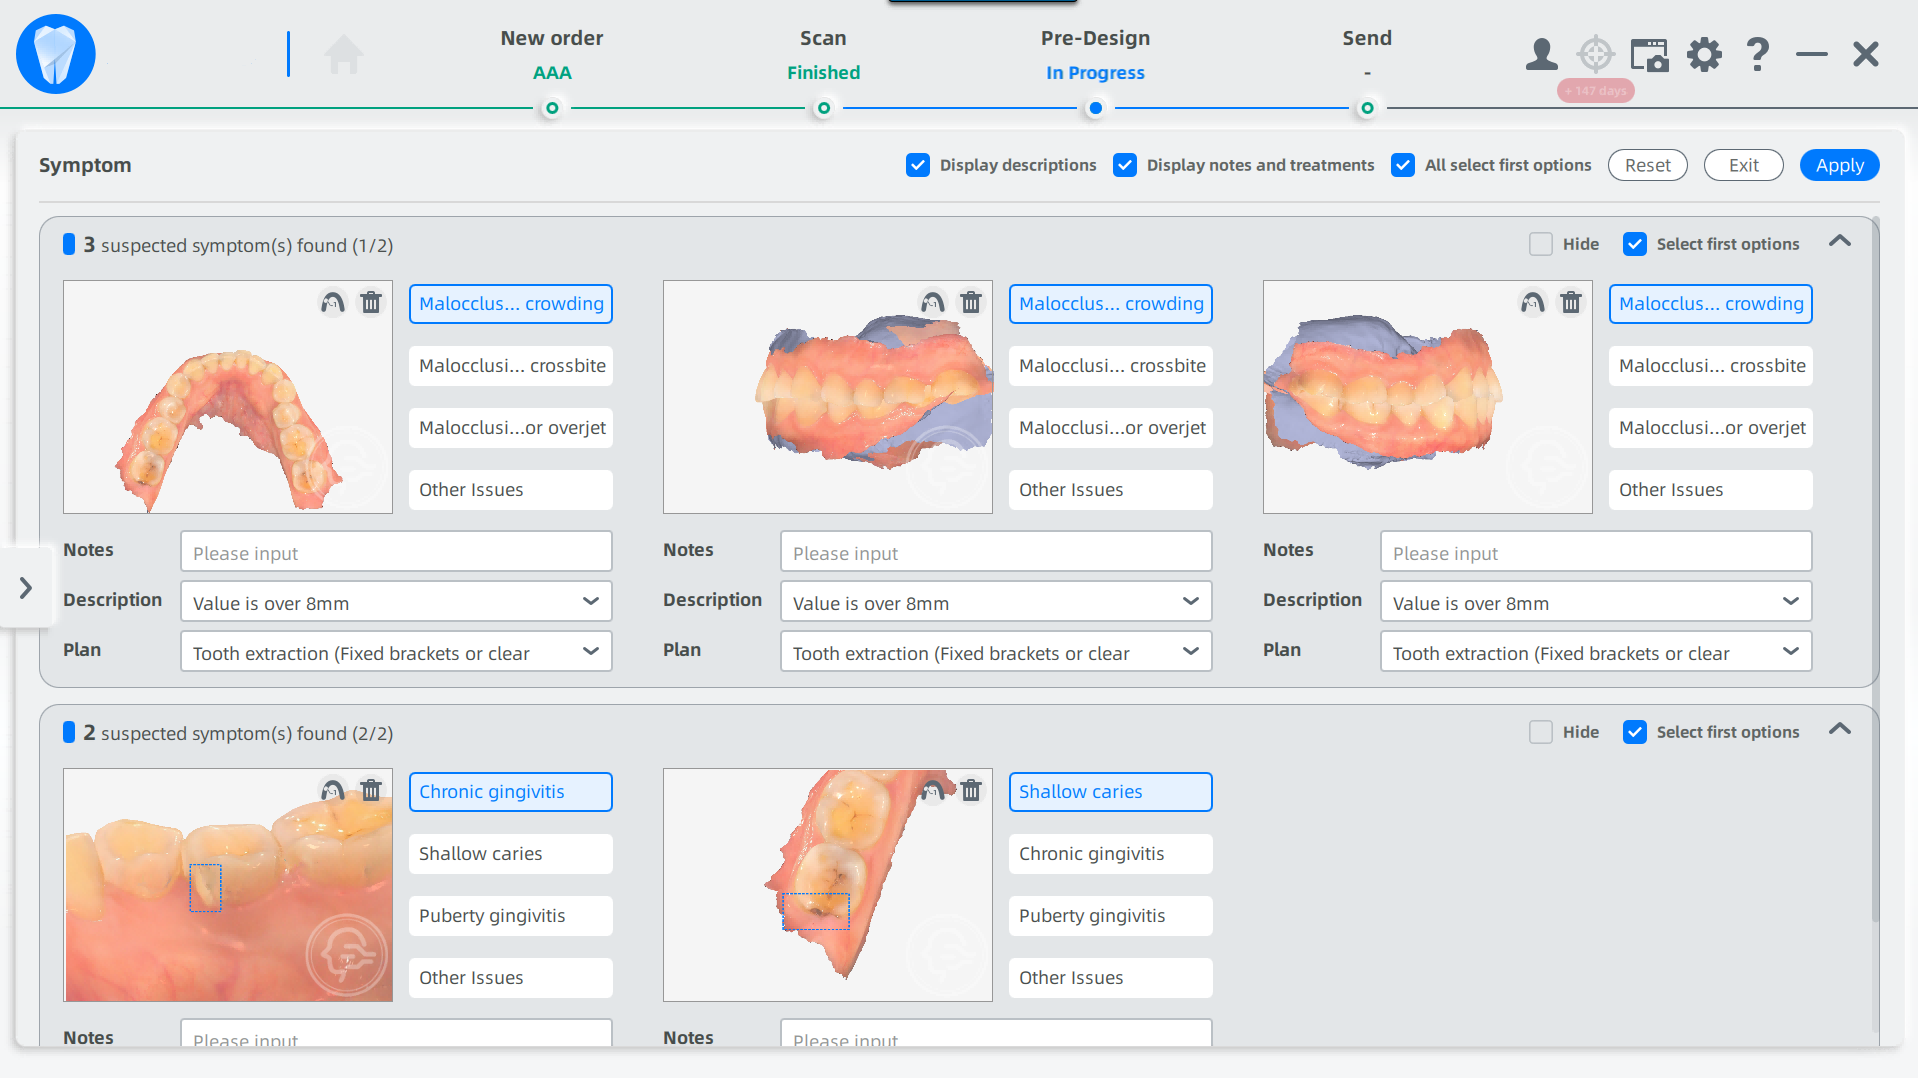
| Operation | Description |
|---|---|
| Show description / Show notes and plan | Check to show the description, notes and plan of the symptoms. |
| Select best (all) | Check to select the first one of the symptoms. |
| Reset option | Click and a tip of "Whether to clear all operations?" pops up. Click Yes to delete all selections and notes. |
| Hide this symptom | Check to hide this kind of symptom. |
| Accept | Save all the selections and enter the interface of editing oral report. |
Select teeth |
Click to select the tooth of the symptom. |
 Delete |
Click to delete the certain symptom. |
- Select no symptom and click Accept, then a tip of "Symptom select incompleted, whether to nex step?" pops up. Click Yes and unselected symptoms are deleted.
Note
The selected symptoms are displayed in the main interface of oral report, while the unselected symptoms are completely deleted.
Main interface of oral report
One-click filling
Click to set descriptions and plans in the issue view.
Delete
Click and a tip of "Whether to delete all issues?" pops up. Click Yes to confirm.
 Preview
Preview the oral health report.
- Share: Create a QR code which can be scanned by the phone to view the report.
- Export: Export the report in the format of PDF or PNG.
 Assistant mode
Assistant Mode will automatically detect teeth problems and take screenshots of certain teeth.
Click when there are already identifications, and a prompt of "Whether to perform auxiliary identification again?" pops up. Click Yes to restart auxiliary identification and current results are deleted.
 Endoscope
Take a screenshot of the model.
Steps:
- Click and the enlarged image window is displayed on the left.
- Scan the teeth.
- Press scanning button on the scanner or click
 on the image window to take a screenshot.
 - Select the treated tooth and problems in the new pop-up. Adding notes is also supported.
- Click
 to take more screenshots.
 CT image
Add an image and edit it. Treatment plan and other information of the treated teeth can be imported.
| Name | Description | Name | Description |
|---|---|---|---|
 |
Click to change the image. |  Mark |
Click the treated tooth to mark it with different colors and enter relative information. |
 Plan |
Click and a box is displayed where you can enter your treatment plan. |
Brush |
Click to paint directly on the image. Drag the slider to adjust its thickness. |
Eraser |
Clear the marks in the model. | Multi clicks for undoing multi-operations. | |
| Multi clicks for redoing multi-operations. | Discard the changes. | ||
| Confirm and save the changes. |
 Grab image
Take a screenshot of the scanned model.
Steps:
-
Click the button of screenshot and an enlarged screenshot box is displayed.
- Press left mouse button within the black box and move the cursor to rotate the model.
- Press right mouse button outside the box and move the cursor to rotate the model.
- Press right and left mouse button outside the box and move the cursor to move the model.
- Scroll the wheel to zoom the model in and out.
-
Double click in the box to confirm and select the treated tooth and problems in the new pop-up. Adding notes is also supported.
- Click to take more screenshots.
 Graffiti mode
- Display models in various angles including close jaw, open jaw and CT.
- Move the slider the adjust the thickness of the brush.
 Recycle bin
- Deleted symptoms are collected in the recycle bin.
- Click the restore button on the top right corner of the picture to restore it.
- Click the recycle bin button again or click Exit in the top right corner to exit.
 Exit
Exit
Click to exit the oral report.
3D label
Disabled by default. When it's enabled, symptoms under this perspective is tagged.
- Click the tag and the picture of this symptom is selected on the right.
- Modifying notes, descriptions and plans, selecting tooth and deleting this symptom are supported.
Click the tag and the picture of this symptom will be selected on the right. Modifying notes, descriptions and plans, selecting tooth and deleting this symptom are supported.
Note
When the jaws are open, the 3D tags are hidden if the software can't determine whether the symptoms are on upper jaw or lower jaw.
Opened jaw
Not enabled by default. When it's enabled, the model is displayed in open jaw.
Direction flag
Not enabled by default. When it's enabled, an indicator avatar is displayed in the bottom left corner.
The indicator avatar will change synchronously as the model is moved, providing users with a more intuitive view of the model.
Graffiti mode
Not enabled by default. When it's enabled, the cursor turns into brush.
You can press the left mouse button and move the cursor to draw on the model.