Pre-op Scanning
Pre-op scanning means to collect and retain intraoral data before treatment.
Create an order
For more details on creating an order, please refer to Create an Order.
Note
- For pre-op scanning, you can choose Restoration or Implantation as the dentistry type.
- In this chapter, the process of pre-op scanning takes restoration of Full Crown as an example.
- To create a pre-op scanning order, please select Yes in the dropdown list of Scan a Pre-op Model (select by tooth position) or select Upper Jaw / Lower Jaw (select by dental arch). Then select General Post-op in the dropdown list of Post-op Scan.
Start scanning
Note
Before scanning, please ensure the intraoral environment and the scanner is well prepared. More scanning preparations can be found in Scanning Preparation.
Steps of pre-op scanning (if pre-op scanning is selected for both upper jaw and lower jaw):
- Pre-op scanning of the jaws and the bite
- Post-op scanning of the jaws
- Check the bite
- Completed

① Pre-op scanning
Scan the pre-op upper jaw, the pre-op lower jaw and the bite with a disinfected scanner. After scanning, click ![]() for next step.
for next step.
-
Click
 (or press Space or press the button on the scanner body) to start scanning the upper jaw. After scanning, click
  to pause scanning and review the results, or click
  to finish scanning the upper jaw.
Note
- If you need to edit the scanned data, you can pause the scan and click
 on the right side to enter the editing interface.
 - Functions such as island Remove Isolated Data, Part Lock and Undercut are also supported.
- More details can be found in Data Edit.
- If you need to edit the scanned data, you can pause the scan and click
-
Scan the pre-op lower jaw. The scanning steps are the same as those of the pre-op upper jaw.
-
Scan the bite. The software can align the upper jaw and the lower jaw automatically when you have scanned part of the data. Click
or press Space tp pause scanning and check the alignment effect.If you want to align manually, you can click
 . More details can be found in Bite alignment.
Caution
- It is not recommended to scan a long area. Stop scanning once the data is matched (when the arches move into place on the bite scan). You can scan the left and right side of the bite (recommended) or scan the left, the right and the front side of the bite (click ➕ to add a third bite).
-
The maximum scanning frames of each bite group is 300. The software will stop the scanning once the frames reach 300.
-
When pausing scanning, you can click
 to add Multiple Bites.
 -
When pausing scanning, you can click
 to add Dynamic Bite.
Bite alignment
You can click ![]() Automatic Alignment or
Automatic Alignment or ![]() Manual Alignment to improve the performance of alignment.
Manual Alignment to improve the performance of alignment.
Automatic Alignment
Click ![]() to automatically align the bite once again.
to automatically align the bite once again.
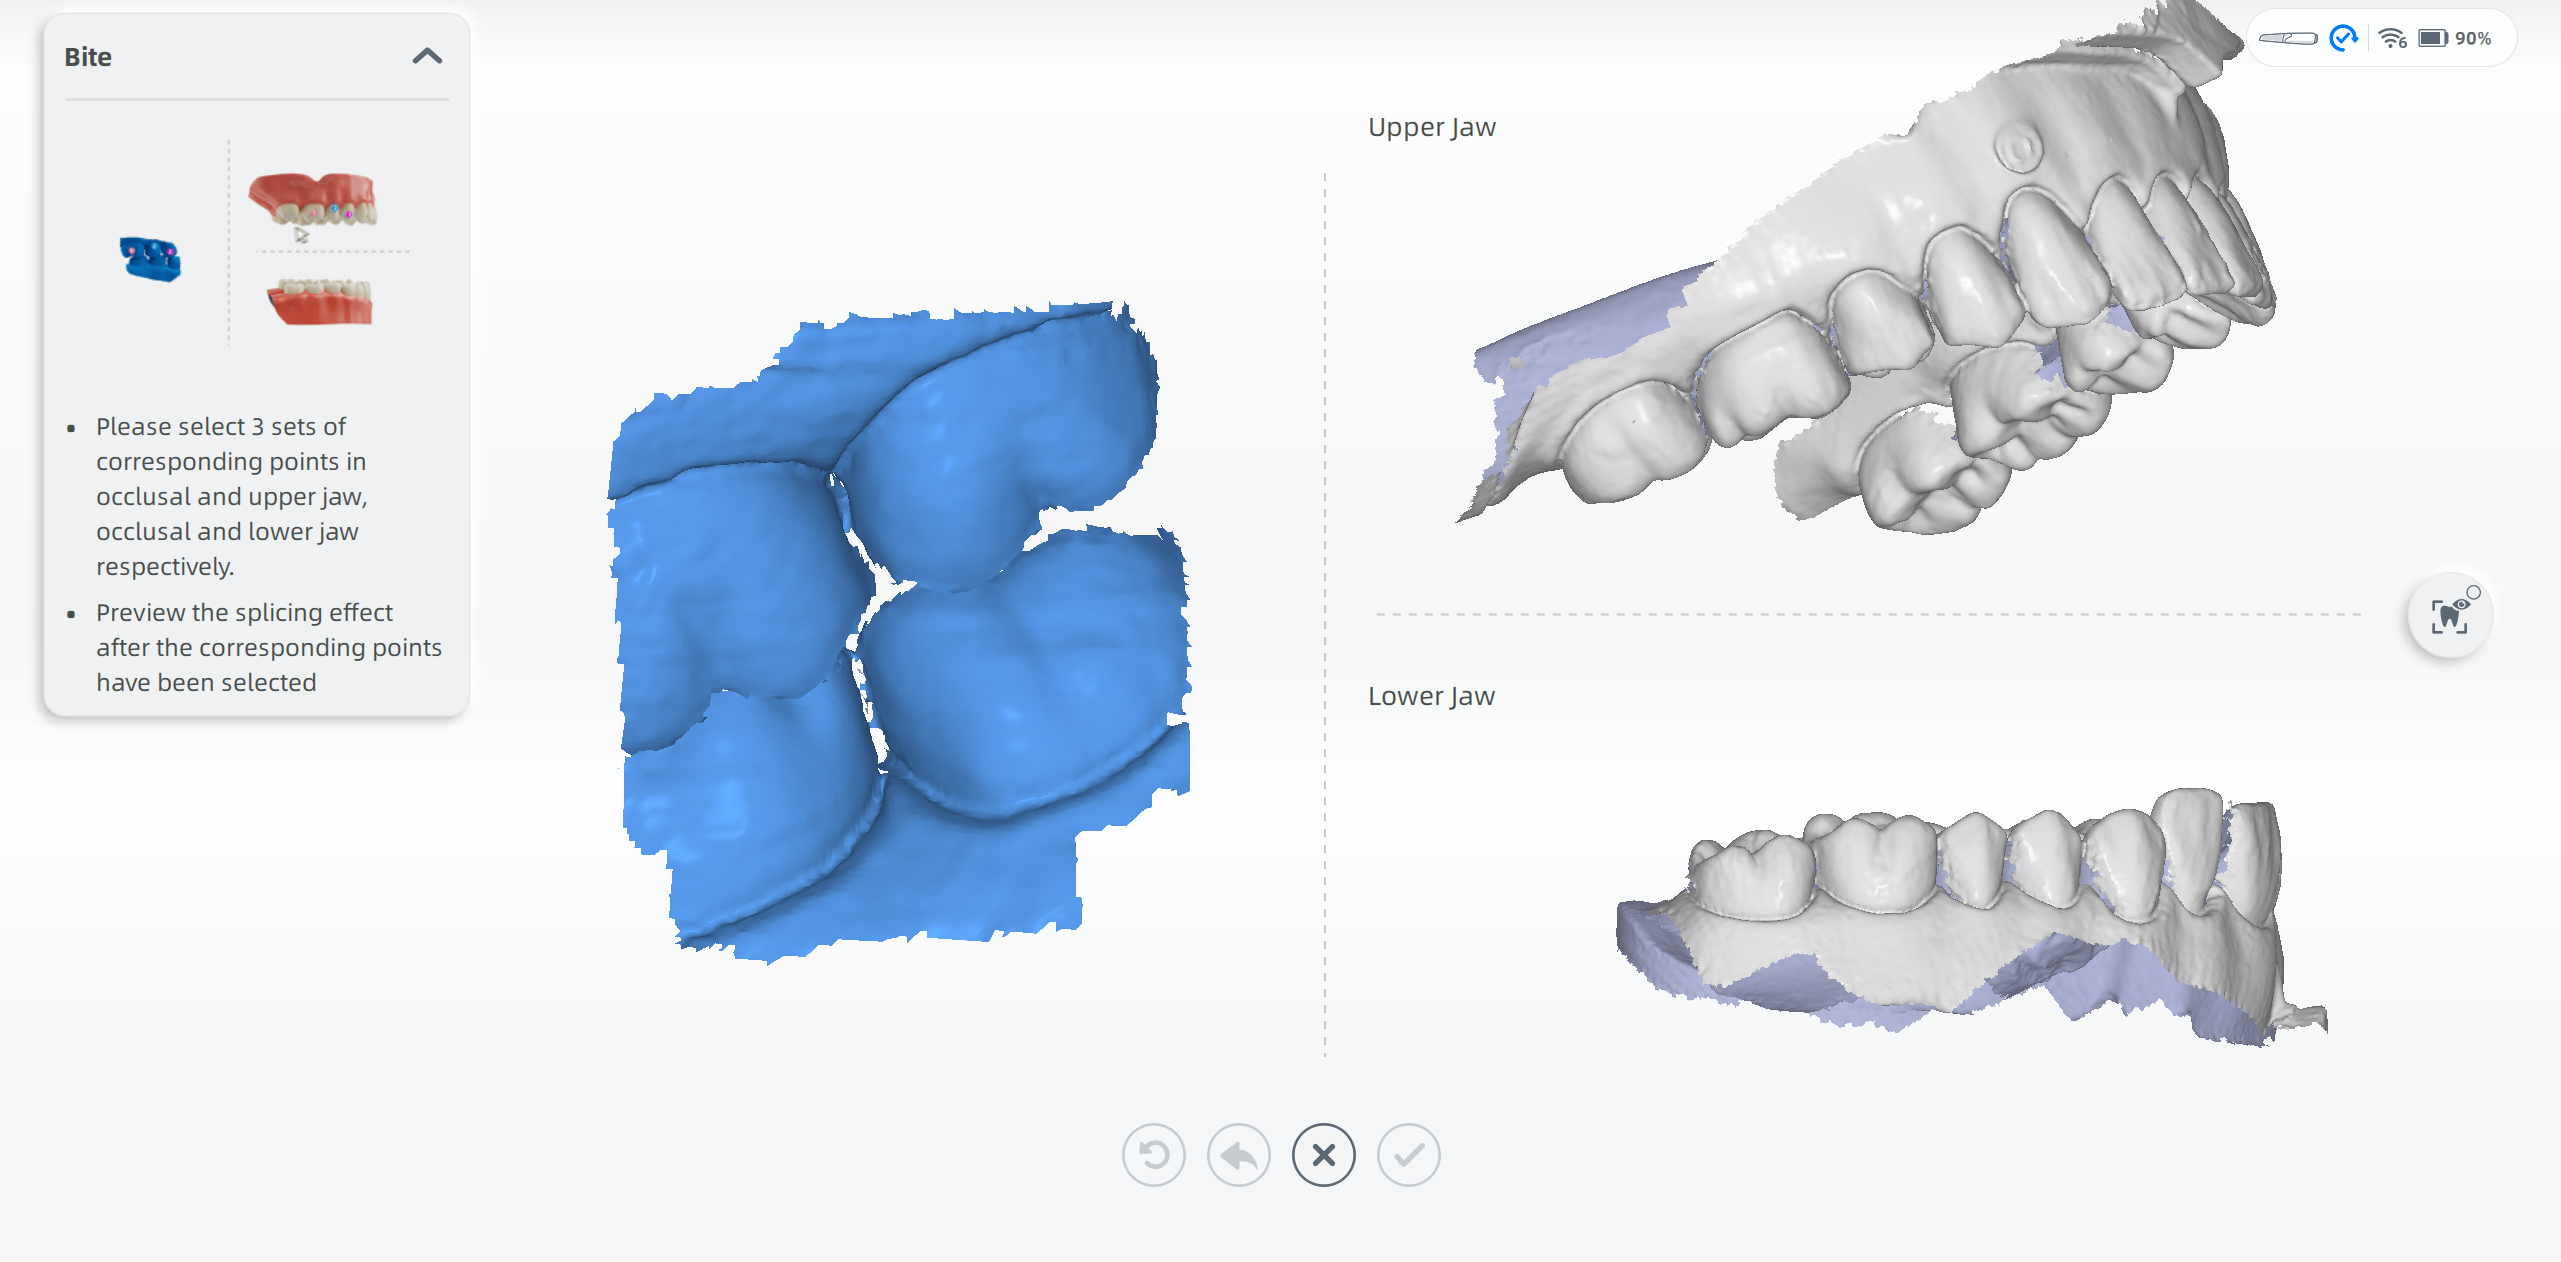
Manual Alignment
Click ![]() to enter the interface of manual alignment.
to enter the interface of manual alignment.
- Please select 3 sets of corresponding points in occlusal and upper jaw as well as occlusal and lower jaw respectively.
- Preview the alignment effect after the corresponding points have been selected.
Caution
If dynamic bite is scanned, when click ![]() to start automatic alignment or click
to start automatic alignment or click ![]() to finish manual alignment, the data of dynamic bite will be deleted and a tip will pop up. Please confirm whether to delete the data according to the tip.
to finish manual alignment, the data of dynamic bite will be deleted and a tip will pop up. Please confirm whether to delete the data according to the tip.
② Post-op scanning
Scan the post-op upper jaw and the post-op lower jaw. In this step, you can dig a hole on the treated tooth and make tooth preparation.
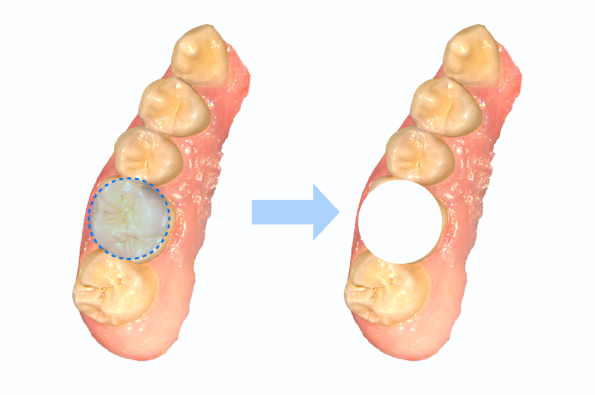
Hole digging
- Move the cursor to the treated tooth.
- Scroll the wheel up and down to zoom in and out the tooth model (make the treated tooth as big as the circle).
- Double-click to dig a hole.
-
Click
to finish and get into tooth preparation scanning.If the effect is not satisfied, you can click
 to re-dig a hole.
Tooth preparation
- Scan the prepared tooth on the hole.
-
After scanning, click
for the next step.Note
- Group scanning is supported. You can click ➕ to add a group of hole digging and tooth preparation when pausing scanning. Four additional groups can be added.
- Locked areas are displayed in dark green. Only the unlocked areas can be scanned and edited.
- During post-op scanning,
 Refined Area is enabled. The recognized refined areas are colored blue. This function can provide more partial details in Pre-design, and is often used as restoration of sharp edges of inlay and veneer.
③ Bite checking
Check the bite. You can re-scan or re-align the bite.
Note
You can switch the models to be aligned at the top right corner.
Scanning completed
Click ![]() to complete scanning. Once the data is post-processed, the software will enter the interface of Pre-design.
to complete scanning. Once the data is post-processed, the software will enter the interface of Pre-design.