Create / Import Files
The post-processing workflow on the computer is mainly done in theWorkspace, where you can choose to create a new workspace or import existing project files for post-processing.
Create a Workspace
- Open the file card list of
Workspace in the main interface, click the
 Create button in the top right corner or the
  Create workspace button in the center of the interface (when the file card list is empty), you can create a new workspace and enter it directly.
 - After entering
Workspace, click File > Create workspace in the top navigation bar, you can create a new workspace and enter it directly.
Import a Workspace / Model File
-
Open the file card list of
Workspace in the main interface, click
Import local file to open the file selection dialog, where you can import project files (.proj); click on the newly added project file card to enter the corresponding workspace.
-
Open the file card list of
Model Library in the main interface, double click on the model file that needs to be imported, click Import workspace in the pop-up window to create a new workspace and enter it.
Note
You can choose to add model files by clicking
Import local file or
 Import from scanner; or you can open the device file list to import the model files on the device into the model library.
 -
Open the device file list and select the model file that needs to be imported, click Import workspace in the top right corner to select or create a workspace and enter it.
-
After entering
Workspace, click
 in the top right corner of the left-side model list, and you can choose Import from scanner, Import from Model Library or Import local file.
Note
- Model files imported from the scanner or locally imported files will be added to the model library automatically.
- About how to connect the scanner, please refer to connect the scanner.
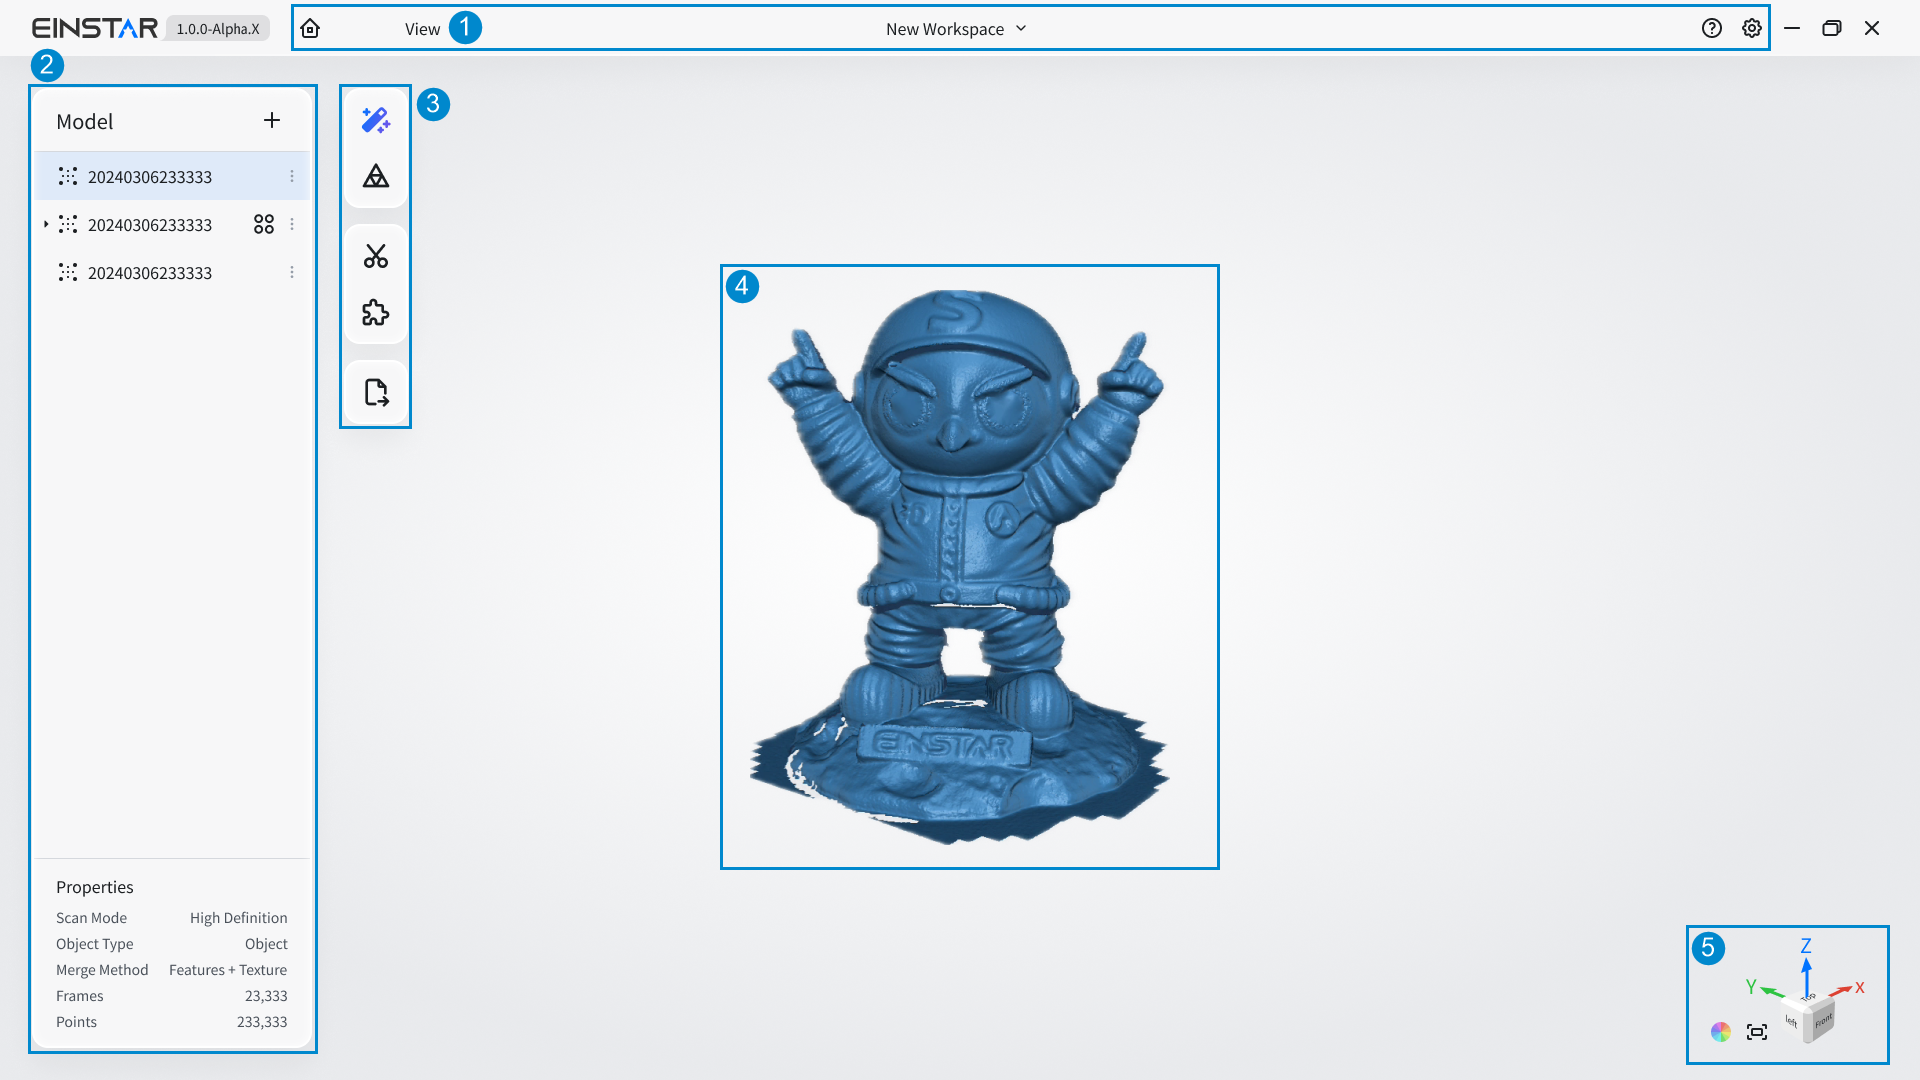
Workspace Interface

- Click
 to return to the main interface.
- Click the View button to expand the drop-down list, where you can choose to hide / show texture or reset the view.
- Click
 on the right side of the workspace's name to expand the drop-down list, where you can rename or export the workspace.
Note
For the introduction to ![]() and
and buttons in the right side of the navigation bar, please refer to help and settings.
Display all the model projects that have been imported into the current workspace in the order of creation, from the nearest to the farthest.
For the projects with generated mesh, you can click ![]() to expand the
to expand the mesh sub-level column, click on which will take you to the interface of mesh editing.
Note
indicates that the project uses the markers alignment mode.
- For the introduction to
and other icons about the project information, please refer to file card.
- You can right-click on one column to rename / export / delete the project; besides, you can also double-click on one column to rename the project.
The bottom displays the properties of the currently selected project, including the scan mode, object type, merge method, etc.
Display the corresponding toolbar for point cloud / mesh editing tools based on the data display status of the current project.
You can manipulate the model using the mouse or trackpad.
Note
If the project uses the markers alignment mode, ![]() markers will be displayed.
markers will be displayed.
| Operation | Gestures on the mouse | Gestures on the trackpad |
|---|---|---|
| Translation | Hold down the middle mouse button or right-click and drag | |
| Rotation | Hold down the left mouse button and drag | Press and swipe with one finger |
| Scaling | Use the scroll wheel |
You can also use the ⑤view controller in the bottom right corner to quickly switch between different model perspectives.
Note
indicates the texture is shown,
indicates the texture is hidden.
- Click
to reset the view to the original status.