Mapping
Interaction
Zoom, pan, and rotate the 3D model
-
To zoom: scroll the Middle Button up or down to zoom in and zoom out the model.
-
To pan: press the Middle Button and drag the model in the direction you wish to pan.
-
To rotate: press the Left Button and move the mouse to rotate the model.
Context menu
| Function | Shortcut | Note |
|---|---|---|
| Fitting view | Ctrl+D | The model will automatically scale to fit the size of the window. |
| Delete selected data | Del | Delete all selected points. |
| Set rotate center | / | Click on the model to add a point as a new rotate center. Press Esc to revoke. |
| Reset rotate center | / | Set model's rotate center to default. |
-
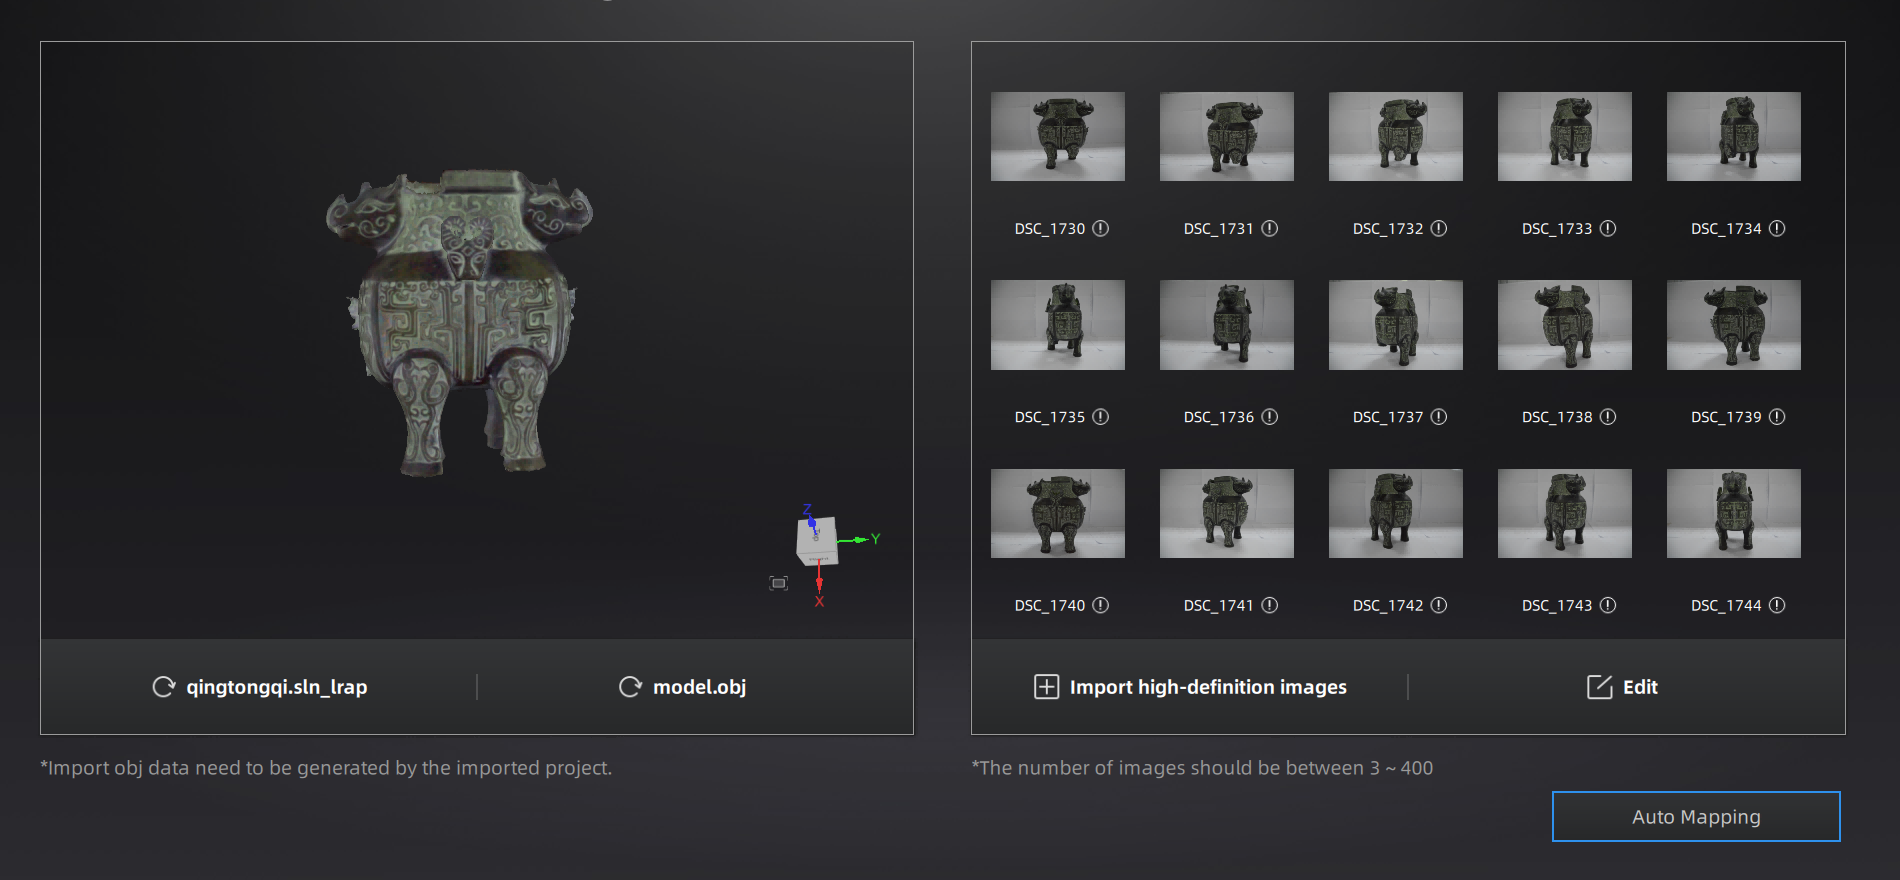
Click Import project group files, Import obj files and Import high-definition images to choose corresponding files on the open dialog box.
Note
-
View image's EXIF data:
-
Hover the cursor over
 on the images below to view the focal length, direction, camera model and other metadata.
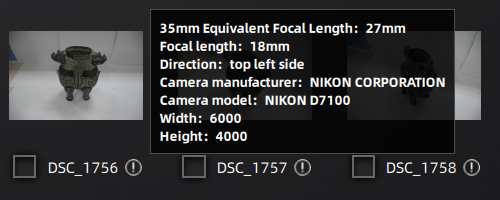
-
The image marked in yellow means that the image is different from most images(focal length, shooting direction, camera), and it needs to be deleted before proceeding to the next step.
-
-
How to delete improper images:
- Click Delete at the prompt above the interface to delete all improper images or click Edit and choose to delete improper images manually.
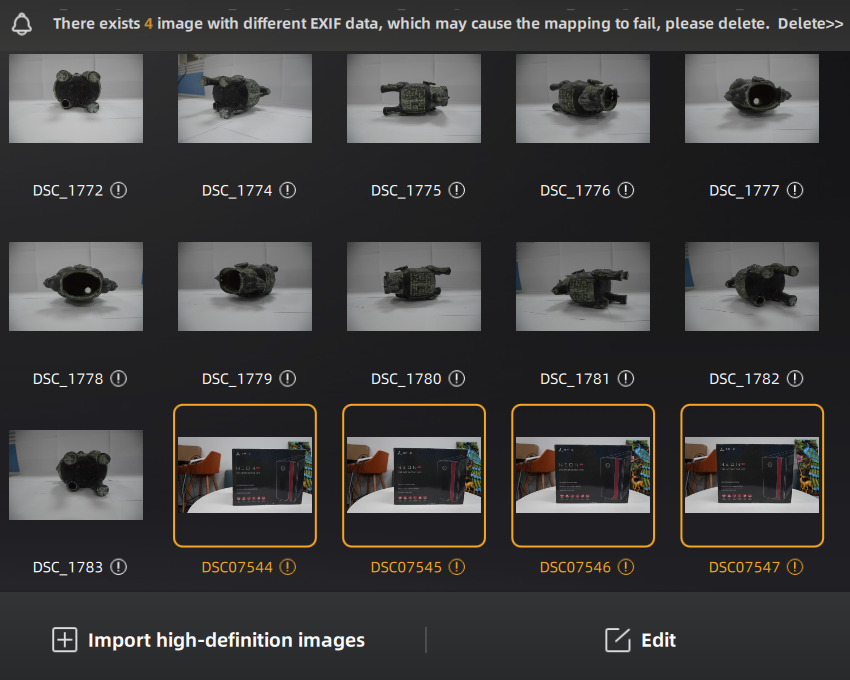
- Click Delete at the prompt above the interface to delete all improper images or click Edit and choose to delete improper images manually.
-
Click Auto Mapping.
Note
Please wait patiently during the auto mapping process. The time for mapping depends on the size of the imported project files and the number of imported images. The mapping time can become even longer when dealing with large files and numerous images.
-
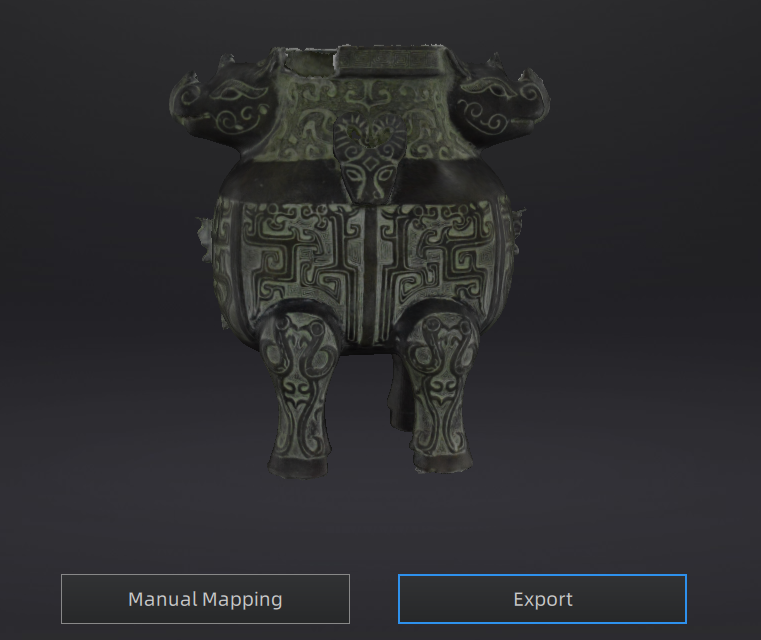
When finished, you can click Export to save the .obj format project file or Manual Mapping to adjust the mapping result again.

Note
After selecting an image that has been successfully mapped, the model under the current picture view ![]() will display a green outline in the mapping result window indicating the applied image texture's area.
will display a green outline in the mapping result window indicating the applied image texture's area.
Keyboard shortcuts
-
You can check the status on the image list:
 : Auto Mapping succeeded.
 : Manual adjustment succeeded.
 : Auto /Manual Mapping failed.
-
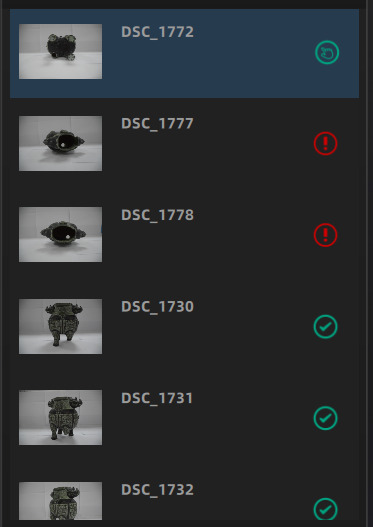
Select the image needed to adjust and preview.
-
Align the model's positioning as closely as possible to the image.
-
Select at least 4 reference points on the model and images each. The reference point positions in the project window and the image window need to maintain a one-to-one correspondence.
-
Click Mapping below the image list. If succeed, The
on the right side of images will turn .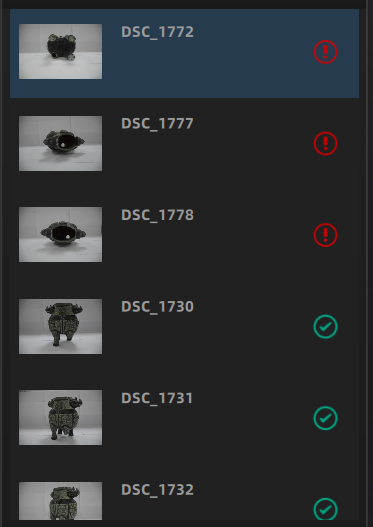
-
Check the mapping result in the bottom window. Click
 /
/ to switch the single image mapping result or overall mapping result.
 -
If you need to adjust the mapping effect in a certain area, you can press and hold the Shift and the left mouse button in Overall Result and move the cursor on the model to select an area; hold down the Ctrl and the left mouse button to deselect the area.
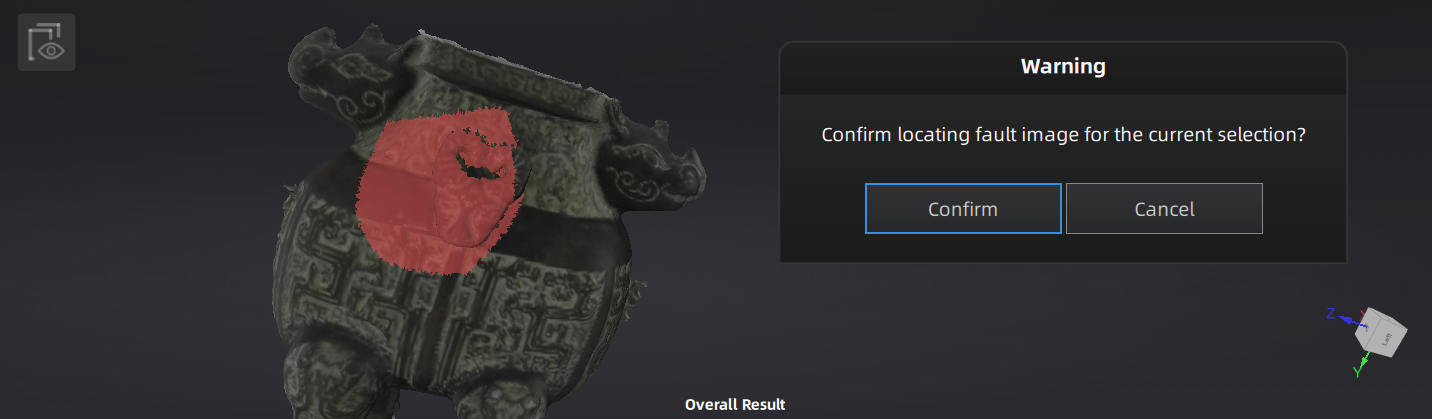
-
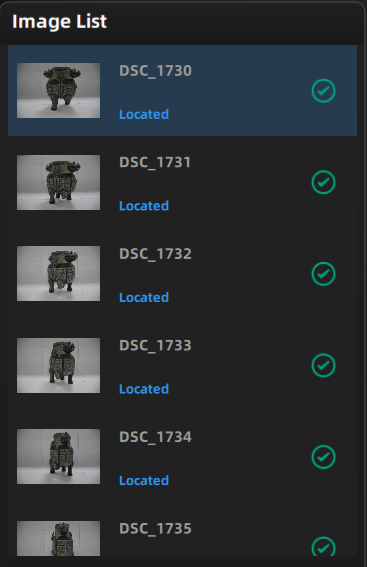
After confirming the selected area, the images in the selected area will be located.
-
Check whether these located images have any texture misalignment or not. If so, you can manually mapping them again.
-
When you finished all mapping operations, click Complete to apply the mapping result.
-
Click Export to save the .obj format project file. Click Manual Mapping to return to the manual mapping interface, if you want to adjust the mapping result again.