Inspection Template
An inspection template can be configured when scanning production line components or parts with identical specifications. Upon completion of the scan, the system automatically processes the data and initiates inspection via external third-party software.
Note
The inspection template can only be set when the scanning mode is Single Item Mode.
Adding an Inspection Template
-
Click
 , to enter the inspection template management window.
 -
Click
 , to add an inspection template.
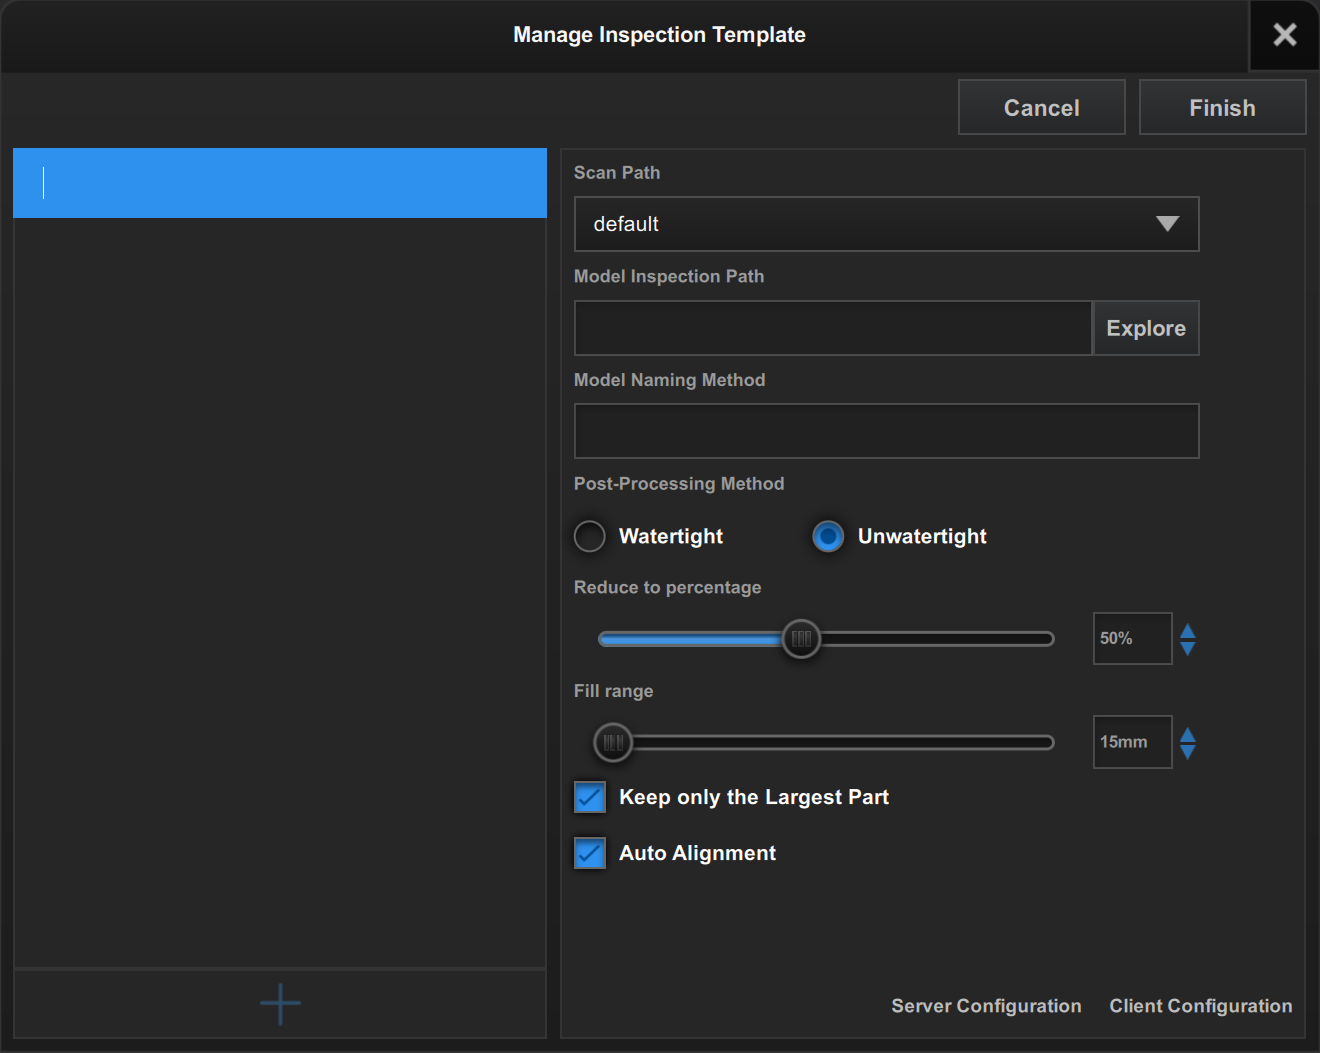
-
Set the parameters for the inspection template.
- Scan Path: It is recommended to choose the default path.
- Model Inspection Path: Refers to the path where the model is stored. You can click Browse to modify the path.
- Model Naming Method: This defines the prefix for your model filenames. For example, entering "Part" will result in a filename like
Part-************.stlin the model inspection path. -
Post-Processing Method: Includes Watertight and Unwatertight. Watertight fills in all holes automatically; Unwatertight retains the original without filling in any holes.
-
Simplification (Reduce to Percentage): A higher simplification value increases the detail of the scanned data, while a lower value reduces the detail.
- Hole Filling Range: When Unwatertight is selected, this parameter defines the maximum fill diameter (in millimeters) for hole filling. Holes with a diameter smaller than the specified value will be automatically filled.
- Keep Only the Largest Part: Retains only the one with the most collected data among the scanned objects. If this function is turned off, data collected above the cutting line will be retained.
- Auto Alignment: If this function is enabled, the parameters of the scanned object will remain consistent with those of the inspection template.
- Client Configuration: Select the path of Geomagic Control X Automation client.exe.
- Server Configuration: Select the path of Geomagic Control X Automation server.exe.
-
Click Finish in the upper right corner.
Editing an Inspection Template
- Select the inspection template name to be edited on the left.
- Click Edit in the upper right corner.
- After modifying the template name and parameters, click Finish in the upper right corner.
Deleting an Inspection Template
- Select the inspection template name to be deleted on the left.
- Click Delete in the upper right corner.