Create a New Project
Before scanning an object, please create a new project. Creating a new project will set the relevant parameters for the scan and save the scan data to a specified path, making it easier for you to process the acquired scan data.
Note
Please complete the calibration before creating a new project.
-
In the homepage, click on Create New Project in the lower right corner.
-
A new project window will pop up, set the following parameters.
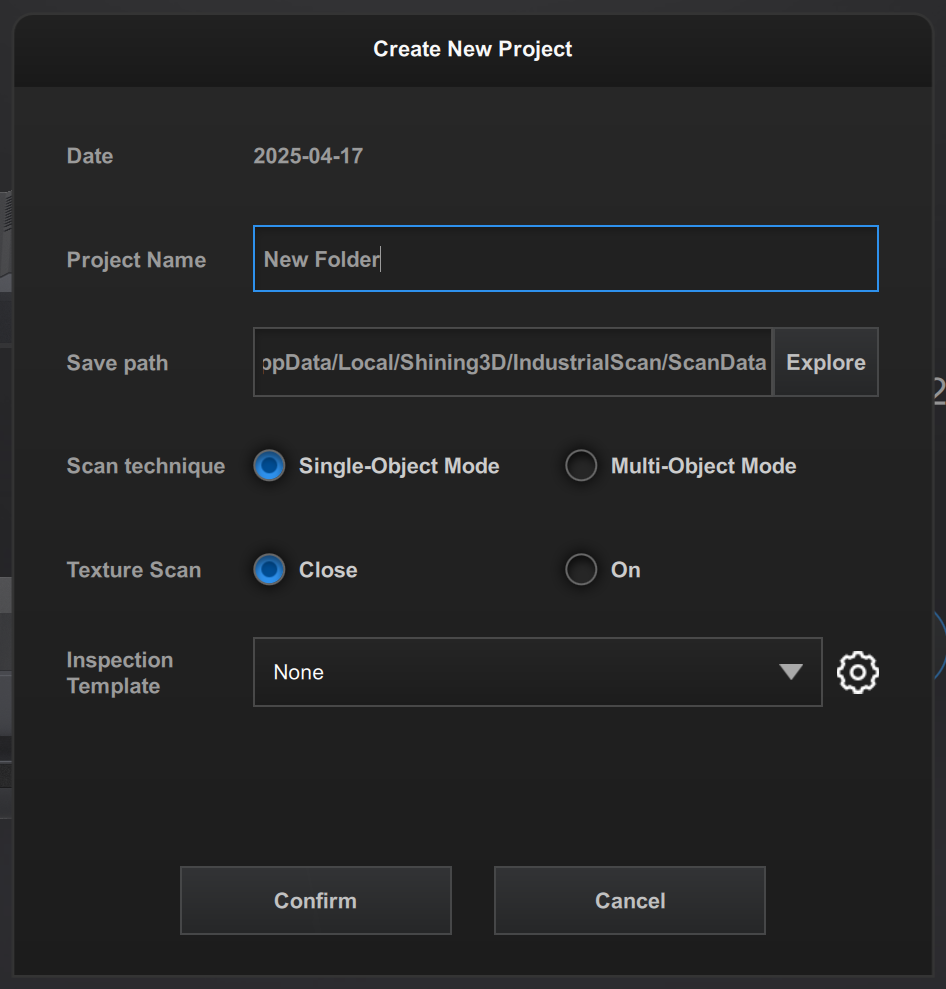
- Date: Refers to the date the project is created, which is automatically set by the software.
- Project Name: The name of the folder generated after customization.
- Save Path: Refers to the path where the collected data files will be stored after packaging.
-
Scan Technique: If you are scanning only one item at a time, please select Single-Object Mode; if you are scanning multiple items at once, please select Multi-Object Mode.
-
Single-Object Mode:
- Supports flip scanning and marker scanning.
-
Multi-Object Mode:
- Supports flip scanning, but does not support marker scanning.
- Supports scanning up to 8 models simultaneously (based on the slots on the scanning plate).
-
-
Texture Scan: Used to capture the color of the scanned object.
- Inspection Template: When scanning assembly line parts with the same specifications, an inspection template can be set to simplify the scanning process (not supported in multi-object mode).
-
In the new project window, click OK to enter the scanning interface.
Import Project
Import an existing project from a folder on your computer.
-
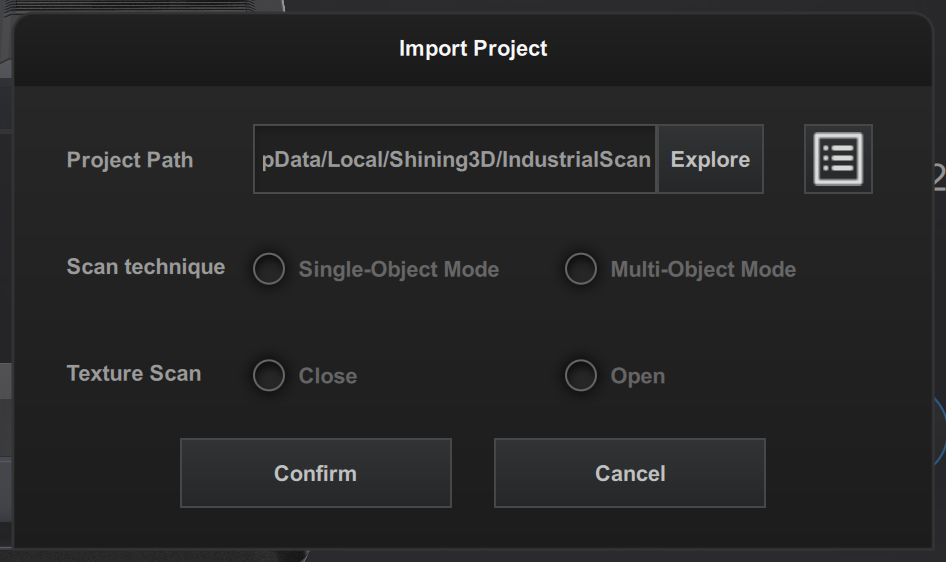
In the homepage, click on Import Project in the lower right corner, and the import project window will pop up.
-
Click Explore to select the project file you want to import in the pop-up window.
- Project Path: Display the file path of the imported project. Click
 to open the project path.
 - Scan Technique: Display the corresponding value based on the scanning mode of the imported project.
- Texture Scan: Display the corresponding value based on the texture settings of the imported project.
- Project Path: Display the file path of the imported project. Click
-
Click Confirm to complete the project import.