Scan Interface
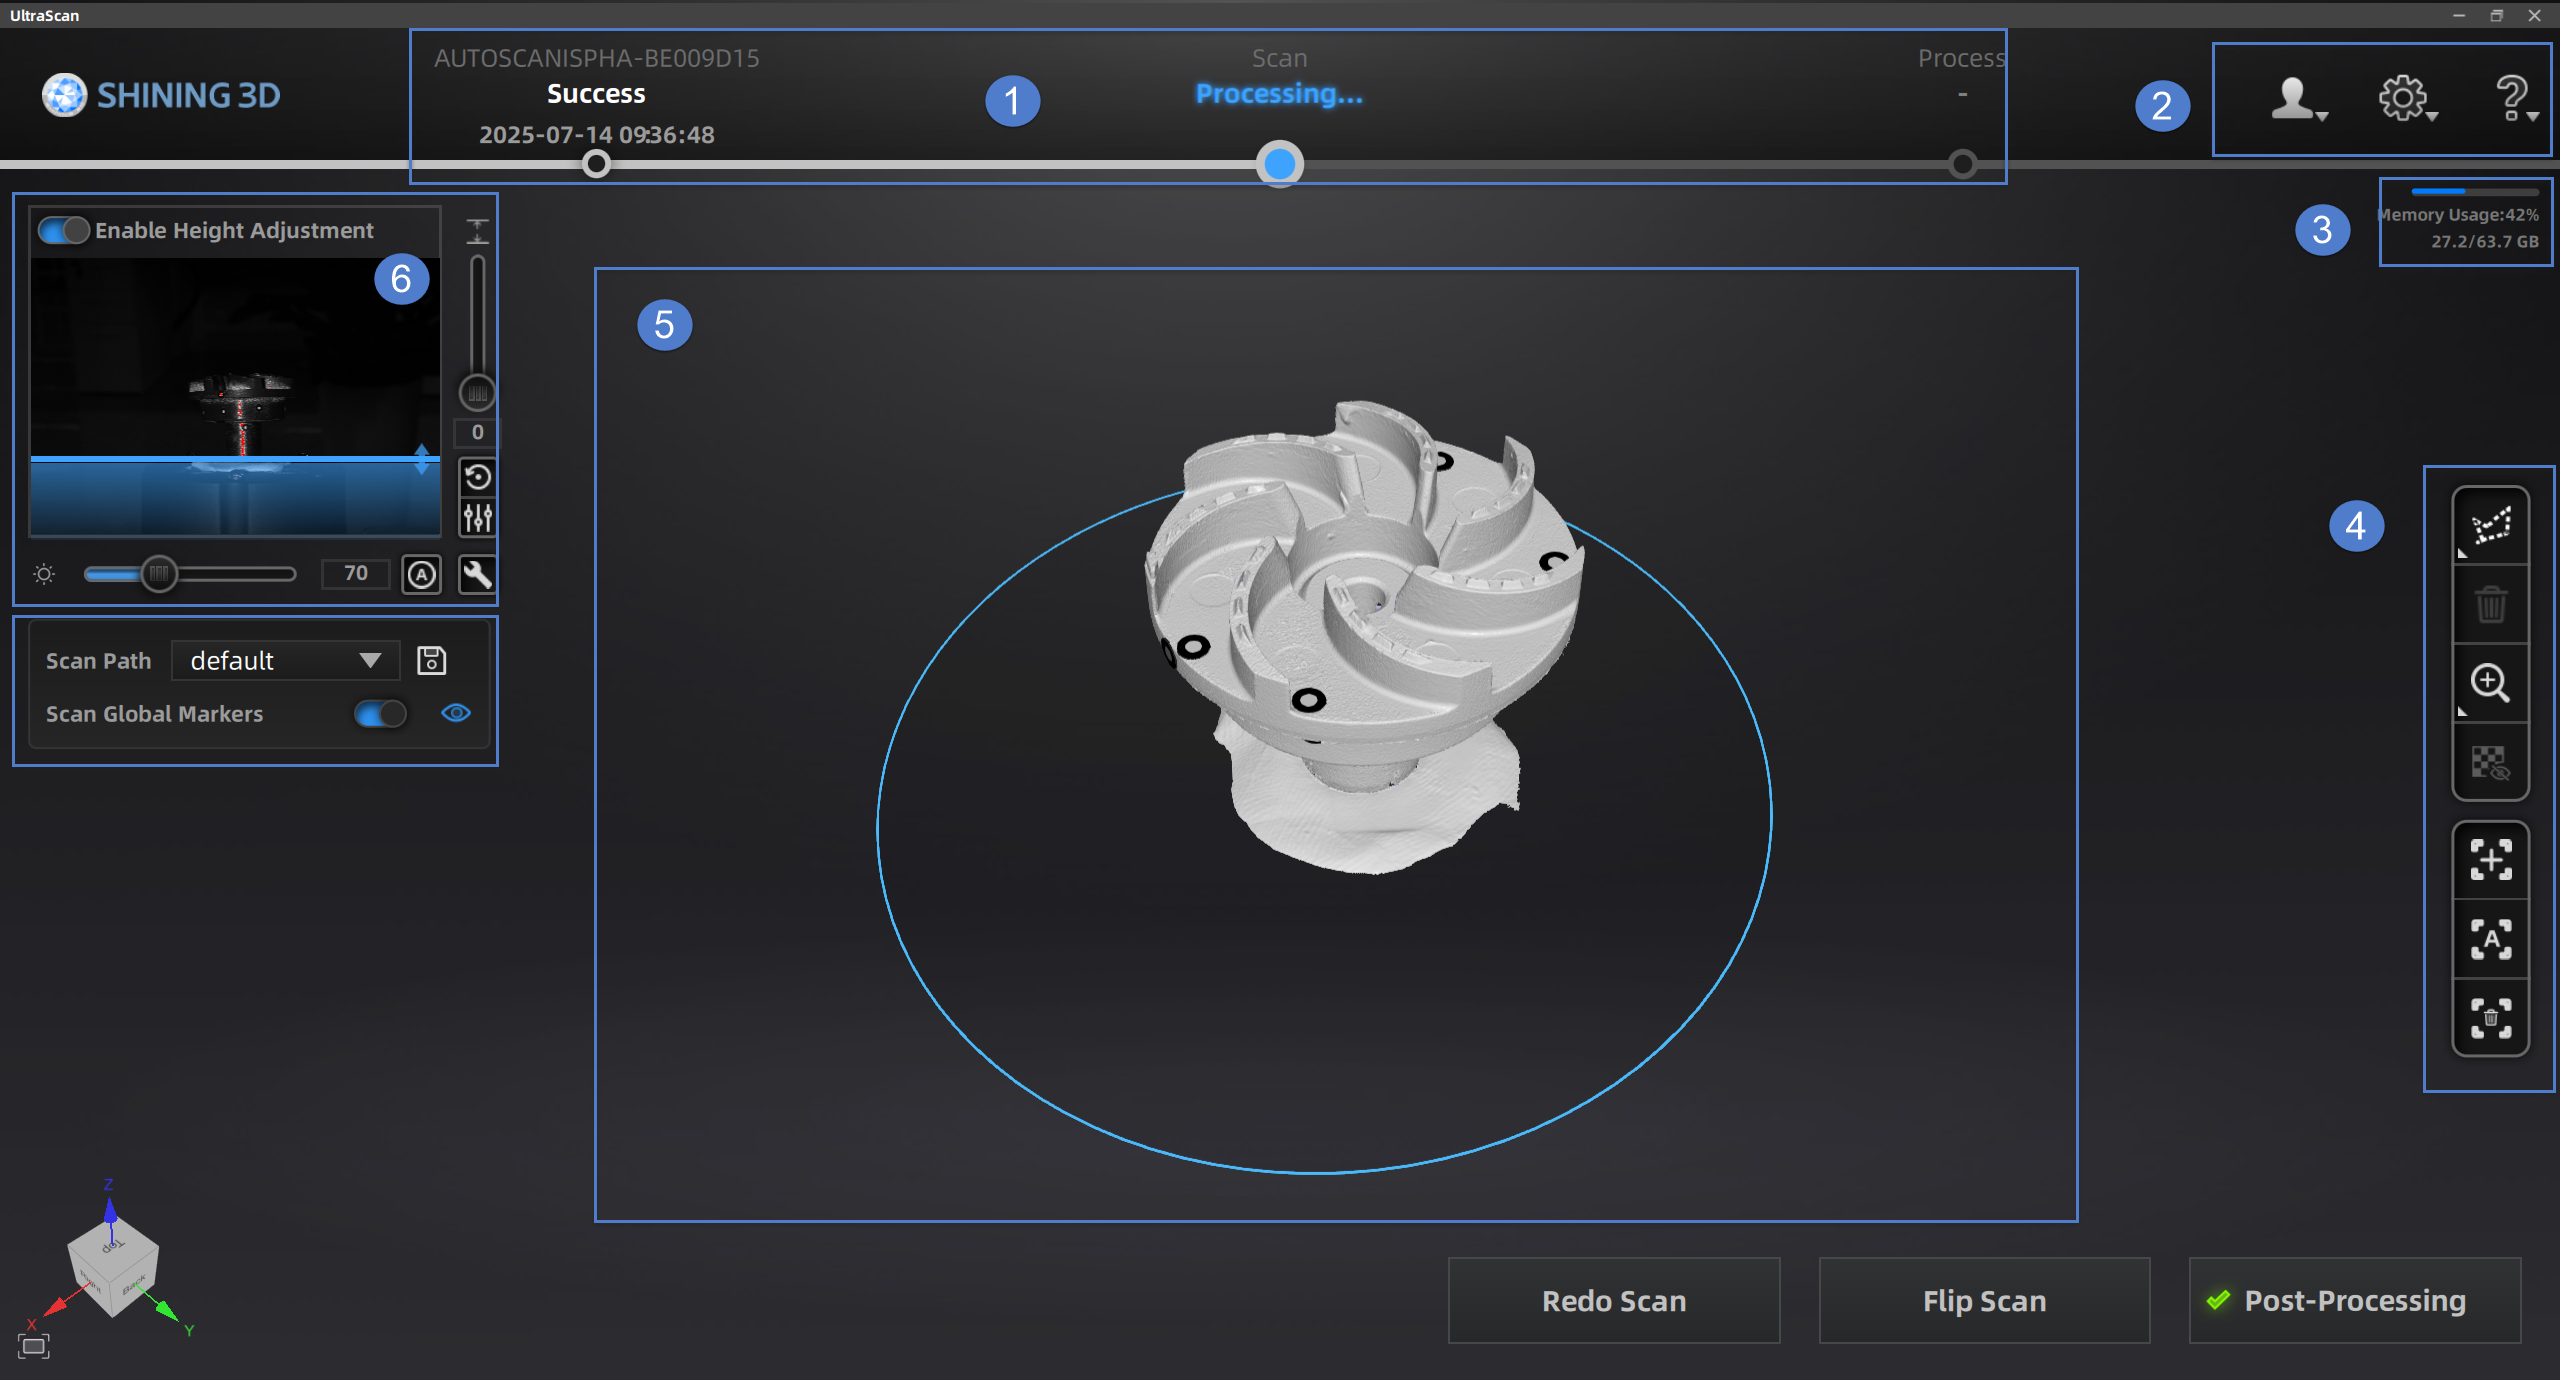
① Navigation Bar
You can directly click ![]() , to switch between calibration, scanning, and other operation.
, to switch between calibration, scanning, and other operation.
② Settings and Help
Log out the current account.
- Language: Choose the display language of the software.
- Check for Updates: If the latest version is detected, it will prompt that no update is needed; when the detected version is lower than the latest version, you can update to the latest version of the software system.
- Device Type: Select the type of device connected to the software.
- Request an Authorization Renewal: Renew the software license online/offline.
- About: View relevant software release information, contact details, etc.
- Enable Hints: When this feature is enabled, after scanning an object, the bottom right will display instructions for Redo Scan, Flip Scan, and Data Wrap.
- TeamViewer: Quick access to remote assistance. Please send the ID and password from the pop-up window to the technical support staff for remote assistance.
- User Manual: Click to open this user manual.
③ Utilization Rate
Memory Usage: Information about the amount of computer memory used by the software program. If the program's usage is too high, it is recommended to close other non-scanning software and wait patiently.
④ Toolbar
Edit the scanning view, fill holes, and perform other operations.
⑤ Scanning Window
You can view the pre-scan effects and model scanning effects in this window.
⑥ Camera Window
Adjust Scanning Parameters.
⑦ Scan Path
After each add-scan is completed, click this button to add a new scanning path under the original path and save it as a new path. After clicking the save button, the new path will be added to the dropdown box. Select the corresponding path, and the next scan will automatically default to the corresponding path.