Start Scanning
Take single-object mode as an example:
-
Secure the scanning object onto a regular pad using a fixture or clay, then click Start Scanning at the bottom right.
Note
If scanning many objects at once, secure the objects onto the multi-die using a fixture or clay.
-
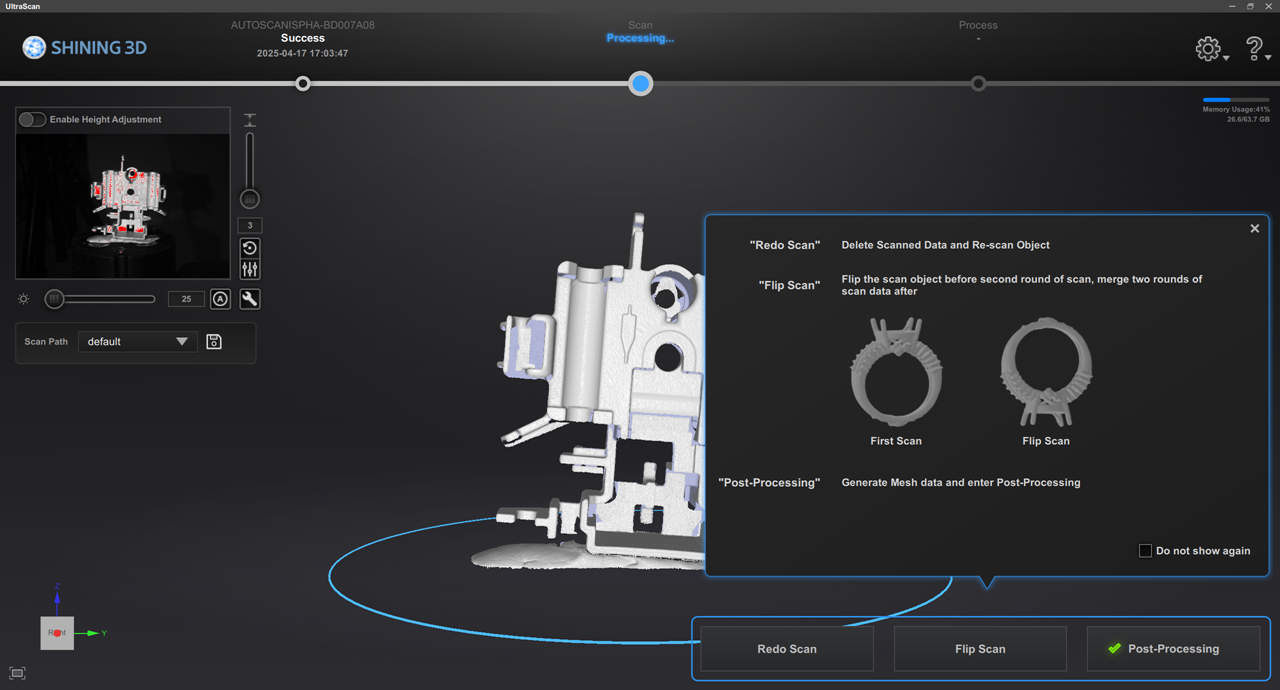
After the scan is complete, you will enter the interface.
Caution
Once the inspect template is configured, mesh data is automatically generated. Consequently, the Add Scan and Flip Scan features are unavailable.
-
If there is missing scanning data or the scanning model is incomplete, you can use the Add-Scan feature:
-
Manual Add-Scan: Rotate the model view to the angle where the model is incomplete, click
 , and the turntable will automatically rotate to the same angle as the model view to perform the add-scan.
 -
Intelligent Add-Scan: Click
 , paint over the area that needs a add-scan, and click Start Intelligent Add-Scan to scan the painted area.
If you are not satisfied with the add-scan results, you can click
 to discard the add-scan data.
 -
-
If the model is still incomplete or you need to scan the bottom of the object, you can choose to flip the scanning object, secure it, and then click Flip Scan to start scanning the object.
-
After the flip scan is complete, click Align at the bottom right.
-
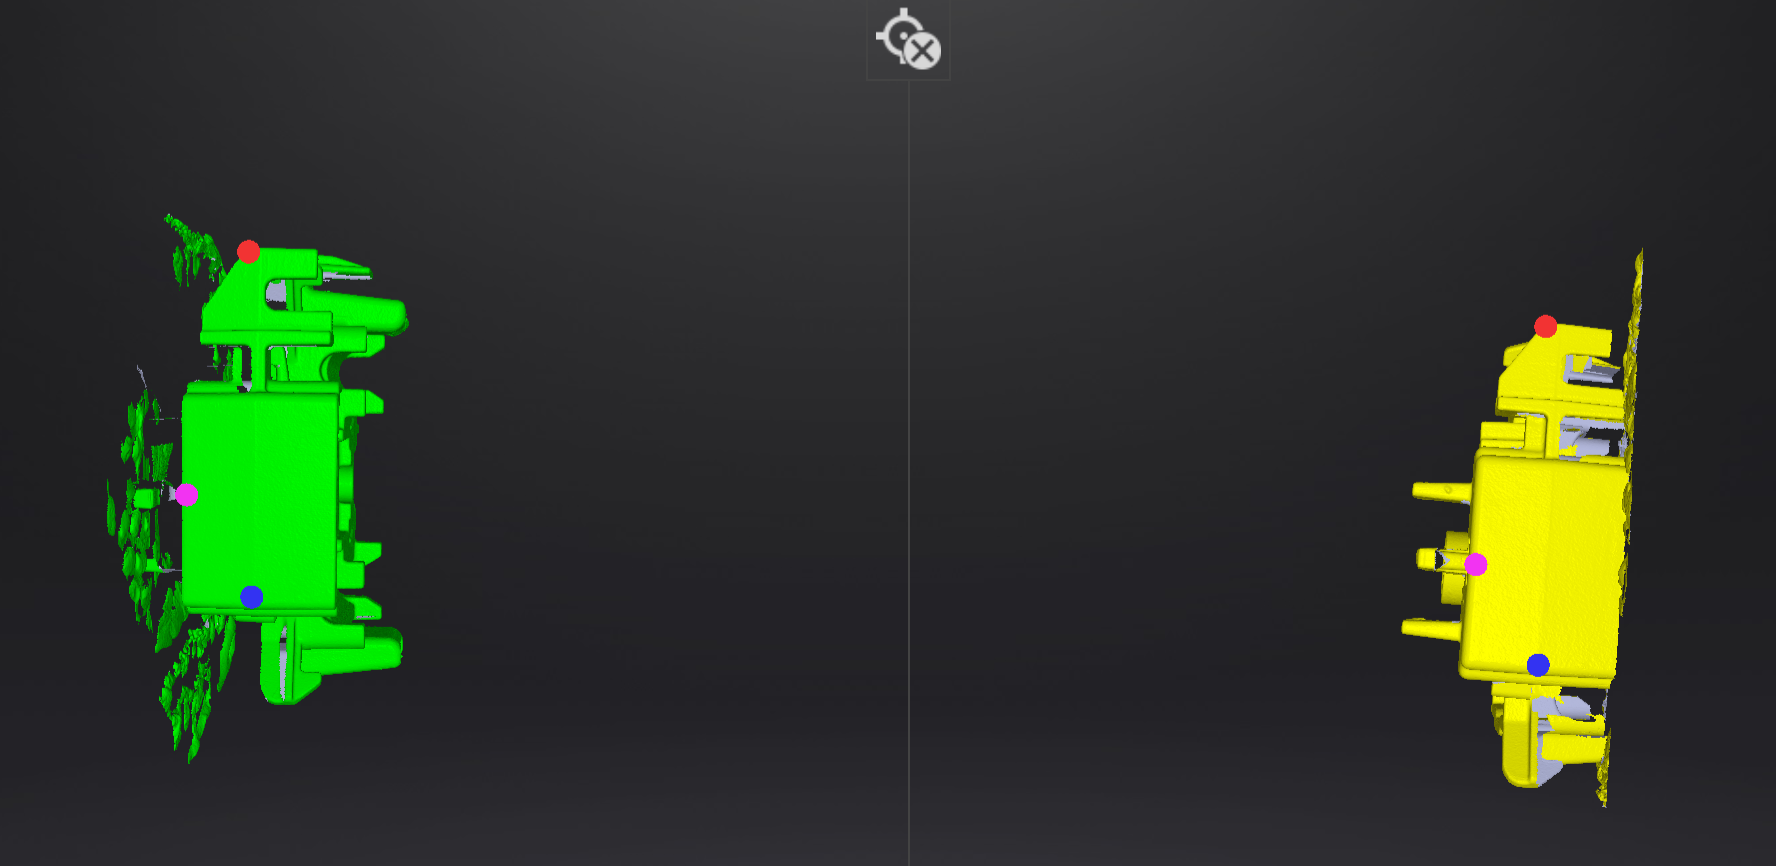
An alignment preview window will pop up, and the software will perform auto alignment. If there are any anomalies, you can click Manual Alignment.

-
Double-click to select three corresponding points on the left and right models.
-
If you select the wrong points, click
 to clear all selected points.
 -
Click Align at the bottom right to return to the alignment preview interface.
-
-
In the alignment preview interface, click Align Preview at the bottom to return to the scanning interface.
-
After the scan is complete, you can Edit Data or proceed directly to Post-Processing.