Align
Use this mode to align the data to the global coordinate for post-processing or reverse engineering.
Caution
- The shape and accuracy of the model will not be changed by the alignment.
- After the alignment and exiting, the changes are irreversible so you can only reset the coordinate by reloading the original file.
Click ![]() to enter the alignment interface; click it again to exit.
to enter the alignment interface; click it again to exit.
Col
Col
-
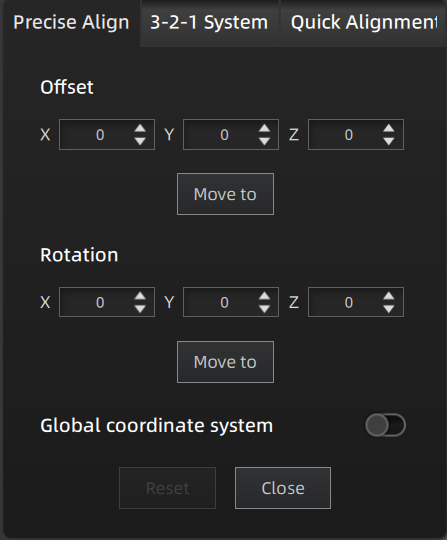
Adjust coordinates by entering values:
Enter values in Offset or Rotation, then click Move To to align the data with the entered coordinates. -
Adjust coordinates by the object mover tool:
Hover the cursor over the object mover tool. Once the object mover tool shows in yellow, hold Left Button or Middle Button to adjust the position and angle of model. -
Click Reset to cancel all edits.
- Click Close to save the results and exit.
Note
The coordinate system displayed on the interface is the global coordinate system, in which the direction of the red line is the positive direction of X-axis, green is the positive direction of Y-axis and blue is the positive direction of Z-axis. This function is disabled by default and needs to be enabled manually.
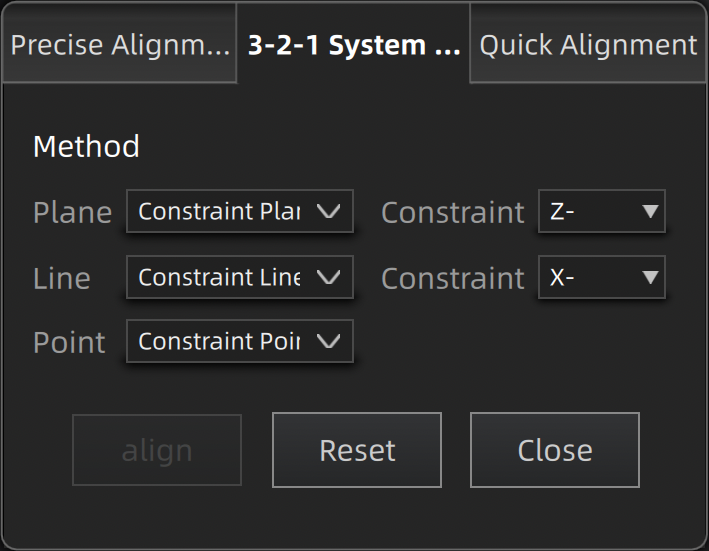
3-2-1 System Alignment aligns data by selecting the point, line and plane. Before alignment, you need create feature points, lines and planes and be careful that the feature lines created can not be perpendicular to the plane.
Col
Col
- Click Align to start. When the lines are perpendicular to the plane, the align will fail.
- Click Reset to cancel all edits.
- Click Close to save the results and exit.
- Select a feature surface in the plane drop-down menu, and select an axis in the corresponding constraint drop-down menu of the plane. The arrow on the plane corner indicates the positive direction of the plane, and the selected axis direction will be consistent with the plane direction.
- Select a feature line in the drop-down menu of the line, and select an axis in the drop-down menu of the line. The arrow of the line indicates the positive direction of the line, and the direction of the selected axis will be consistent with the direction of the projection of the line on the selected plane.
- Click the drop-down menu to select a point and the position of this point is the origin of the coordinates (0, 0, 0).
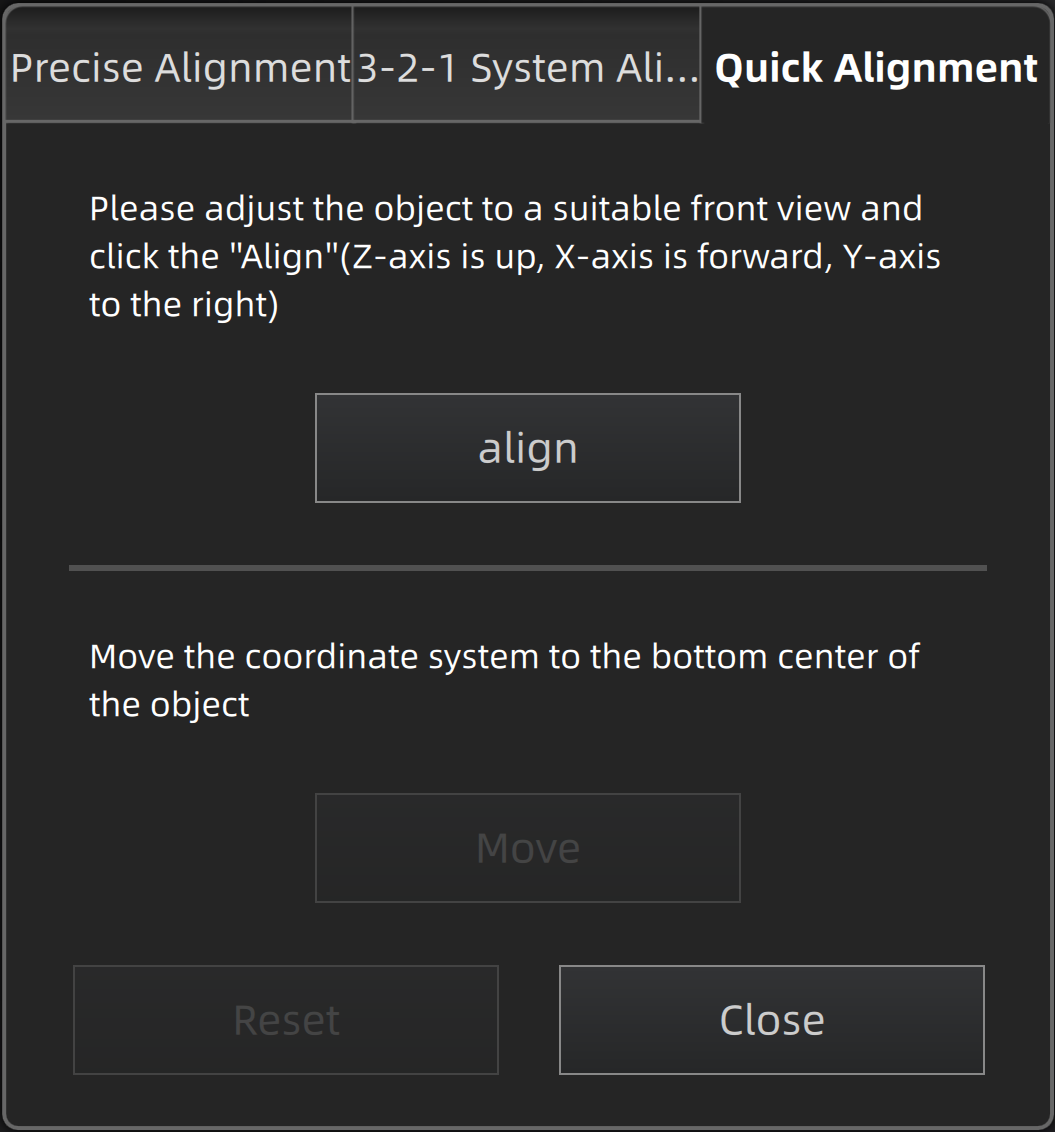
The coordinate system can be quickly adjusted by this function.
Col
Col
- Click Align to move the coordinate system to the center of the object, and the position of the coordinate system is that the Z axis is parallel to the screen and faces upward, the X axis is perpendicular to the screen and the Y axis is parallel to the screen and faces to the right.
- Click Move to move the coordinate system to the center of the bottom of the object.
- Click Reset to restore the coordinate system to its original state (before opening the function).
- Click Close to apply the adjusted coordinate system and exit.
Note
If you are not satisfied with the alignment result this time, you can re-adjust the model and perform it again.