Device Connection
Supports both wireless and wired connections for devices; the device can be used for scanning after the connection.
Wireless Connection
-
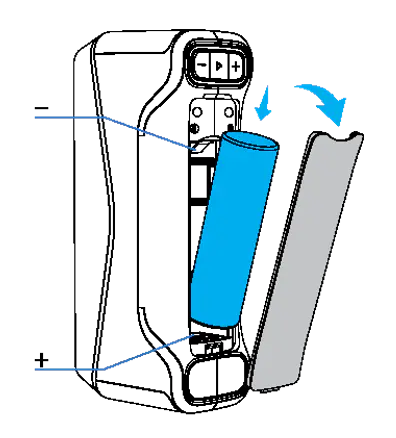
Open the battery compartment as shown in the illustration and insert the battery.
Caution
Place the battery correctly according to the positive and negative directions shown in the illustration.
-
Long press the
 button on the device body to power it on. The status indicator light flashing blue means it is powered on.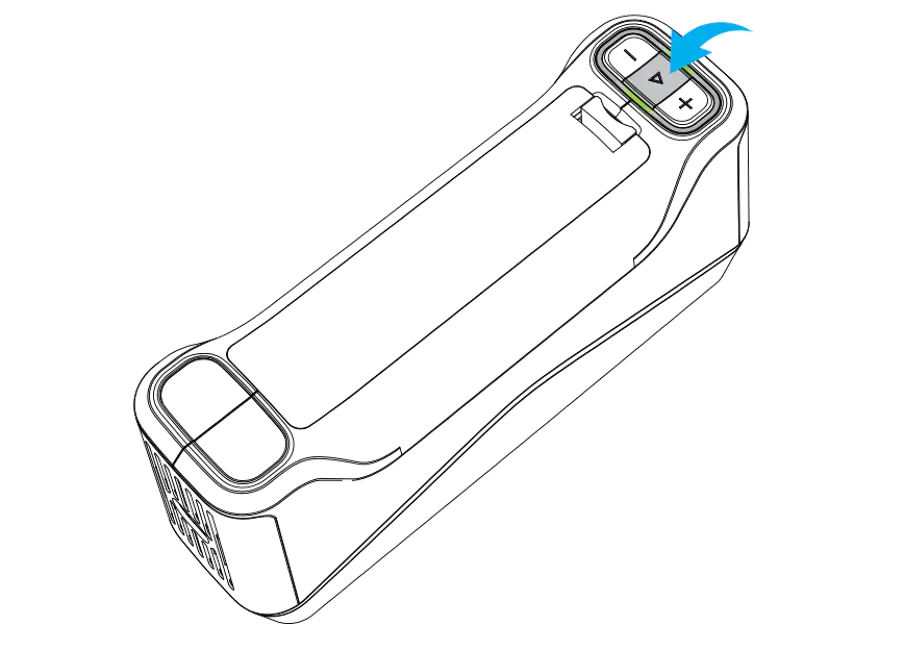
-
Launch the EXStar Hub software.
- Click + in the upper left corner of the software homepage to open the device connection window.
-
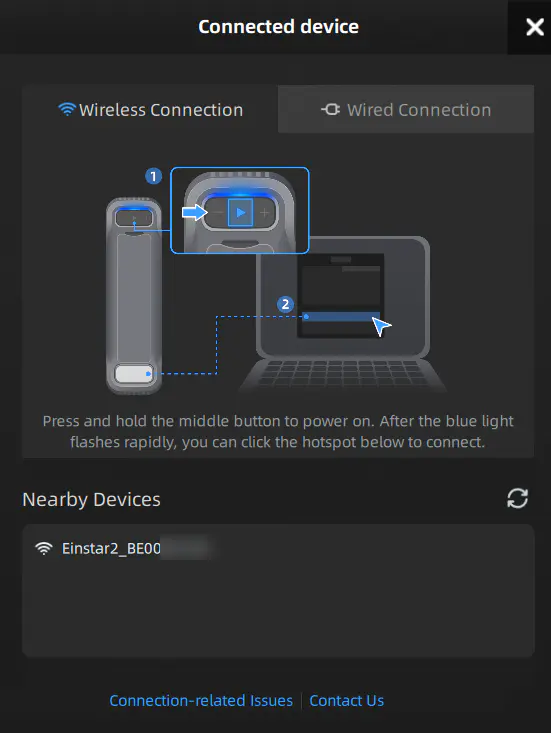
In the device connection window, select the current device's hotspot to connect.
Note
The hotspot name is Einstar2_xxx, and the password is fixed as Einstar2.
-
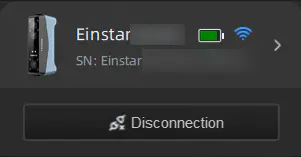
Once you connect, the status indicator light changes to a steady green, and the upper left corner of the software homepage shows the device information. The scanner is now ready for scanning.
Caution
If the wireless connection fails, refer to the following troubleshooting methods:
- If the prompt "Connection failed. Please check the network quality and retry." appears, check the network signal between your computer and the device, then retry connecting.
-
If the prompt "Connection failed. Please set the IP to auto-obtain in your computer's network settings and try again." appears, set the IP to auto-obtain (DHCP) in your computer's network settings, then reconnect:
- Select Start > Settings > Network & Internet.
- Select the network you are connected to via the device hotspot (select Wi-Fi for a Wi-Fi connection, or Ethernet for an Ethernet connection).
- Next to IP assignment, select Edit.
- Under Edit IP settings, select Automatic (DHCP), then select Save.
Wired Connection
-
Long press the
button on the device body to power it on. The status indicator light flashing blue means it is powered on. -
Launch the EXStar Hub software.
-
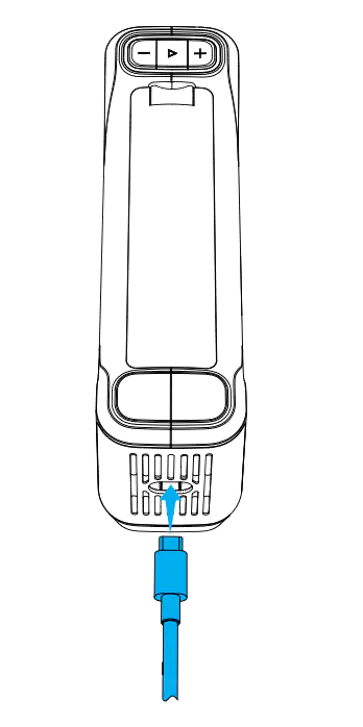
Use the provided Type-C cable to connect the scanner to the computer.
-
When the software recognizes the scanner, it will automatically connect to it.
-
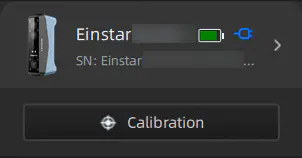
Once connected, the status indicator light will change to a steady green, and the upper left corner of the software homepage will display the relevant information of the device. At this point, the scanner can be used for calibration and scanning.
Note
If the scanner has been connected to the computer beforehand, unplug and reinsert the Type-C cable after launching the software.
Disconnection
In wireless connection state, click Disconnect on the software homepage. In wired connection state, simply unplug the Type-C cable from the device.
Note
Only one device can be connected at a time. Disconnect the connected device before switching to a different one.