Interface Introduction
After the scanner powers on, it enters the homepage by default (except for first-time use), where you can view and manage scanned models or marker frames, connect the scanner, and access the Account.
Home
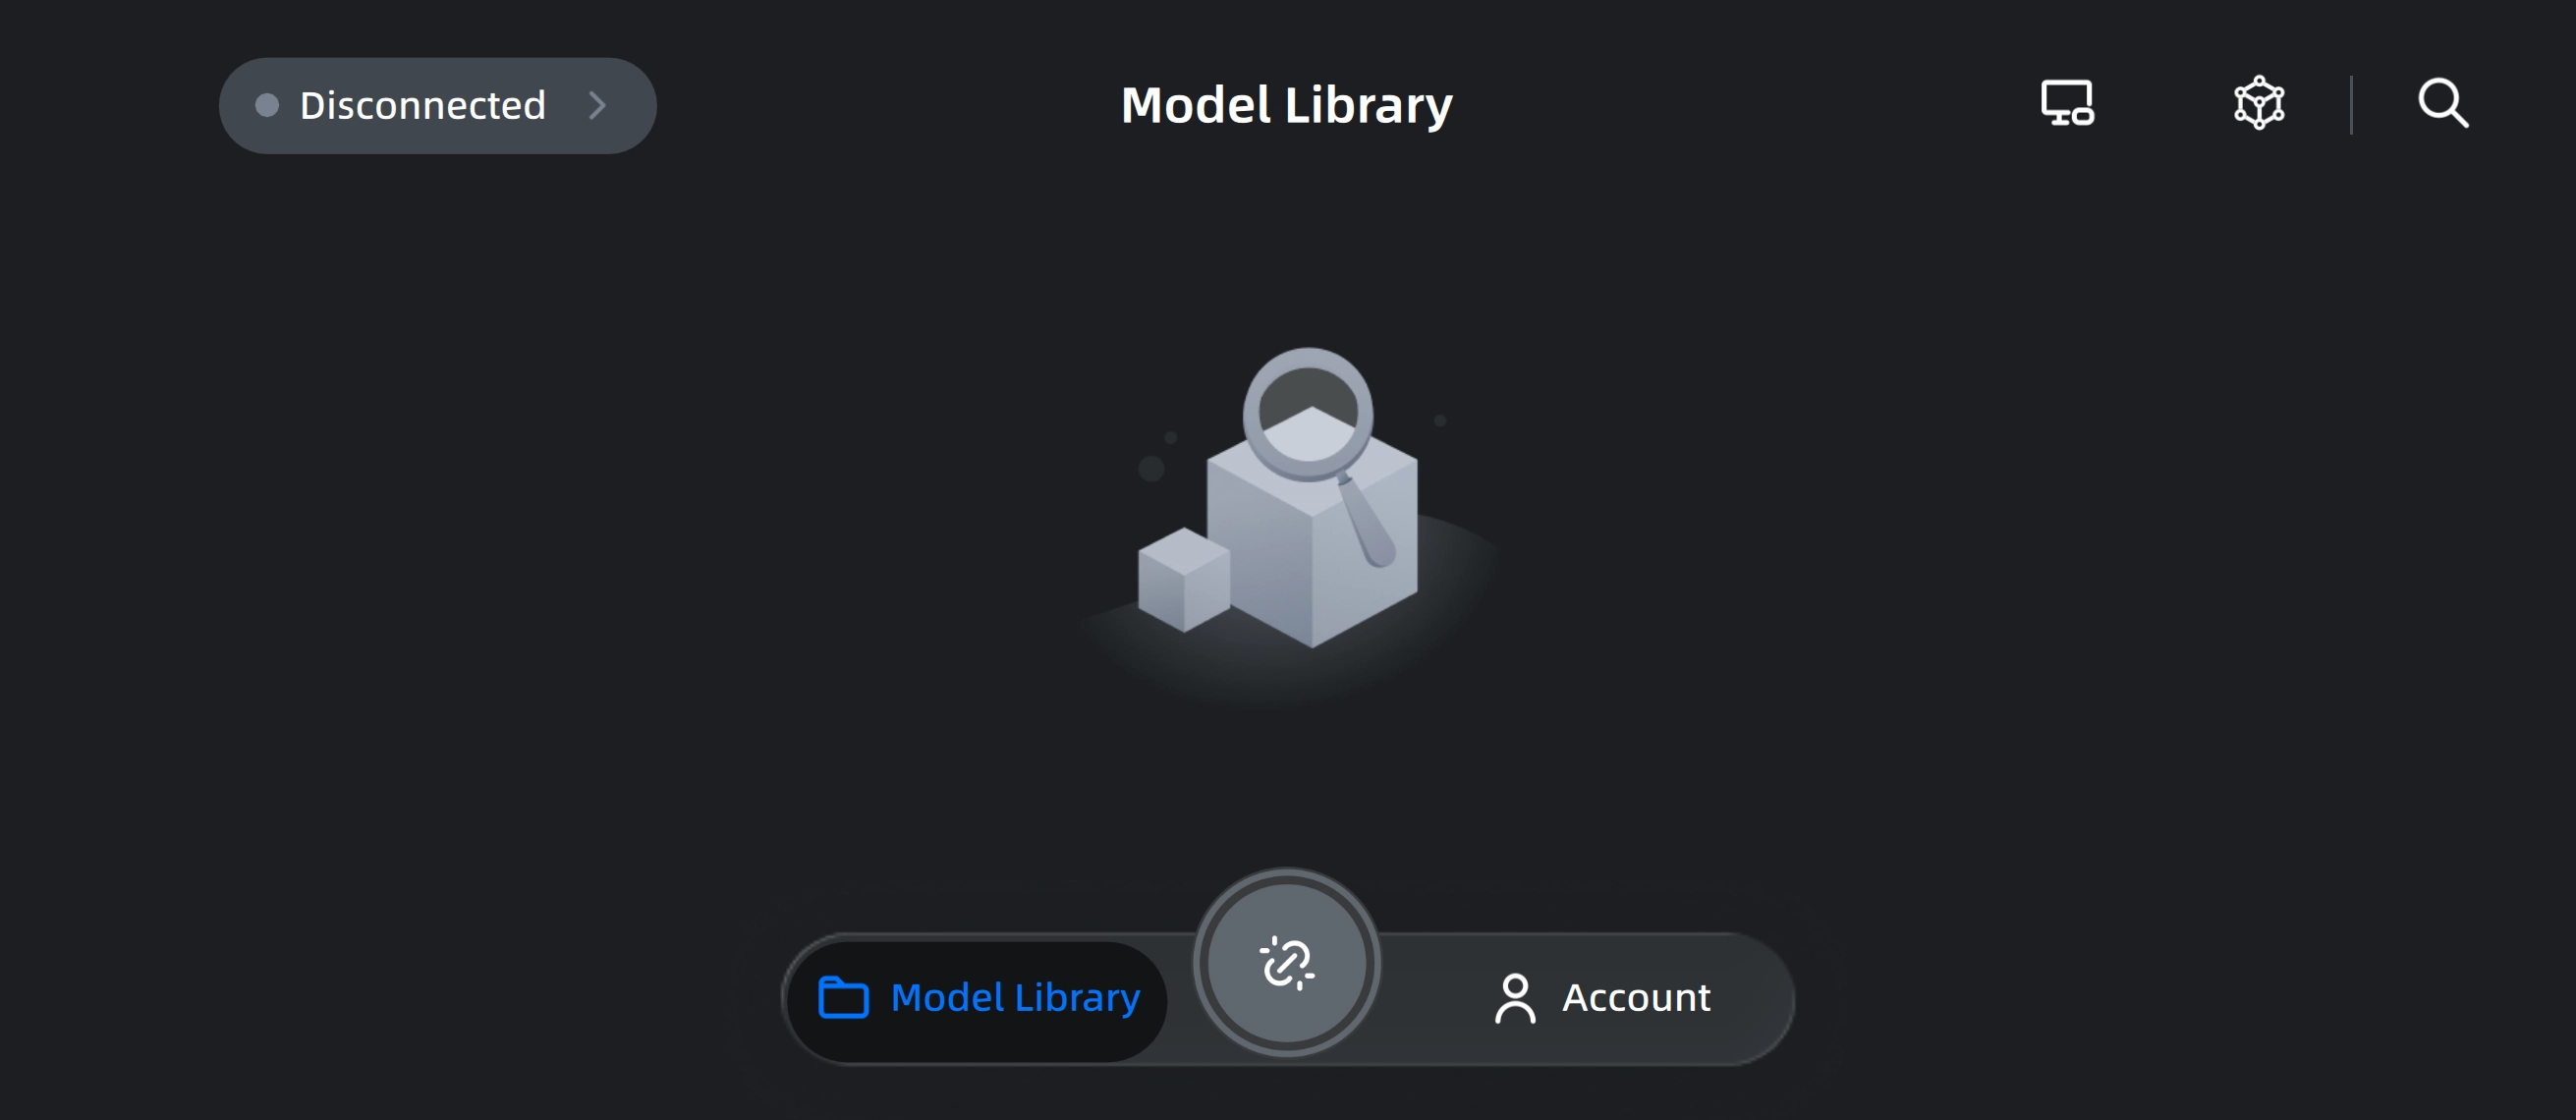
The page contains the following functions:
| Function | Description |
|---|---|
| Connection Status | Shows the connection status of the current scanner. Once connected, the connection method and device battery level are displayed. Tapping it navigates to calibration or device information. |
| Model Library | View and manage saved scan models. |
 |
Connect to computer |
 |
View and manage saved marker frame files. |
 |
Search for scan models in the model library. |
 |
Tap to connect the scanner. |
 |
After successful connection, tap to enter the scanning function. |
The status bar at the top of the software shows the current time, calibration status, memory (RAM) usage, connection method, device temperature, scanner battery level, and device battery level.
Status Bar
| Status | |
|---|---|
| Calibration Reminder |  : More than 7 days have passed since the last calibration.  : More than 14 days have passed since the last calibration. |
| RAM | Prompt of the used memory space of the device. Caution When  is displayed here, the used memory exceeds 70%. Please pay attention to the remaining memory space to avoid affecting the scanning experience due to insufficient memory during scanning. |
| Connection Method | The current connection status of the device (wired / Wi-Fi). |
| Temperature | The current temperature of the device. |
| Battery Level | Shows the current battery level of the scanner and the device.Caution If the battery level is below 20%, please replace the battery or charge the device with the provided USB-C data cable and power adapter in time. |
Model Library
Displays all saved model files as cards, sorted in descending order by file update time.
Note
- Tap the card of a project group file to enter the sub-project interface of that project group.
- Tap the card of a project file to enter the post-processing workflow of that scan project.
Col
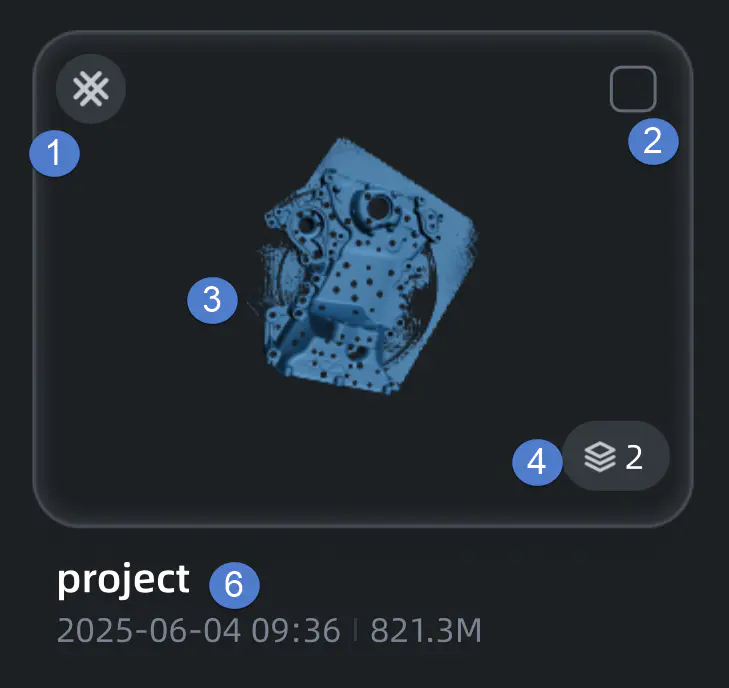
Project group card
Col
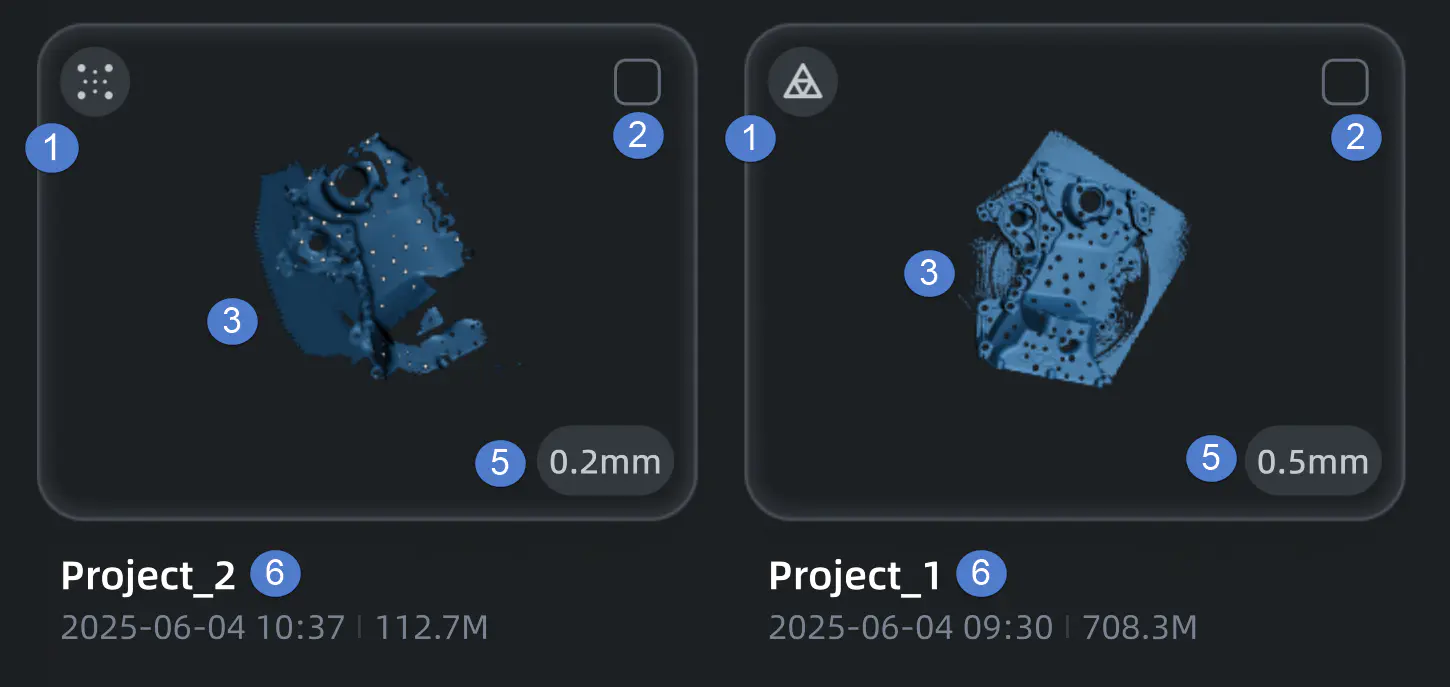
Project card
 : Indicates that laser scanning mode was used when scanning the model.
 : Indicates that infrared scanning mode was used when scanning the model.
 : Indicates that object scanning mode was used when scanning the model.
 : Indicates that portrait scanning mode was used when scanning the model.
 : Indicates that the model file contains point cloud data.
 : Indicates that the model file contains mesh data.
 : Indicates that the project contains 3DGS rendering data.
Tick  or press and hold the card to select it, and then perform operations such as copy, delete, and rename.
Displays the model thumbnail in the model file; point cloud models with texture enabled and mesh models with texture mapping generated are displayed in color, while other models are displayed in blue.
Note
If a project file is corrupted,  is displayed; tap it and follow the on-screen prompts to restore or delete the corrupted file.
Shows the number of sub-projects in the project group.
Shows the point distance of the project.
Shows the name, last update time, and file size of the model file.
Account
On the Account page, you can sign in to your account, calibrate the scanner, modify software settings, submit feedback, and get help and related information.
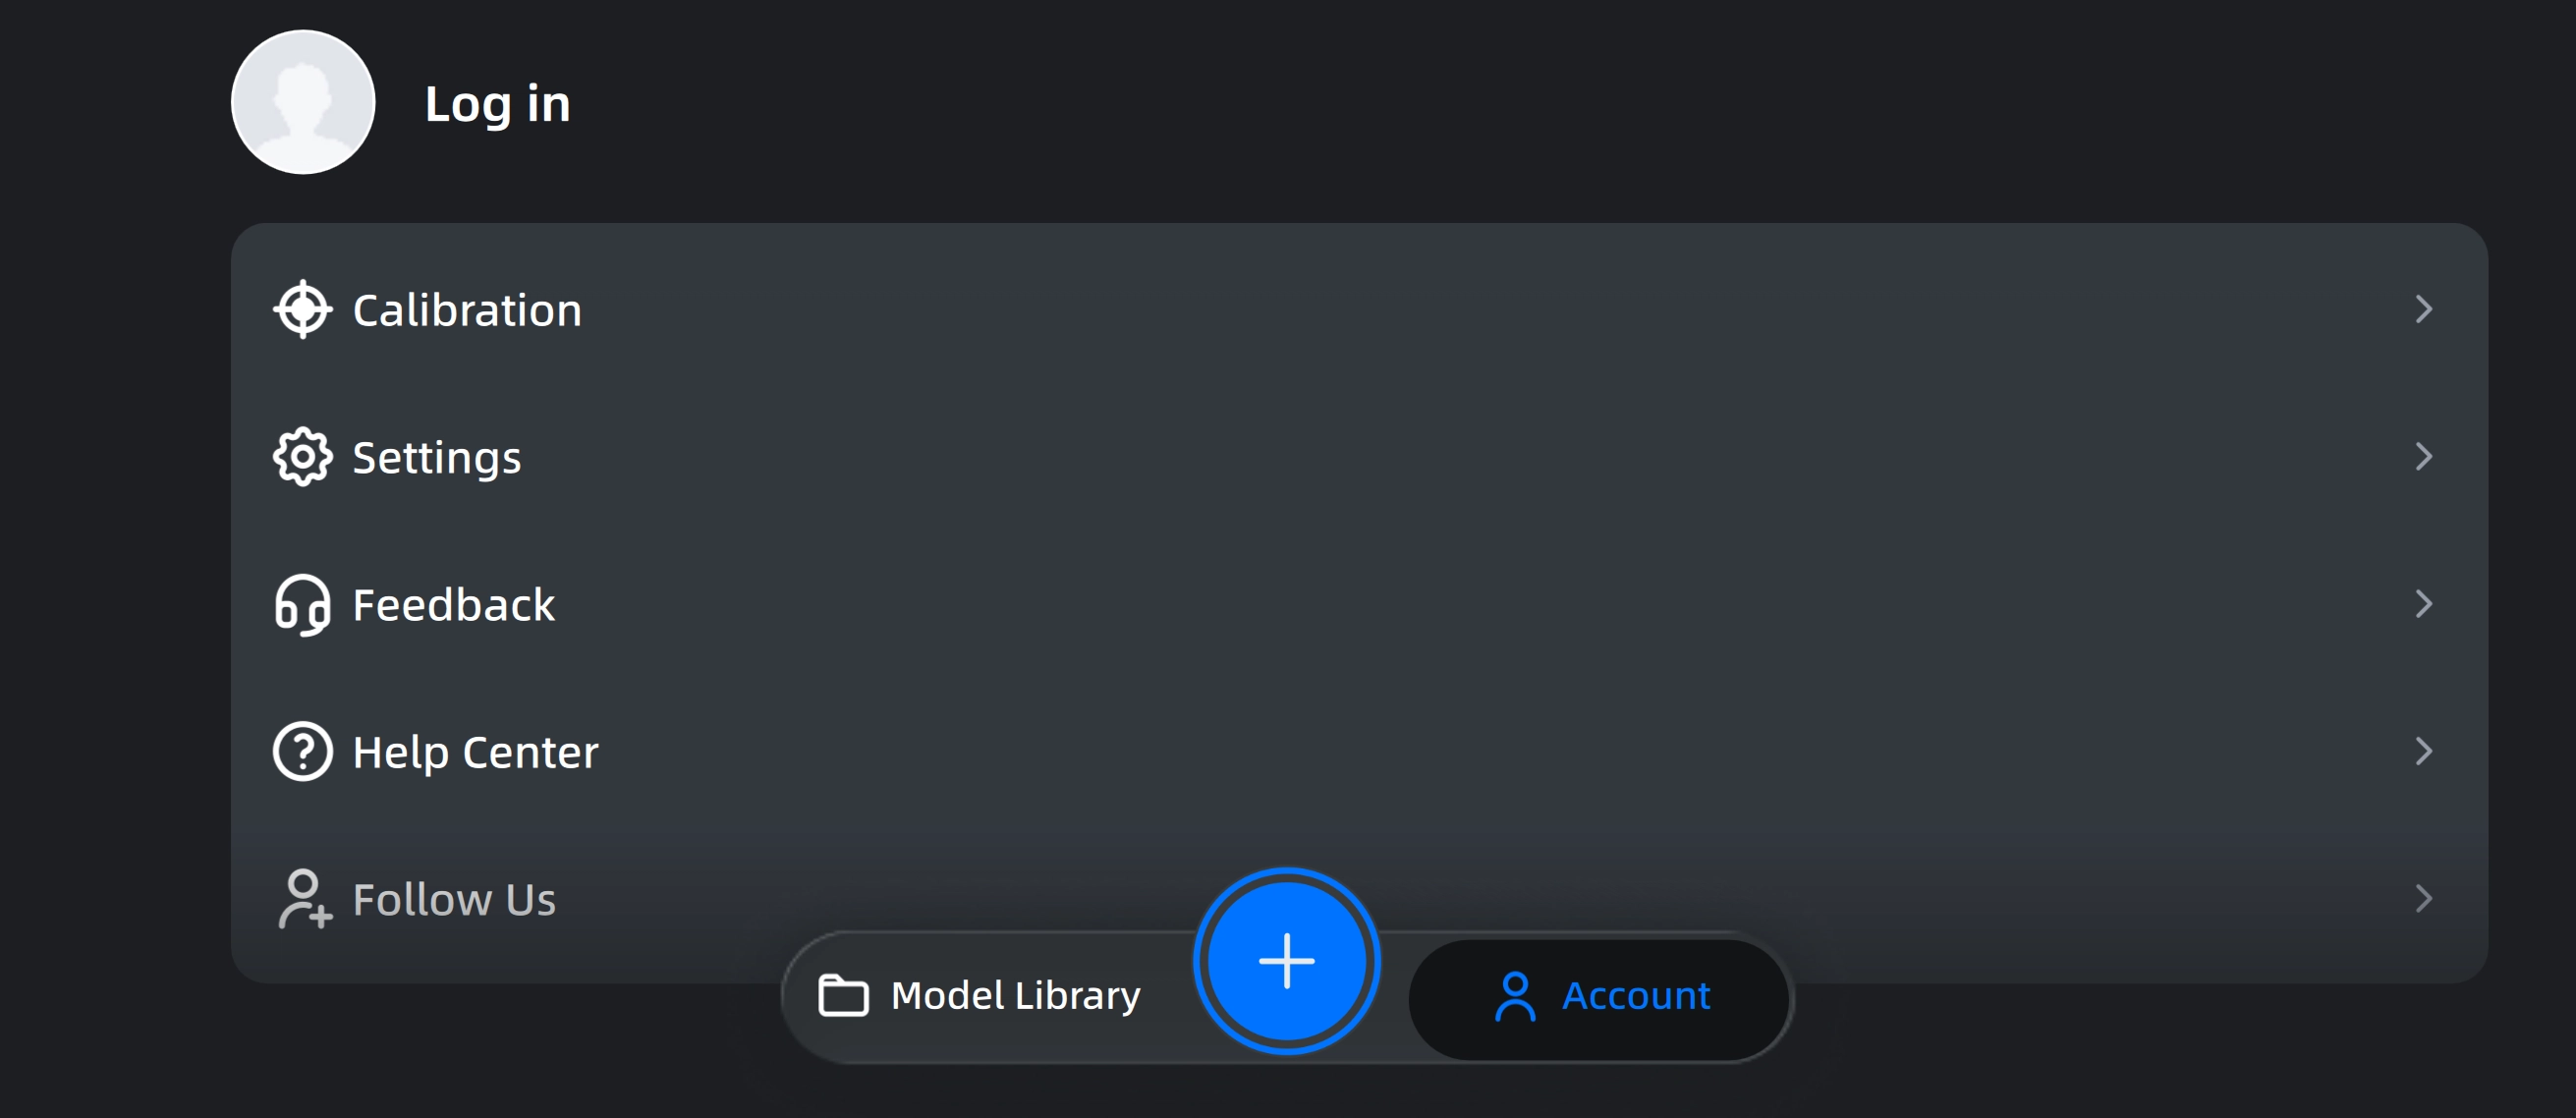
The page contains the following functions:
| Function | |
|---|---|
 |
Sign in to your account. After signing in, account-related functions are available. |
 |
Enter the Settings > Calibration interface to calibrate the scanner. |
 |
Enter Settings to view and modify software-related settings. |
 |
Enter Feedback to view the contact phone number for feedback; tap Export Logs to export device logs for problem analysis. |
 |
Enter Help Center to view beginner tutorials and reset the beginner guide, or scan the QR code to view the user manual. |
 |
View the related QR codes; scan them to follow us. |
Settings
On the Settings page, you can view and modify software-related settings.
| Setting | Description |
|---|---|
| Account | Sign in to your account. |
| Calibration | Bind the calibration board and view the calibration status. |
| Language | Switch the language. |
| Display | Switch the software theme between dark and light. |
| Storage | Clear exported models and logs. |
| About | View the software version as well as the end-user license, privacy policy, terms of use, personal information collection list, third-party information sharing list, and more. |
Device Information
After the scanner is connected successfully, tap Connection Status at the top left of the software homepage and select Device Information to view device-related information.
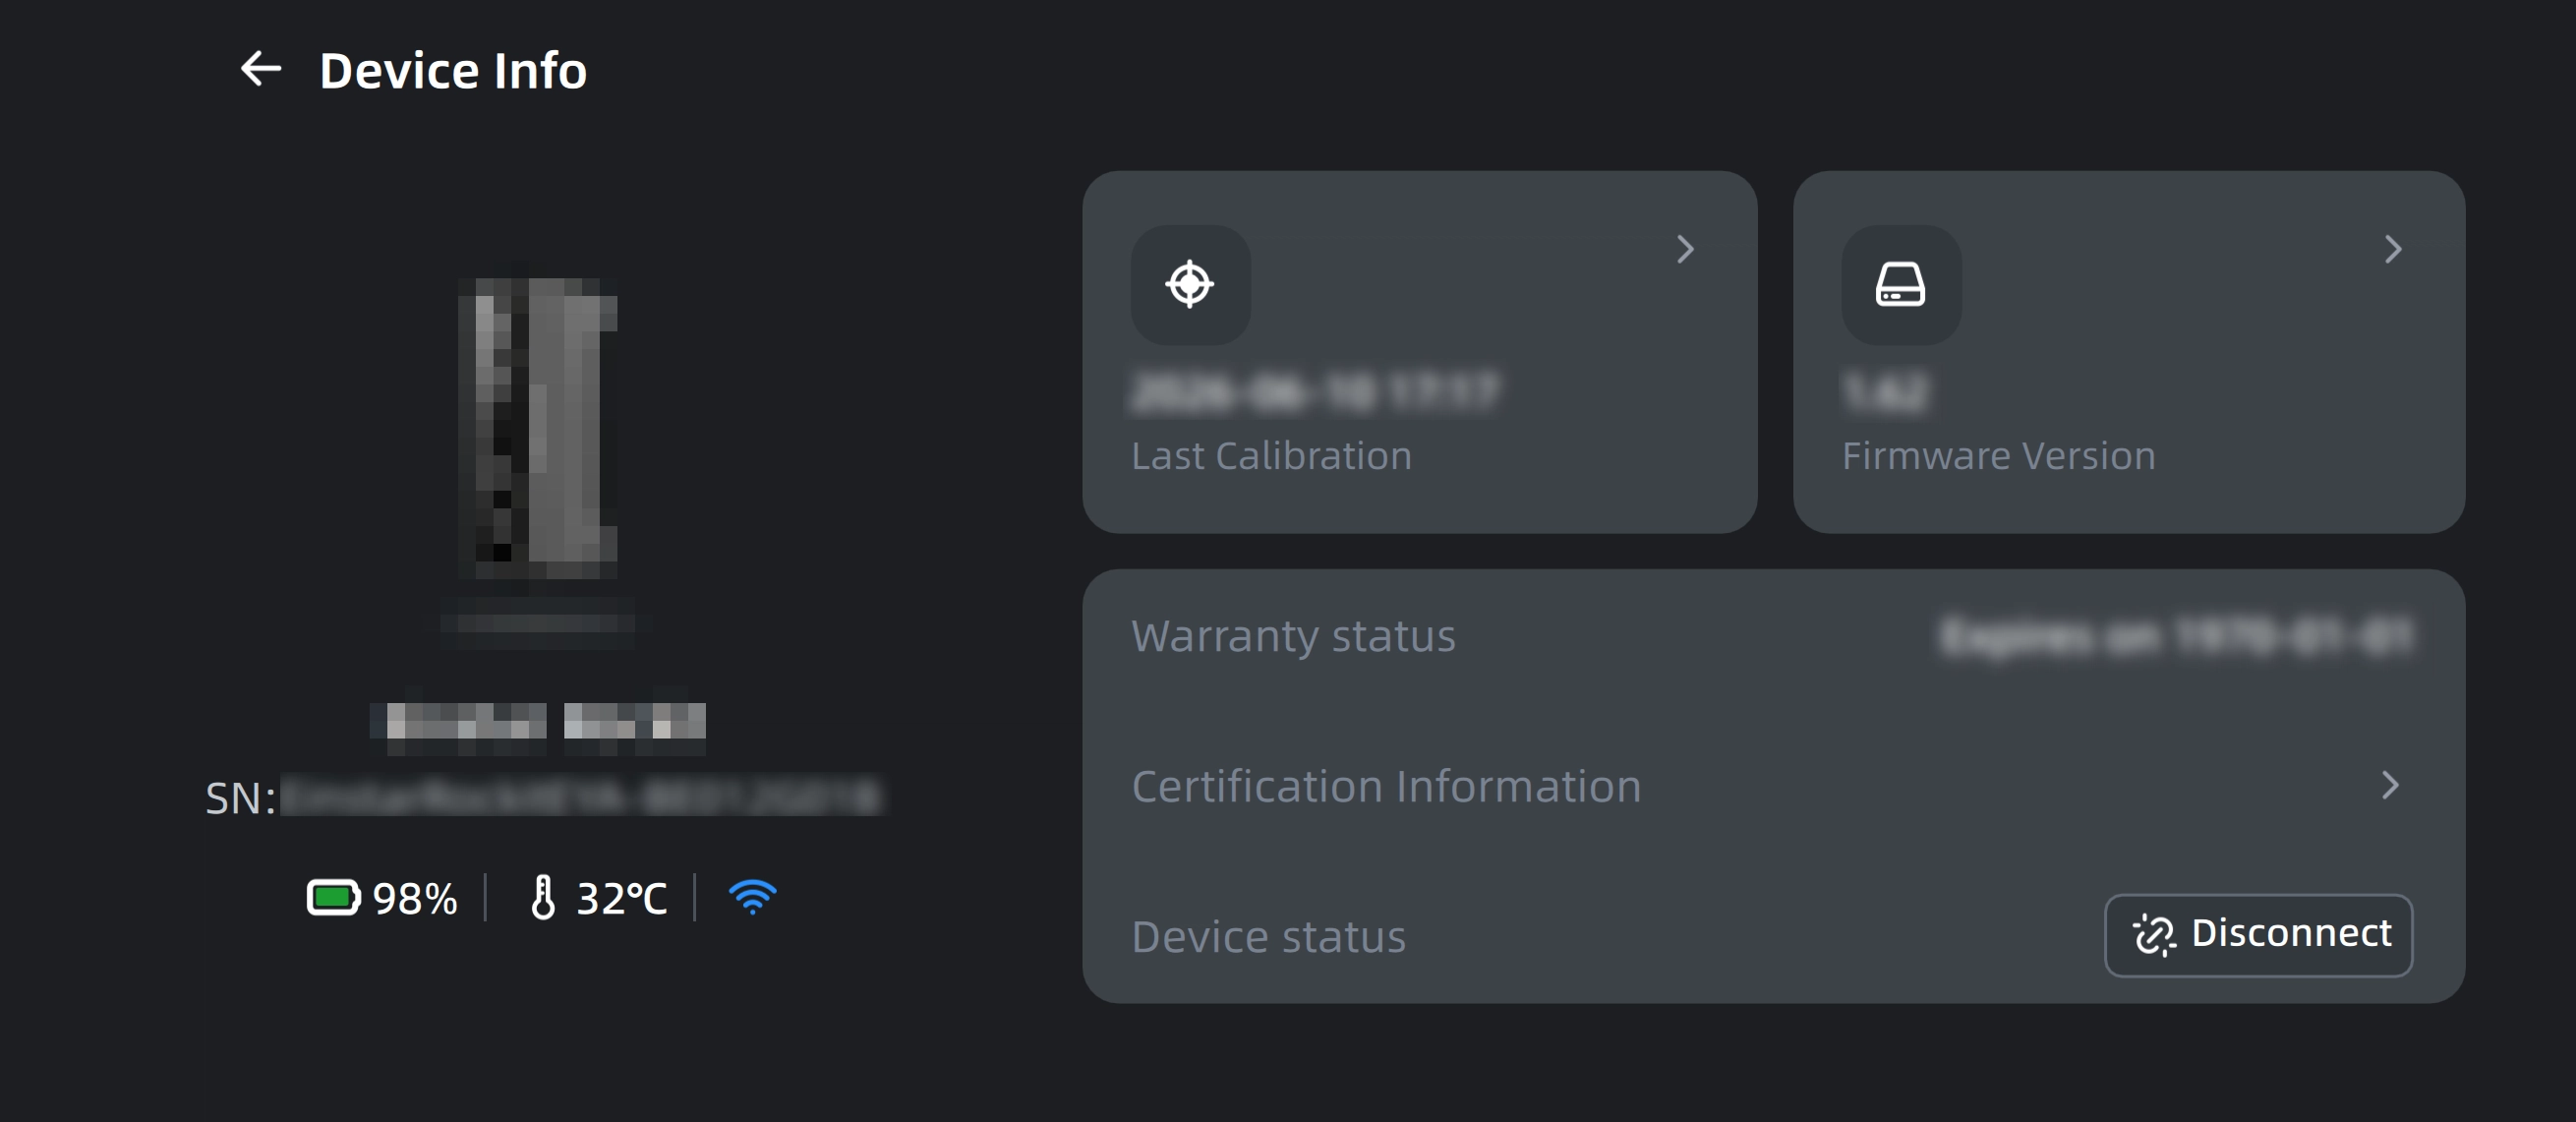
| Information | |
|---|---|
| Device Name | Shows the model name and serial number (SN) of the connected scanner. |
| Device Status | Shows the scanner battery level, device temperature, and connection method. |
| Last Calibration | Shows the time when calibration was last completed; tap the card to enter the calibration process. |
| Firmware Version | Shows the current firmware version of the scanner; tap the card to enter the firmware check page. Note The firmware update needs to be performed in the EXStar Hub software. |
| Warranty Status | Shows the warranty expiration date of the device. |
| Certification Information | View the certification information of the device. |
| Disconnect | Tap to disconnect the scanner from the software.Note This function is available when connected via wireless connection. |