Calibration
Video instruction
Calibration
With calibration, the scanner parameters are recalculated, which not only ensures the accuracy of the scanner, but also improve the quality of scanning.
 Note
Note
Calibration is required under the following conditions:
-
When the scanner is used for the first time, or when it is reused after being laid idle for a long period of time (1-2 weeks).
-
The scanner was severely shaken or shocked, such as shocked during transportation.
-
Severe accuracy reduction, such as frequent errors in alignment or unrecognized markers.
-
Incomplete data is acquired during the scanning or serious deterioration of the quality of scanned data.
 Warning
-
The calibration board is matched to the device. Doing the calibration with an incorrect calibration board will fail to generate good scan data or optimum accuracy.
-
Always make sure that both sides of the calibration board are clean and free of scratches.
-
Do not place heavy objects or sundries on the calibration board.
-
Keep the calibration board away from corrosives, metals and sharp objects to avoid corrosion or damage.
-
It is not recommended to wipe the calibration board. When cleaning the board becomes very necessary, gently wipe it with a piece of a clean damp cloth. Do not use a cloth with chemicals or alcohols to wipe the calibration board.
-
After using the calibration board, put it in a flannel bag.
Steps
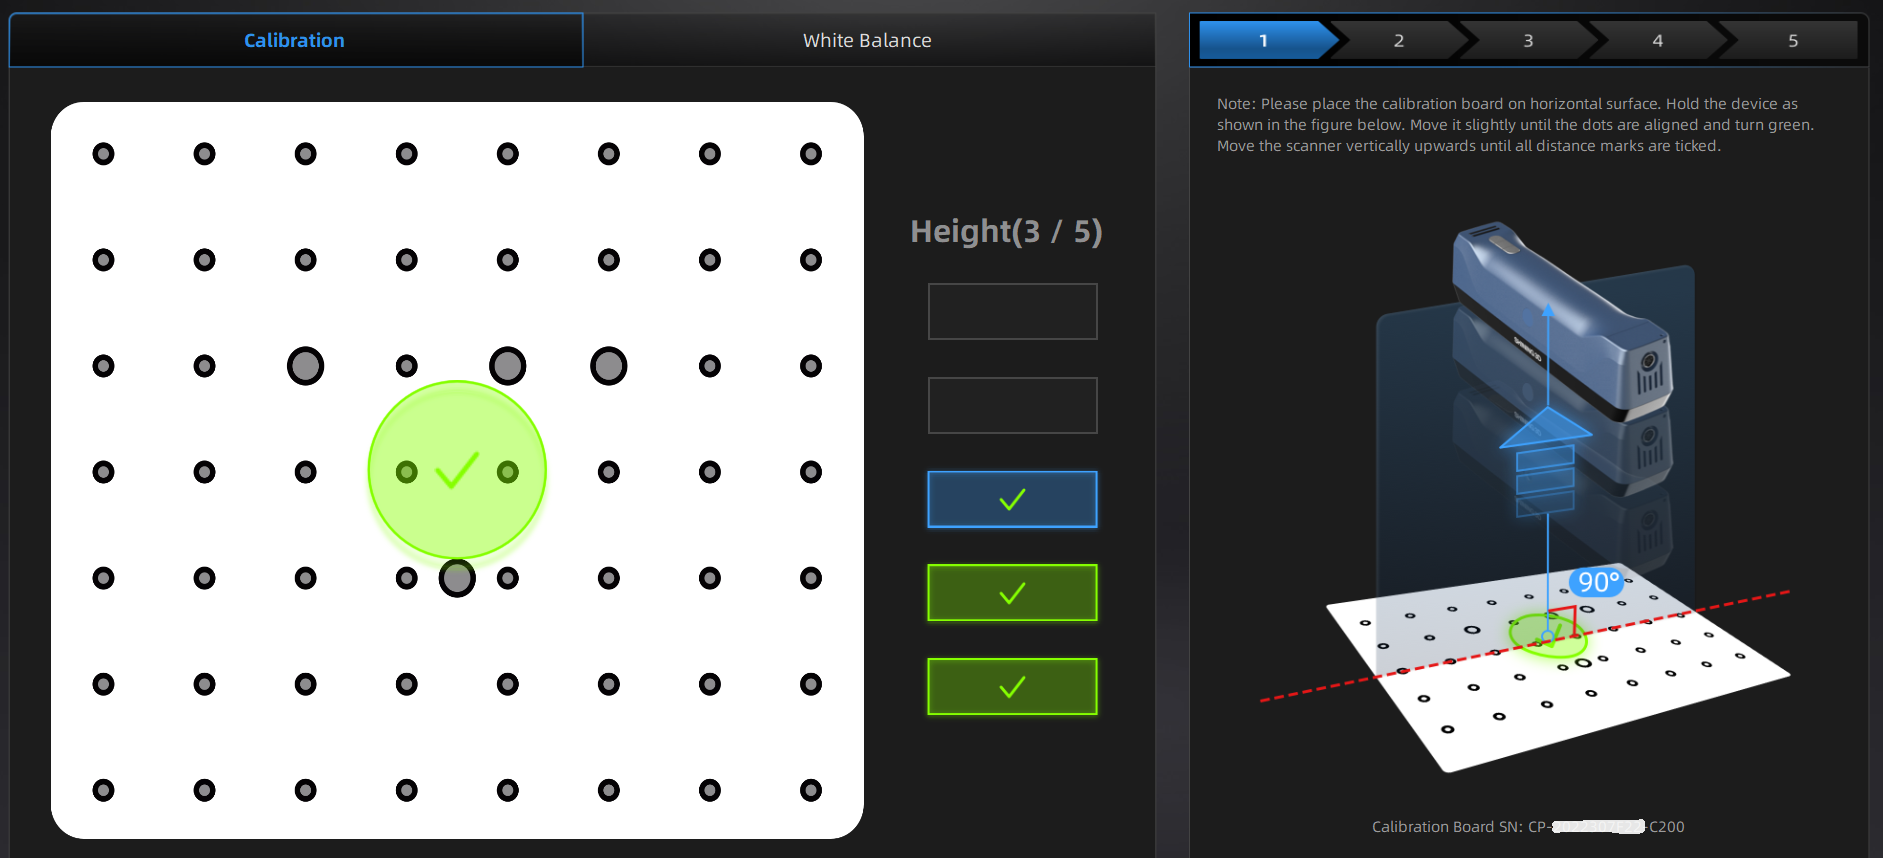
Follow the steps of the calibration wizard in the software. You need to calibrate the scanner from 5 different directions.
-
Place the calibration board horizontally, with its front site (white with markers) lying towards up.
-
Place the scanner with the same position as shown in the software.
-
Press the scan button on the scanner to start calibration.
-
Move the device slowly and adjust the distance between the scanner and the calibration board according to the height indicating box.
-
Keep moving until all height boxes turn green.
-
Place the scanner with the next position and repeat step 3~5.
-
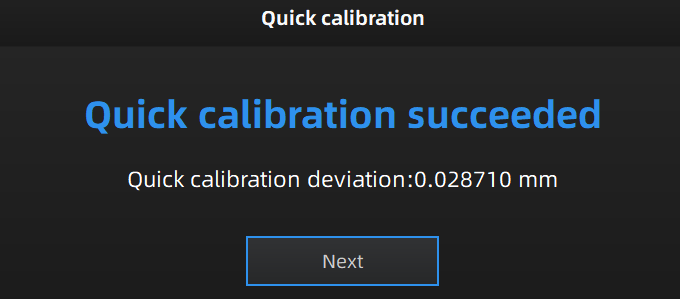
Check the calibration result.
Note
-
If the calibration fails, please try it again from step1.
-
If you cannot get the pass result anyway, please contact your supplier or our support team.
White balance
Steps
-
Place the calibration board on a horizontal flat surface with its back site (white) lying towards up.
-
Hold the scanner face to the center of board in upright position.
-
Press the scan button on the scanner to start calibration.
-
Keep moving the scanner up and down slowly until the scanner takes a photo automatically, which indicates that the distance is just being optimal.
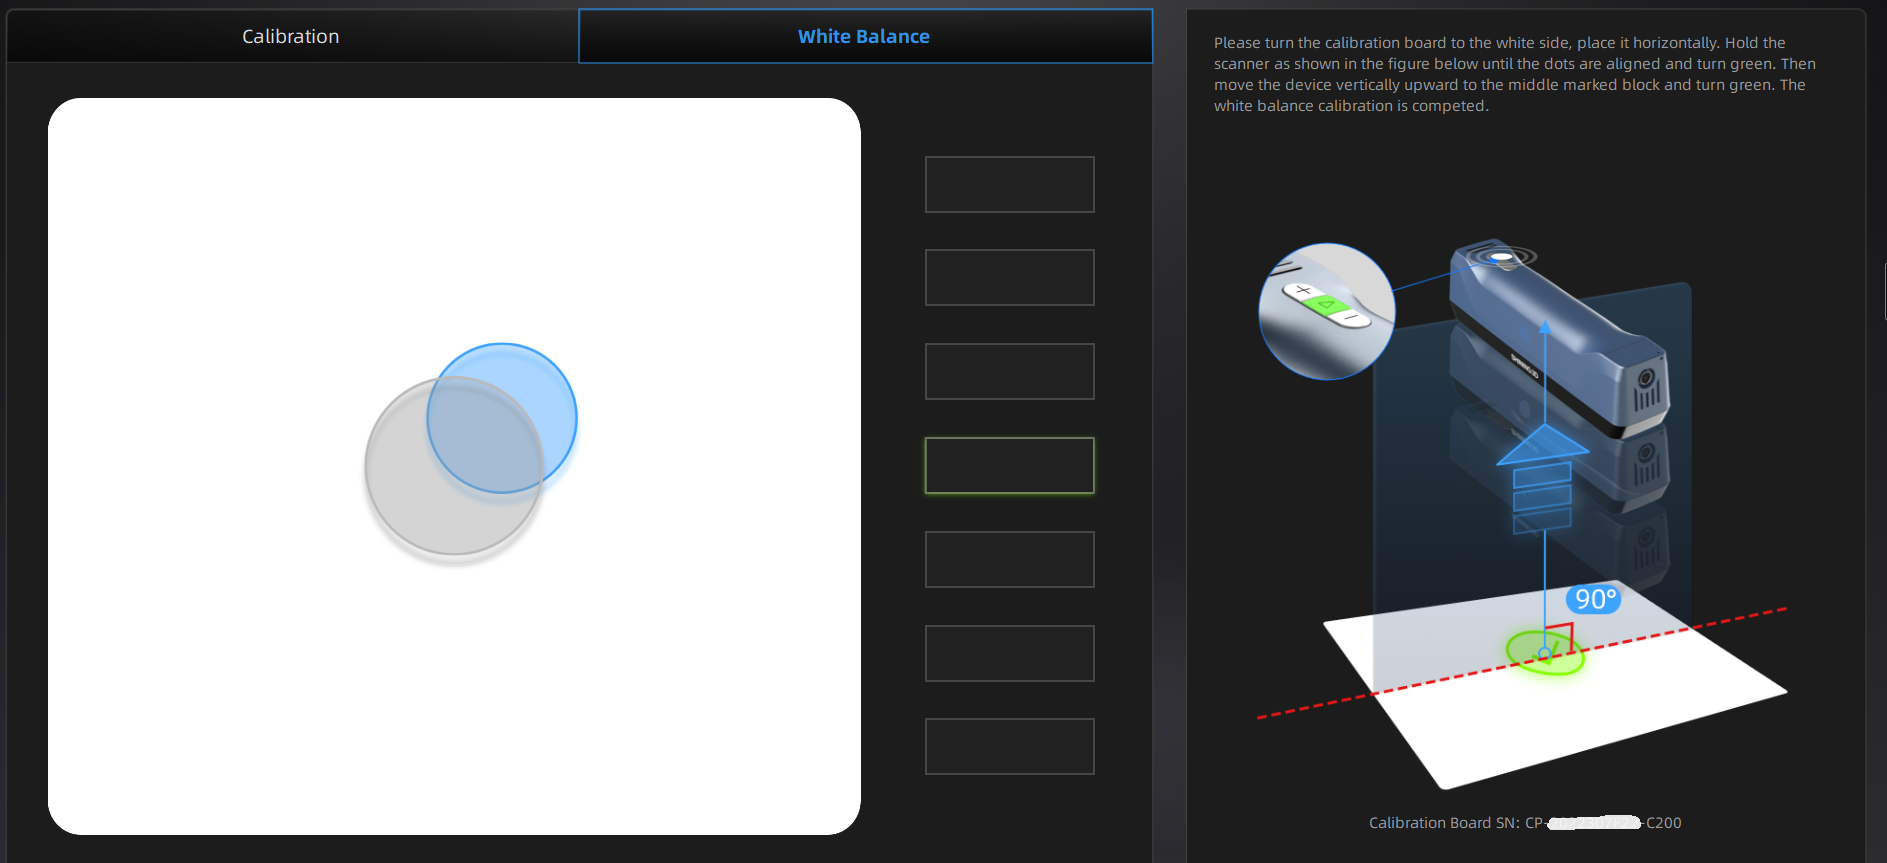
- After finishing the white balance calibration, click Next on the following pop-up for entering the scan mode.

Note
-
Do not do white balance or scan with texture align under strong light, it may cause color deviation.
-
If white balance fails, please try it again.
-
If you cannot get the pass result anyway, please contact your supplier or our support team.