Device Appearance
The tracking laser scanning system mainly consists of Laser 3D Scanner and Optical Tracker.
Tracker
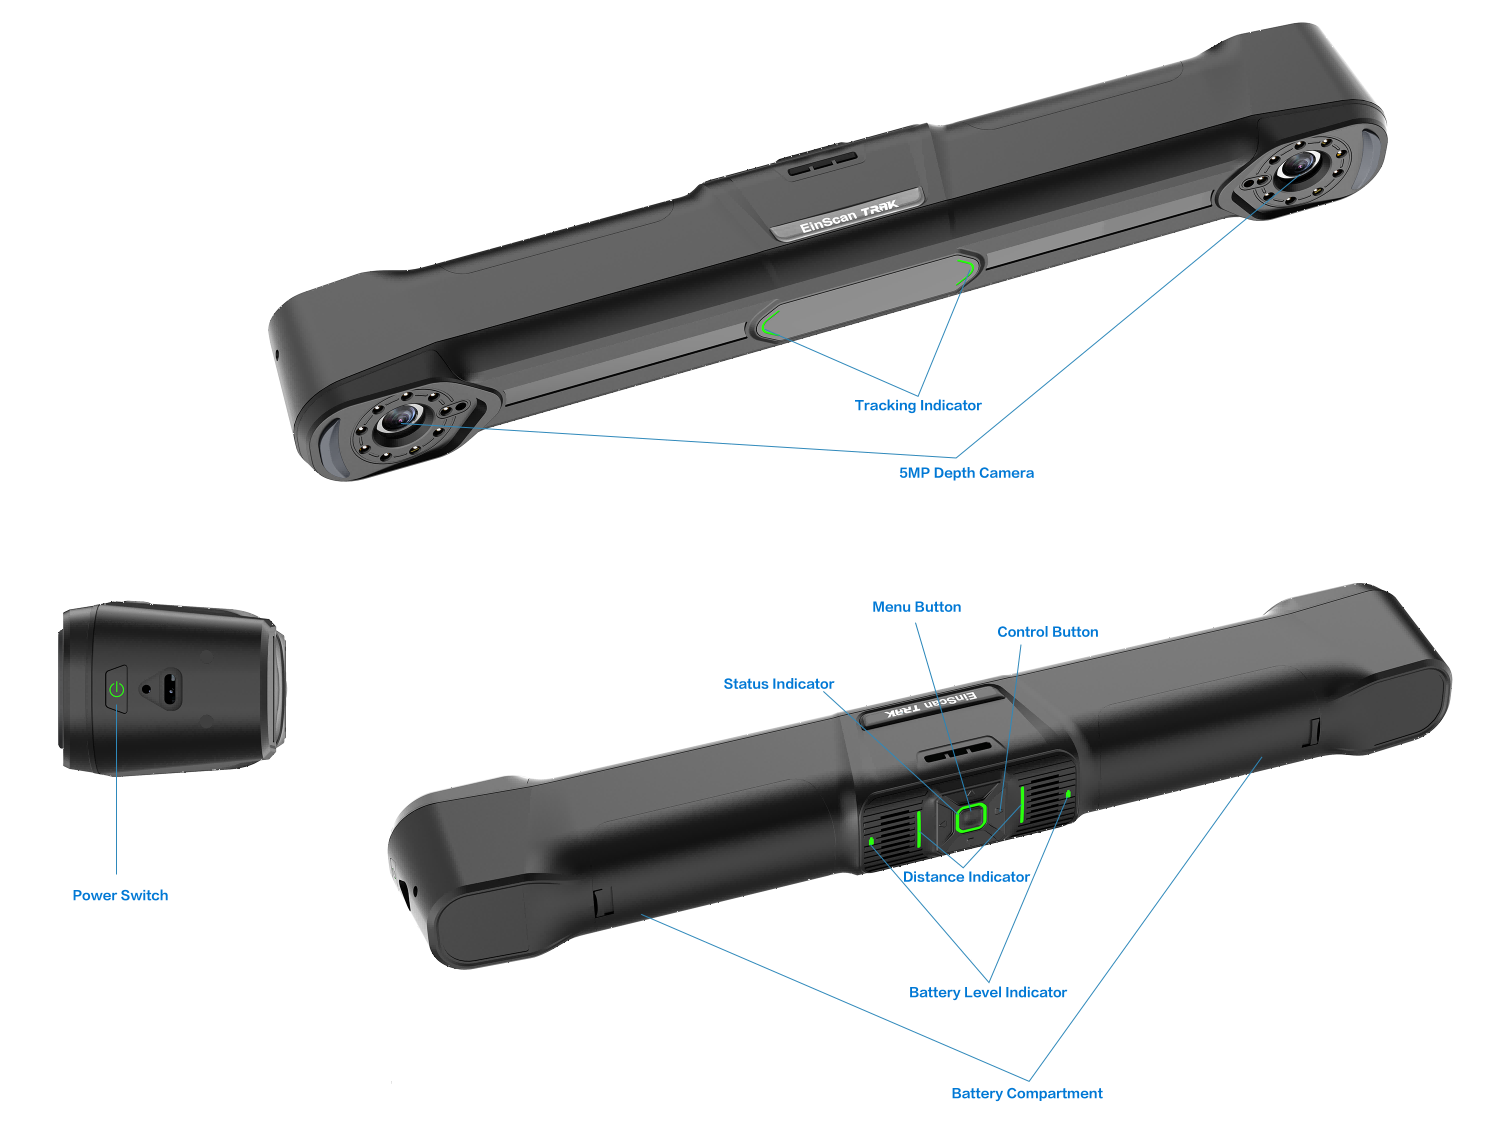
Indicator Light Color |
Status Indicator |
Distance Indicator Track Mode > Photogrammetry Mode |
Range Indicator Track Mode > Scan Point Cloud Mode / Local Resolution Mode |
Battery Indicator |
|---|---|---|---|---|
| Blue | Device network connected, software not connected | Scanning distance too far | Scanner too far from tracker, scanner out of tracking range | / |
| Cyan | Power-on initialization | Scanning distance far | / | / |
| Green | Device network and software both connected normally | Scanning distance appropriate | Within tracking range | Battery remaining ≥ 60% During charging: green breathing light |
| Yellow | / | Scanning distance close | / | / |
| Orange | / | / | Insufficient global markers recognition | 25% ≤ Battery remaining < 60% |
| Red | Device network abnormal | Scanning distance too close | Scanner too close to tracker, scanner out of tracking range | Battery remaining < 25% |
| Button | Press Once | Press Twice | Long Press |
|---|---|---|---|
| Power Button | When battery powered only, press to power on | / | When battery powered only, long press to power off |
| Middle Button | Open menu window | Perform Global Markers Optimization | |
| Up Button | / | / | |
| Down Button | / | / | |
| Left Button | / | / | |
| Right Button | Increase brightness | / | / |
Note
When wired connection, the device automatically powers on when connected to power, no need to press the power button.
Track Mode Scanner
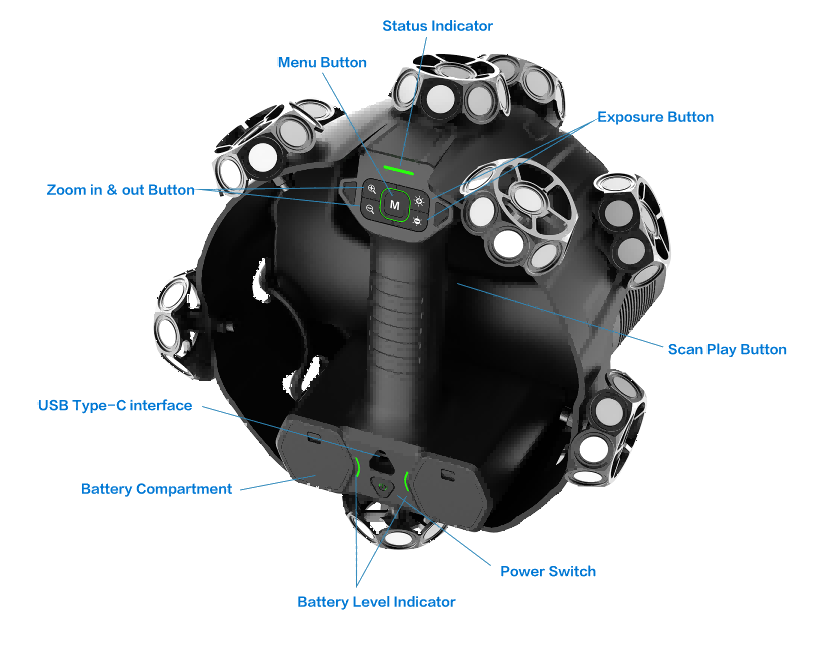
| Indicator Light Color | Battery Indicator | Distance Indicator | Status Indicator |
|---|---|---|---|
| Blue | / | Scanning distance too far | Device network connected, software not connected |
| Cyan | / | Scanning distance far | Power-on initialization |
| Green | Battery remaining ≥ 60% During charging: green breathing light |
Scanning distance appropriate | Device network and software both connected normally |
| Orange | 25% ≤ Battery remaining < 60% | / | / |
| Yellow | / | Scanning distance close | / |
| Red | Battery remaining < 25% | Scanning distance too close | Device network abnormal |
| Button | Press | Press Twice | Long Press |
|---|---|---|---|
| Power Button | When battery powered only, press to power on | / | When battery powered only, long press to power off |
 |
Switch scan mode (Hybrid Leapfrog Mode) | Switch Light Source Mode | |
 |
/ | Enable or disable Local View function | |
 |
/ | Enable or disable View Lock function | |
 |
Increase brightness | / | |
 |
/ | ||
| Scan Button | Cycle through Preview, Scan and Pause | / | Perform Mesh or Global Markers Optimization |
Note
When wired connection, the device automatically powers on when connected to power, no need to press the power button.
Scanner Mode Scanner
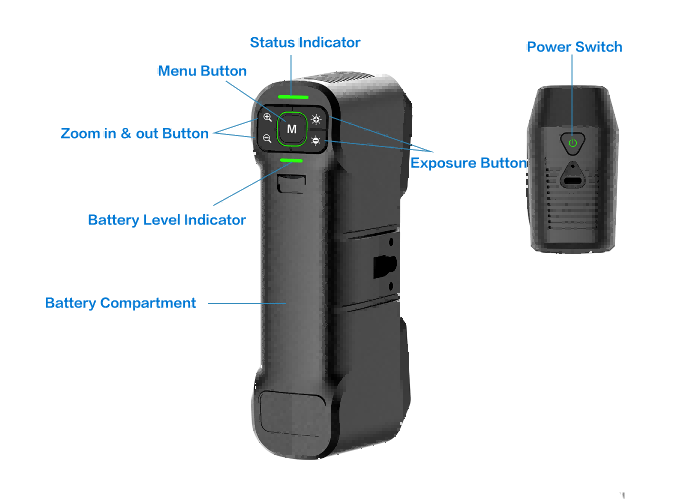
| Indicator Light Color | Battery Indicator | Distance Indicator | Status Indicator |
|---|---|---|---|
| Blue | / | Scanning distance too far | Device network connected, software not connected |
| Cyan | / | Scanning distance far | Power-on initialization |
| Green | Battery remaining ≥ 60% During charging: green breathing light |
Scanning distance appropriate | Device network and software both connected normally |
| Orange | 25% ≤ Battery remaining < 60% | / | / |
| Yellow | / | Scanning distance close | / |
| Red | Battery remaining < 25% | Scanning distance too close | Device network abnormal |
| Button | Press | Press Twice | Long Press |
|---|---|---|---|
| Power Button | When battery powered only, press to power on | / | When battery powered only, long press to power off |
|
Open menu window | Switch Light Source Mode | |
|
/ | Enable or disable Local View function | |
|
/ | Enable or disable View Lock function | |
|
Increase brightness | / | |
|
/ |
Note
When wired connection, the device automatically powers on when connected to power, no need to press the power button.