Device Connection
This software supports wireless connection for wireless scanning. If the wireless connection fails, you can try Wi-Fi Pairing.
Wireless Connection
- After connecting the router and turning on the device, launch the software, and the device will automatically establish a wireless connection.
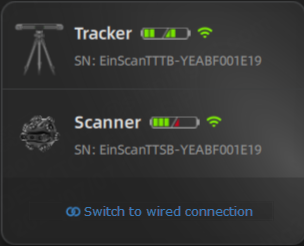
- Once the connection is successful, you can start wireless scanning. If the interface indicates that the battery level is low (remaining battery below 25%) or the battery indicator light turns red while using the device, please replace the battery as soon as possible.
Note
If the wireless connection fails multiple times, you can choose a wired connection for wired scanning, or follow the on-screen prompts to perform Wi-Fi pairing. If the problem persists, please contact technical support.
Wi-Fi Pairing
Caution
If you have failed to connect wirelessly, changed the router name or password, reset or replaced the router, please complete the wired connection of the device, launch the software, and perform Wi-Fi Pairing within the software. After successful pairing, you can use wireless scanning.
Steps
- Go to the router settings page (192.168.8.1), set the router to Wi-Fi 6 mode, and disable 2.4G.
-
After launching the software, on the home screen, click Switch to Wired Connection > Wi-Fi Pairing.
-
Click the Pair button on the Wi-Fi pairing interface.
- In the router pairing window that pops up, enter the corresponding SSID and password.
- Click Confirm to start pairing, or click Cancel to return to the Wi-Fi pairing interface.
- After successful connection, the device information card will turn green.