Scan Interface
Interface Overview
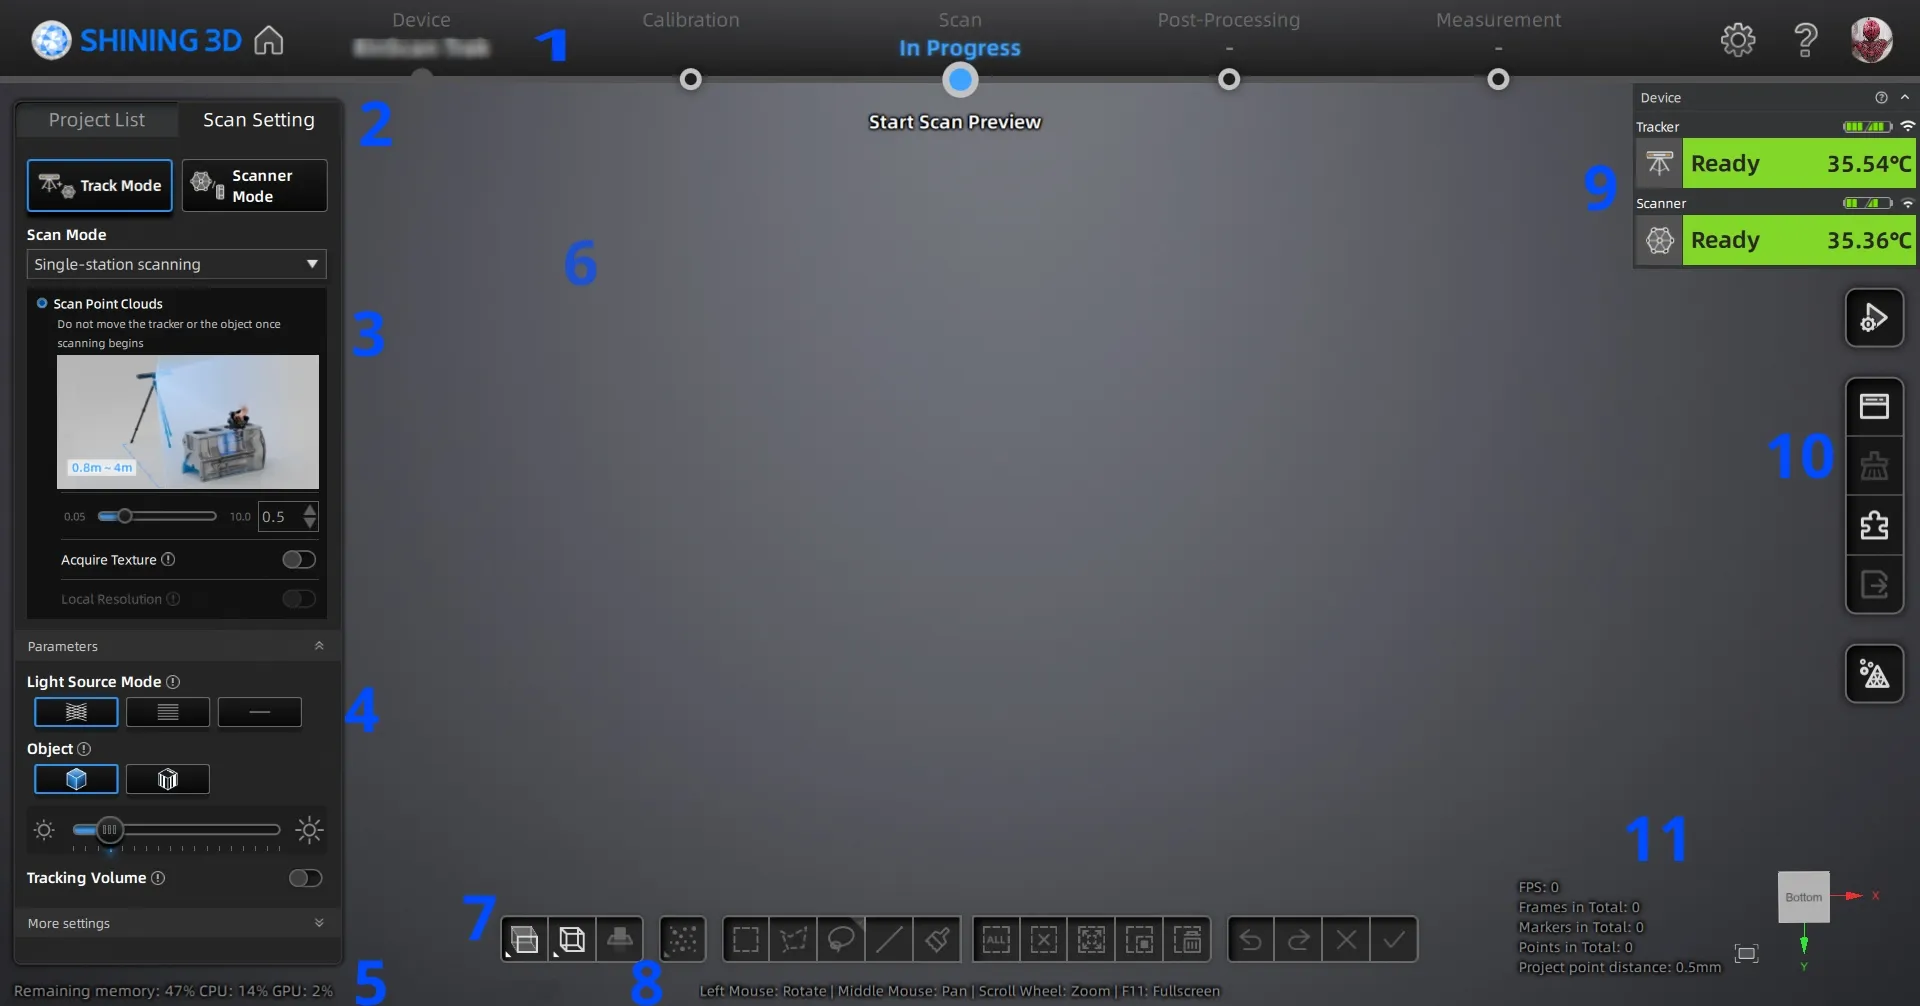
Note
The screenshot shown above is for illustrative purposes only. Always refer to the actual software interface.
① Navigation Bar
- Click
 to quickly return to the software home screen.
 - Click the
 button in the corresponding position on the navigation bar to quickly jump to the corresponding function interface.
② Project List and Scan Settings
Switch between project list management and scan settings windows.
③ Scan Mode
You can choose Track Mode or Scanner Mode for scanning based on the application scenario.
④ Parameter Settings
See more details in Scan Settings.
⑤ Remaining Memory, CPU Usage and GPU Usage
- Remaining Memory: Displays the percentage of remaining memory. If the remaining memory is very limited, the system may become slow or even crash.
- CPU Usage: Displays the current CPU usage of the computer. If the usage is too high, the system may slow down or experience response delays. It is recommended to close other non-scanning software and wait.
- GPU Usage: Displays the graphics card usage. When the GPU usage approaches or exceeds the VRAM capacity limit, performance may degrade, or the graphics card or program may crash.
⑥ Preview / Scanning Window
The window for viewing pre-scan and scanned models.
⑦ Data Editing
Supports model editing and view adjustment. See more details in Data Editing.
⑧ Keyboard Shortcuts
Quickly adjust model angles and move the model using shortcuts.
⑨ Device Information Card
Click Device Information in the upper right corner of the software interface to expand the device information card, where you can view the device connection status and related information. If the device is connected, the card shows green; if not connected, it shows gray.
| Icon | Icon | ||
|---|---|---|---|
 |
Click to open the device connection guide. |  |
Displays the current battery level of the device. |
 |
The device is wirelessly connected. |  |
The device is connected via cable. |
⑩ Buttons
| Function | |
|---|---|
 Preview |
Only preview, the scanned data is not saved. In preview mode, you can adjust scan parameters based on the scanning effect. You can enable or disable Preview by clicking  in the upper right corner to open the settings interface. When disabled, this button will not appear on the scanning interface. in the upper right corner to open the settings interface. When disabled, this button will not appear on the scanning interface. |
 Scan |
Start scanning, the scanned data will be saved to the specified path. Caution Caution |
 Pause |
Pause scanning. You can edit the scanned data. |
| Function | Function | ||
|---|---|---|---|
 Project Group |
Create or open a project group. |  Delete Data |
Delete the data on the current interface. |
 Align |
Align the project data as needed. |  Export Data |
 : Save the scanned data locally in the specified format. : Save the scanned data locally in the specified format. : If you have installed EXModel, click this button to switch to EXModel, and the model data will be automatically imported. : If you have installed EXModel, click this button to switch to EXModel, and the model data will be automatically imported. |
 Texture |
Show or hide the model texture. |  Mesh |
Click to enter the mesh process. |
⑪ Others
Display FPS, frame count, point count of the project and other information.
| Function | |
|---|---|
 Fit View |
Click to center the model and adjust the view size to fit the screen automatically. |
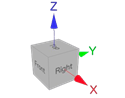 View Controller |