Data Editing
After completing the scanning, you can edit the point cloud data to remove redundant data.
Interface Overview
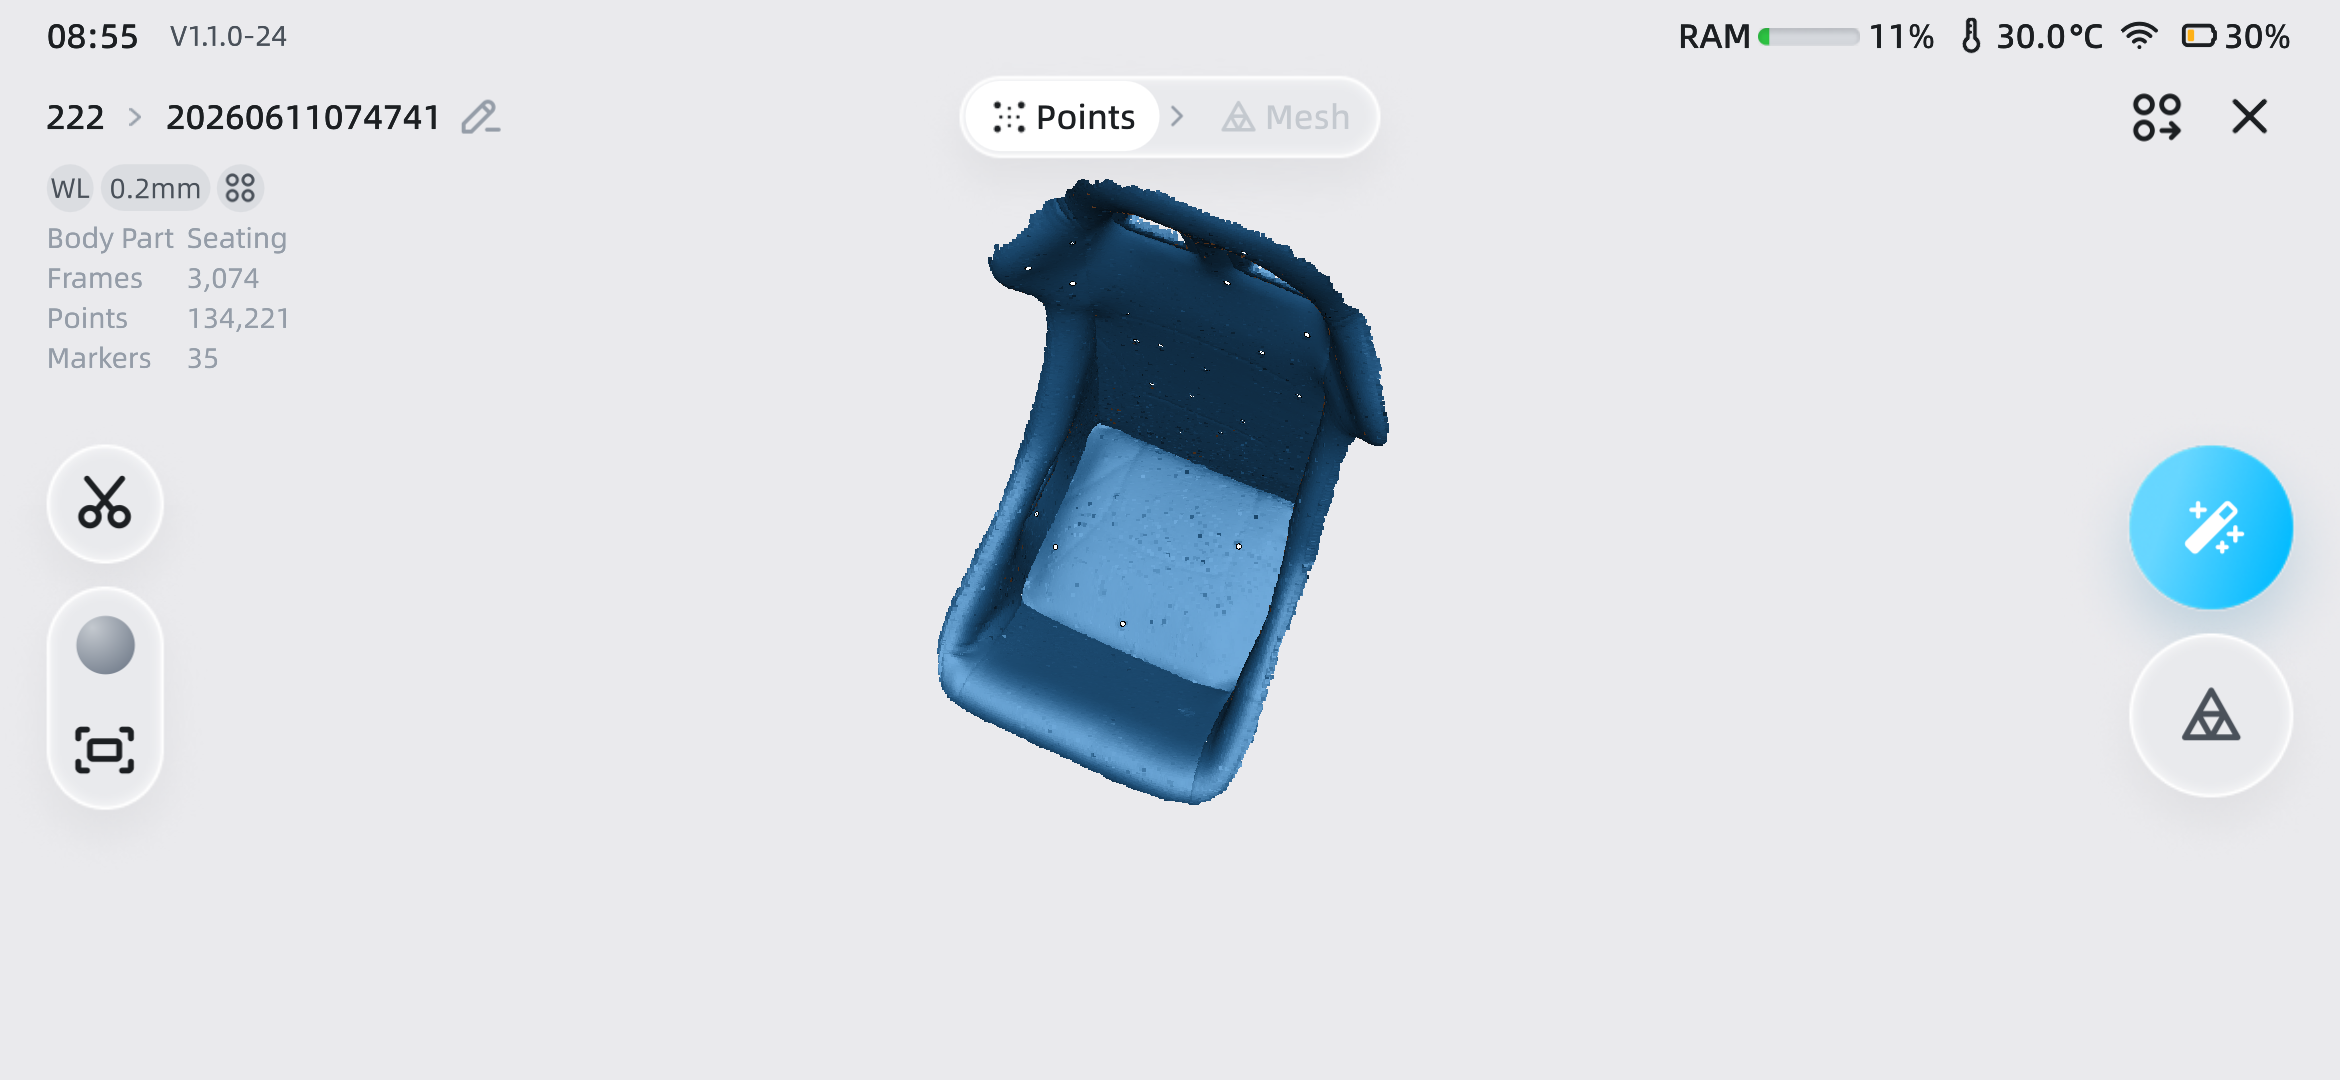
![]() Point Cloud /
Point Cloud / ![]() Mesh
Mesh
Tap the corresponding button to switch the current data to point cloud data or mesh data.
Note
If no mesh data has been generated in the current interface, generate mesh data from the current point cloud data before tapping the button to switch between point cloud and mesh data.
![]() Edit Name
Edit Name
Tap to rename the project.
![]() Data Clipping
Data Clipping
Tap this button to enter the data clipping interface, where you can clip the data and remove noise data.
![]() Texture Display
Texture Display
After tapping this button, you can choose to turn texture display on or off.
Note
Only projects with Acquire Texture enabled support texture display.
![]() Fit View
Fit View
Tap this button to restore the model data to its original size and center it on the screen.
![]() Auto Mesh
Auto Mesh
After tapping this button, mesh data will be generated automatically.
Note
- If Acquire Texture is enabled, texture mapping is automatically performed when mesh data is generated.
- In Foot Scan mode, tapping this button automatically aligns foot data and plantar data.
- In Foot Scan mode, when Acquire Texture is enabled, texture mapping is not automatically performed when mesh data is generated. You need to manually tap
 in the Mesh Interface to perform texture mapping.
![]() Manual Mesh
Manual Mesh
After tapping this button, manually set optimization parameters to generate mesh data.
| Function | |
|---|---|
| Watertight Processing | Choose whether to close all holes on the model surface and enclose all areas. |
| Resolution | Set the mesh resolution of the current project. The higher the resolution, the more geometric details the surface of the 3D wrapped model presents. You can also tap |
| Mesh Smoothness | Denoises the data to make the mesh data smoother and improve data quality. The higher the smoothing level, the smoother the data surface and the more data details are lost. |
| Remove Small Floating Parts | Deletes small floating parts that is not connected to the main data. |
| Fill Markers | Automatically closes holes in all marker areas. Enabled by default. When the watertight function is enabled, Fill Marker Holes cannot be disabled.  Note NoteIf Marker Alignment is not enabled, this setting item is not displayed. |
| Texture Mapping | Applies colors and textures to the model surface.Note If Acquire Texture is not enabled, this setting item is not displayed. |
Complete
Tap this button to display the menu panel and select the save and export method for the project file. Tap ![]() Back to Home to save only the model file to the Project List and return to the Scan Mode selection interface.
Back to Home to save only the model file to the Project List and return to the Scan Mode selection interface.
Note
After tapping ![]() to generate a mesh, the button will appear.
to generate a mesh, the button will appear.
Data Clipping
In the ![]() Point Cloud interface, tap the
Point Cloud interface, tap the ![]() button on the left toolbar to clip the point cloud data. After clipping, tap the Complete button in the upper right corner to save the clipped data and return to the editing interface.
button on the left toolbar to clip the point cloud data. After clipping, tap the Complete button in the upper right corner to save the clipped data and return to the editing interface.
Note
Once clipping is confirmed, reverting to previous scanned data is not supported.
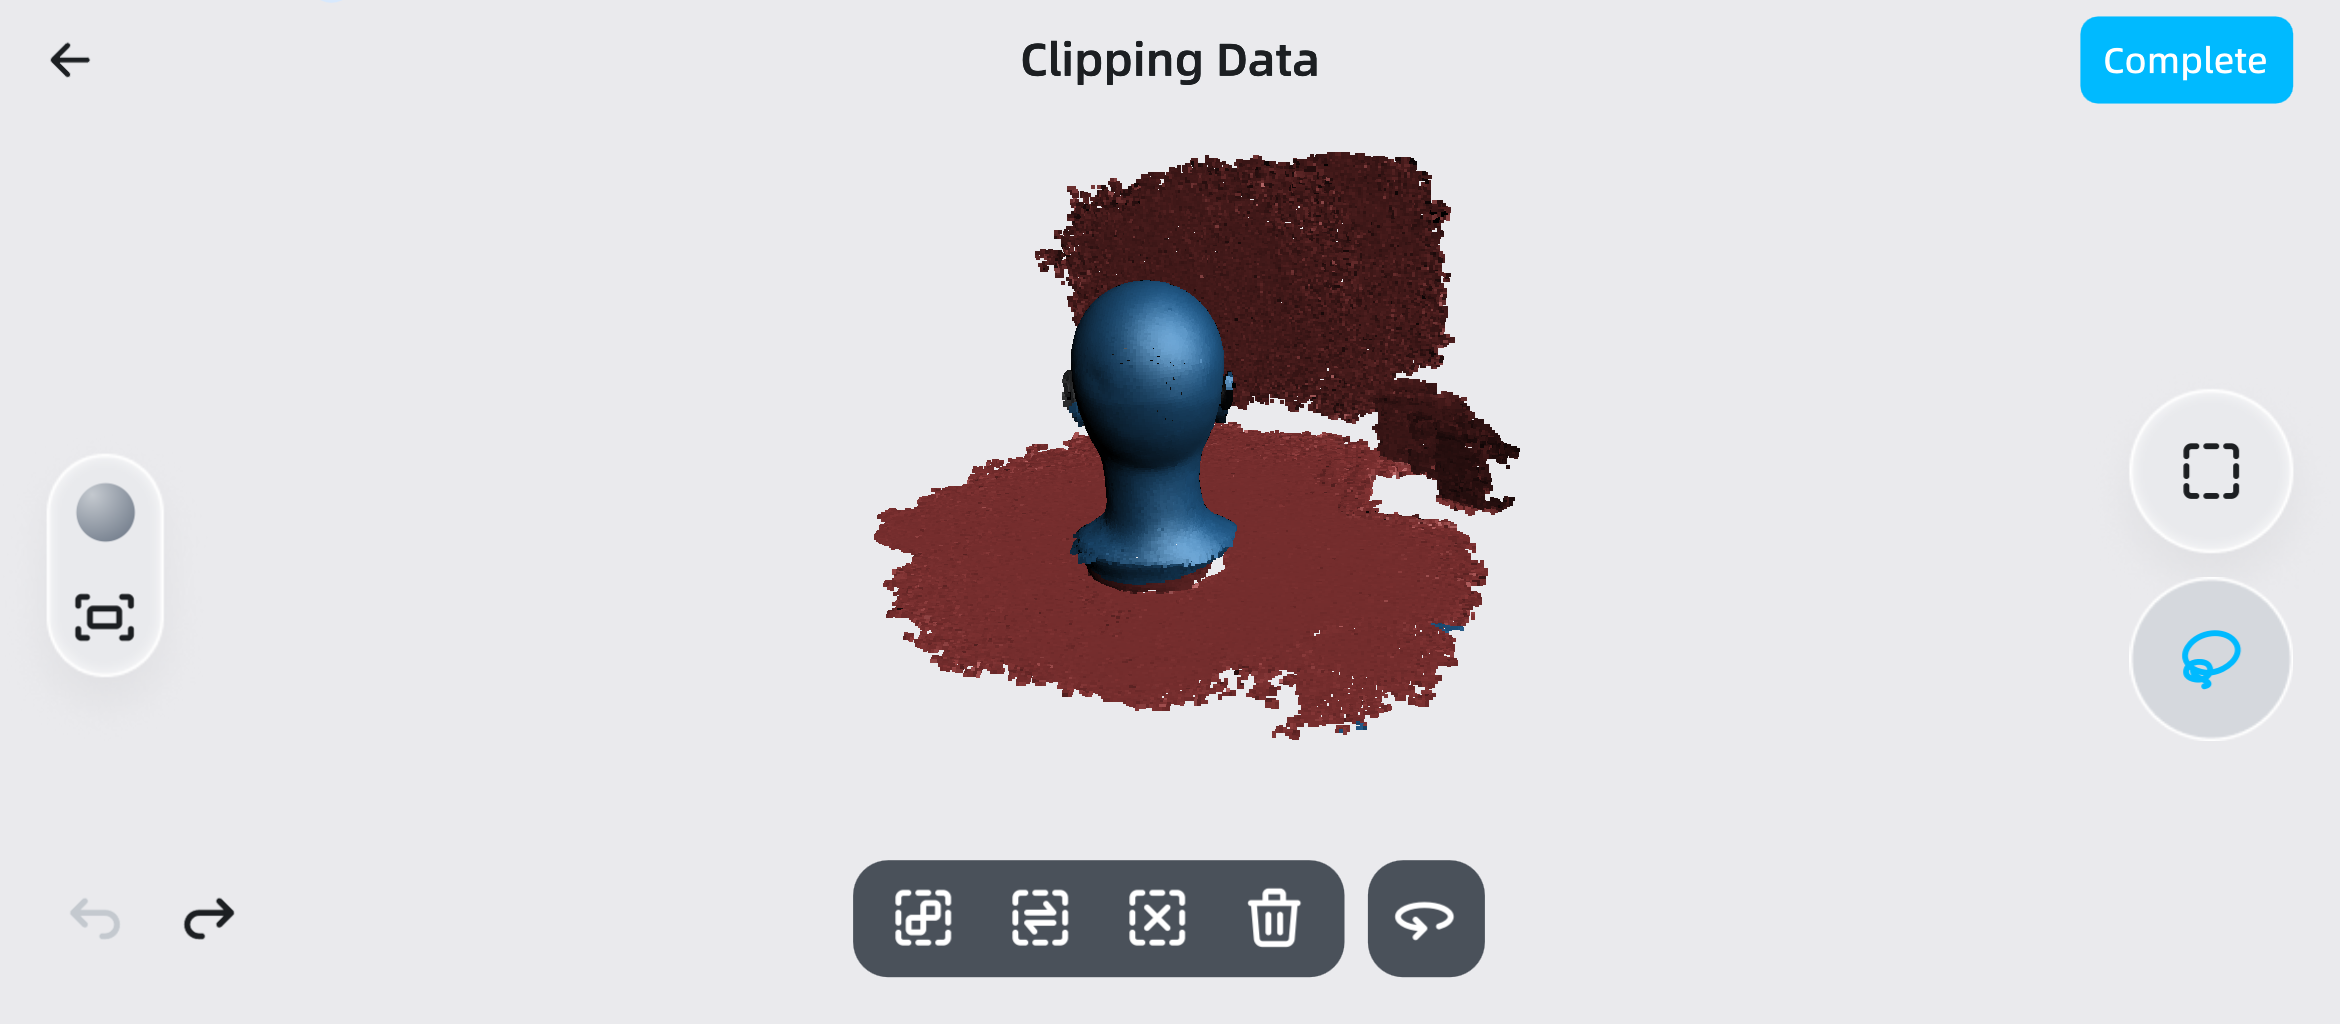
Editing Tools
1.On the right side of the interface, tap ![]() or
or ![]() to select the corresponding selection tool, and slide on the screen to select data with one finger; the selected area is displayed in red.
to select the corresponding selection tool, and slide on the screen to select data with one finger; the selected area is displayed in red.
Col
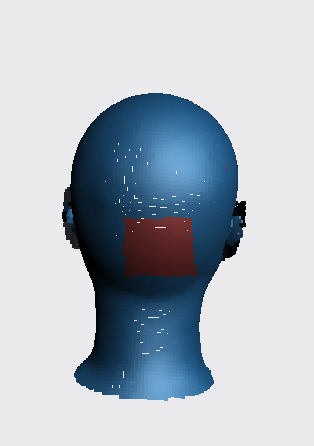
![]() Rectangle Selection
Rectangle Selection
Col
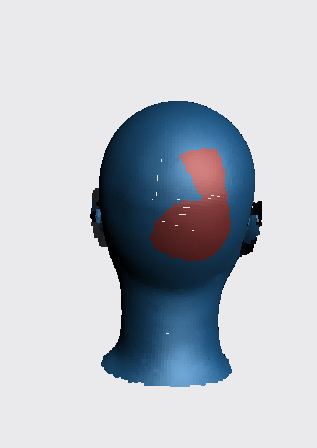
![]() Lasso Selection
Lasso Selection
2.For the selected area, you can use the following tools to quickly select all, invert selection, deselect, or delete.
| Tool | |
|---|---|
| After selecting the area, tap this button to automatically select all remaining areas connected to the selected area. | |
| After selecting the area, tap this button to invert the selection based on the selected area. | |
| After selecting the area, tap this button to deselect all selected areas. | |
After selecting the area, tap this button to delete the selected area.  Note Note
|
Auxiliary Functions
| Function | |
|---|---|
| After tapping this button, you can choose to turn texture display on or off. Note Only projects that have turned on Acquired Texture can support turning on texture display. |
|
| Tap this button to restore the model data to its original size and center it on the screen. | |
 |
Long press in areas other than the button to display a magnification effect. |
| Tap Note Using any other selection tool will automatically turn off the rotation mode and switch to the selection mode. |