Interface
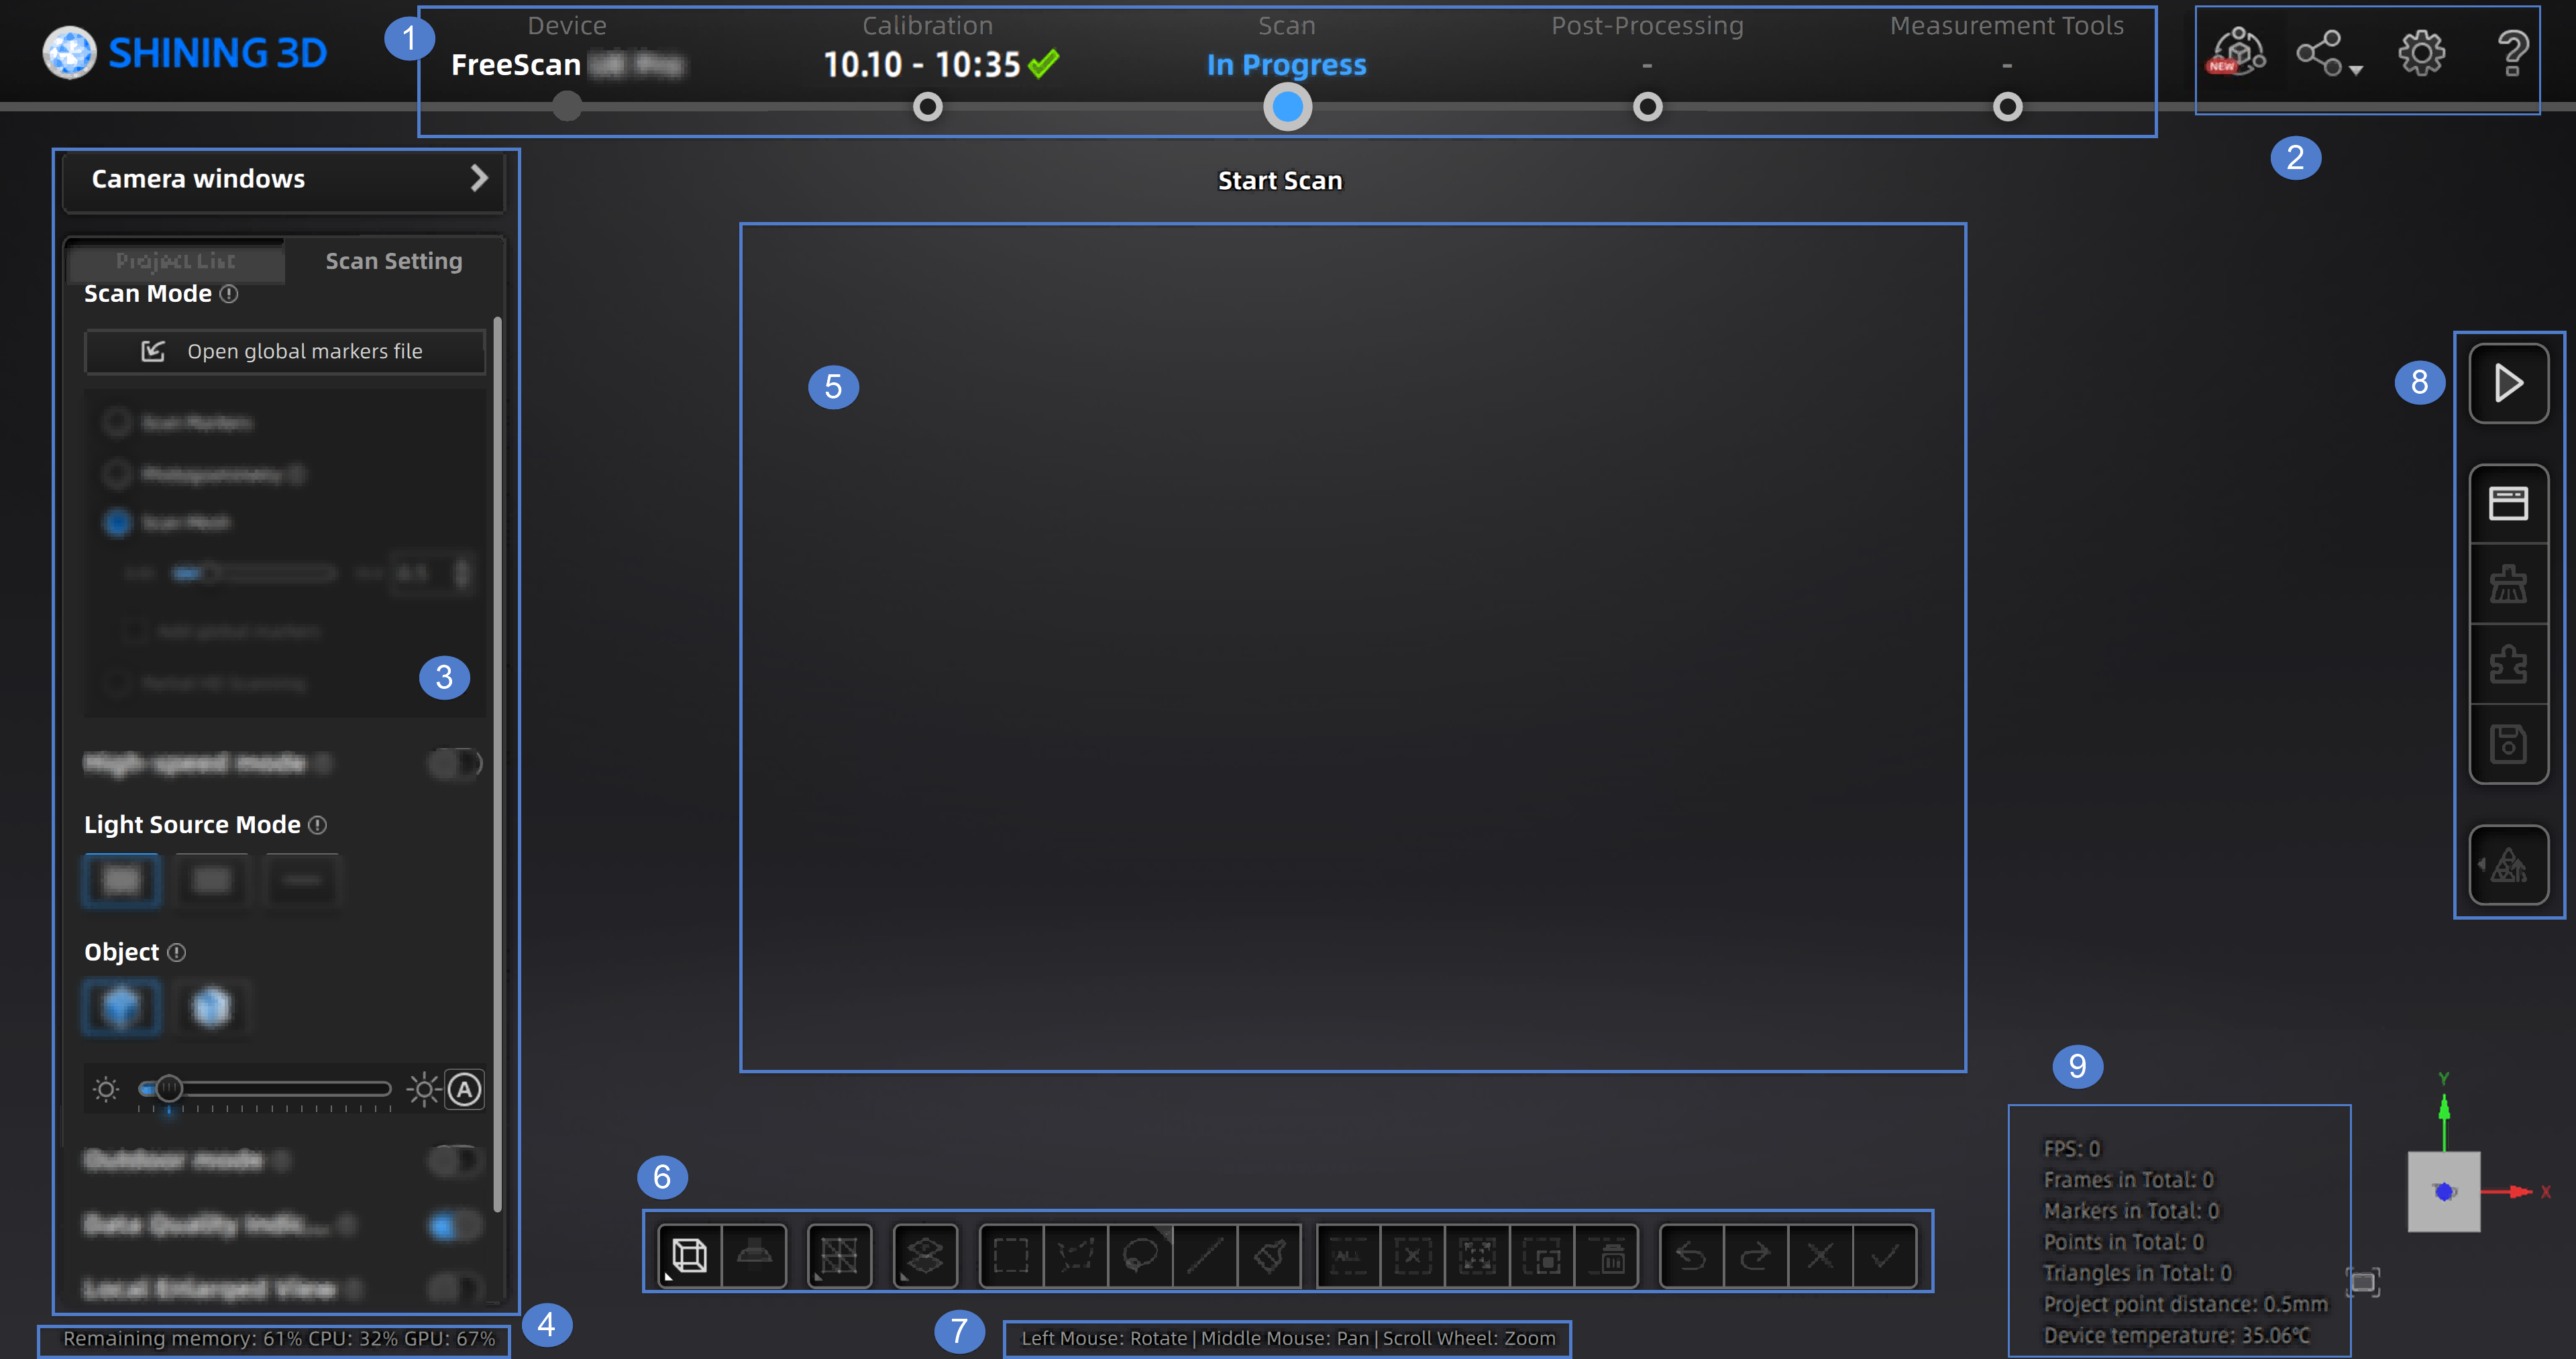
- Device: Display the device name and status: online / offline. Click
 to reconnect when the scanner is offline.
 - Calibration: Click it to calibrate.
- Scan: Go into scan process.
- Post processing: Go into post processing after scanning, which includes mesh editing and mesh optimizationg
- Measurement tools: To measure your model.
Reverse Engineering Service
- Official website:Open the official websiteof Shining 3D to learn about the company’s products and information.
- Facebook:Enter Shining 3D’s Facebook to view product introduction and other operations.
- Support platform: Enter Shining 3D’s support platform to view product introduction and other operations.
-
Select language: set the language displayed in the software.
-
Preview:You can preview the scanning effect before the actual scanning when enabling the function.
-
Advanced Mode: Enabling the function allows you to choose a smaller resolution when creating a new project. For more, see resolution.
-
Shape detection optimization:It can improve the accuracy of sphere diameter but may affect some details of the scanned data.
-
Scanner tone:Adjust the volume of the scanner's beep sound.
- Scanning distance indication method:There are two methods to indicate the scanning distance.
During scanning, you can adjust the scanning distance based on the color indication. Here is the color code for distance adjustment:
Blue: It indicates that the scanning distance is too far.
Green: It indicates that the distance is proper.
Red: It indicates that the scanning distance is too close.
By observing the color of the laser line or distance bar, you can make adjustments to ensure the scanning distance is appropriate.
Col
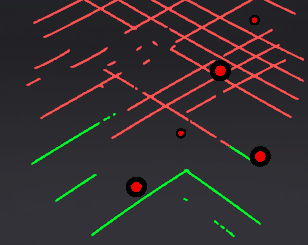 Laserline indicator
Col
 scanning distance indicator
- The laser line closes intelligently:If the scanner fails to recognized enough markers, it will not project the laser line during scanning when enabling the function.
Click Recover to initialize all settings and the software will automatically restart.
- About:View related scanner information, software version, etc.
- System diagnose:Check whether computer configuration meet the operating conditions. If it shows
 , it means that the configuration meets the operation requirements. If not, please repair the problem according to the interface prompts. Click Refresh to diagnose again.
 - Support:You can open the user manual, get remote assistance and check contact information of technical support here.
- Camera windows: To preview the actual scene during scanning. Parameters can be adjusted accurately through the camera window.
- Project group: To manage projects and the project group. For more, see Project and Project Group.
- Scanning parameters: To set scanning parameters. For more, see Setting.
- Remaining memory
- CPU usage: If the running program occupies a large proportion, it is recommended to close other software.
- GPU usage.
Window for viewing the preview and scanning model.
There are several tools available to edit scanned data to reduce noise. For more, see Data Editing.
Quickly move the model or adjust the angle through shortcut keys.
For more, see Scanning and other functions.
To show information about FPS, Frames in Total, Points in Total, etc.