UI
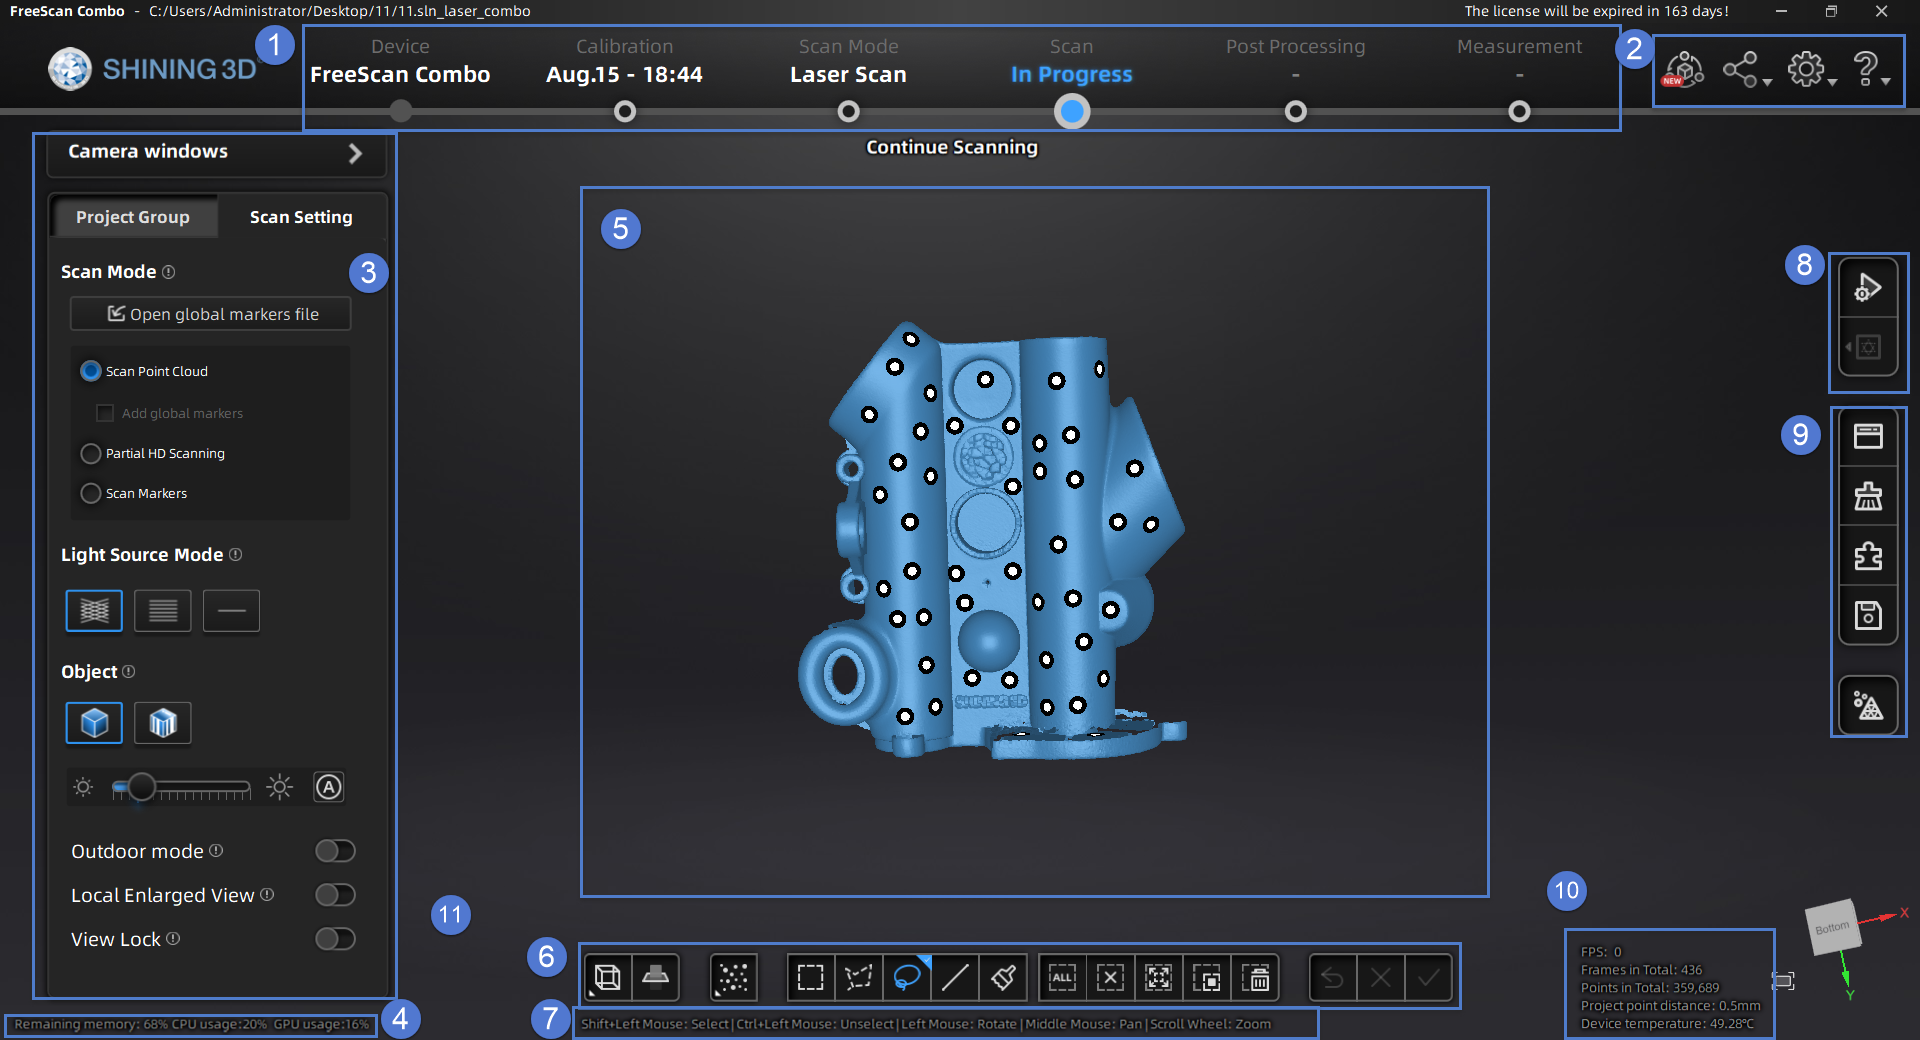
| ●Device: Display the device status: online / offline. Click  ●Calibration: Click it to calibrate. ●Scan Mode: Choose the scan mode. ●Scan: Go into scan process. ●Post Processing: Go into post processing after generate point cloud, which includes mesh and mesh editing. ●Measurement: To measure your model. |
||
| ●Reverse Engineering Service ●Link - Official Website: Open the official website of Shining 3D to learn about the company’s products and information. -Facebook: Enter Shining 3D’s Facebook to view product introduction and other operations. - Support Platform: Enter Shining 3D’s support platform to view product introduction and other operations. ●Settings - Advanced Mode: Check the box to select a smaller dot pitch when creating a new project1. - User Experience: To help us improve the user experience. We hope to be allowed to collect usage experience information and we will . - Factory Default: All settings can be restored to the initial settings, and the software will restart automatically. - Language: To set the language displayed in the software. - About: View related software release information, contact information, etc. ●Help - User Manual: Open the user manual. - Teamviewer: The quick access to remote assistance. Please send the ID and password in the pop-up window to the technical supporters for remote assistance. |
||
| ●Camera Window: To preview the actual scene during scanning. Parameters can be adjusted accurately through the camera window. ●Project Group: To manage projects and the project group. For more, see Project and Project Group. ●Scanning Parameters: To set scanning parameters. For more, see Setting. |
||
| ●Remaining memory. ●CPU usage: If the running program occupies a large proportion, it is recommended to close other software. ●GPU usage. |
||
| Window for viewing the preview and scanning model. | ||
| For more, see Data Edit。 | ||
| Quickly move the model or adjust the angle through shortcut keys. | ||
| For more, see Scanning。 | ||
| For more, see functions。 | ||
| To show information about FPS, Frames in Total, Points in Total, etc. |
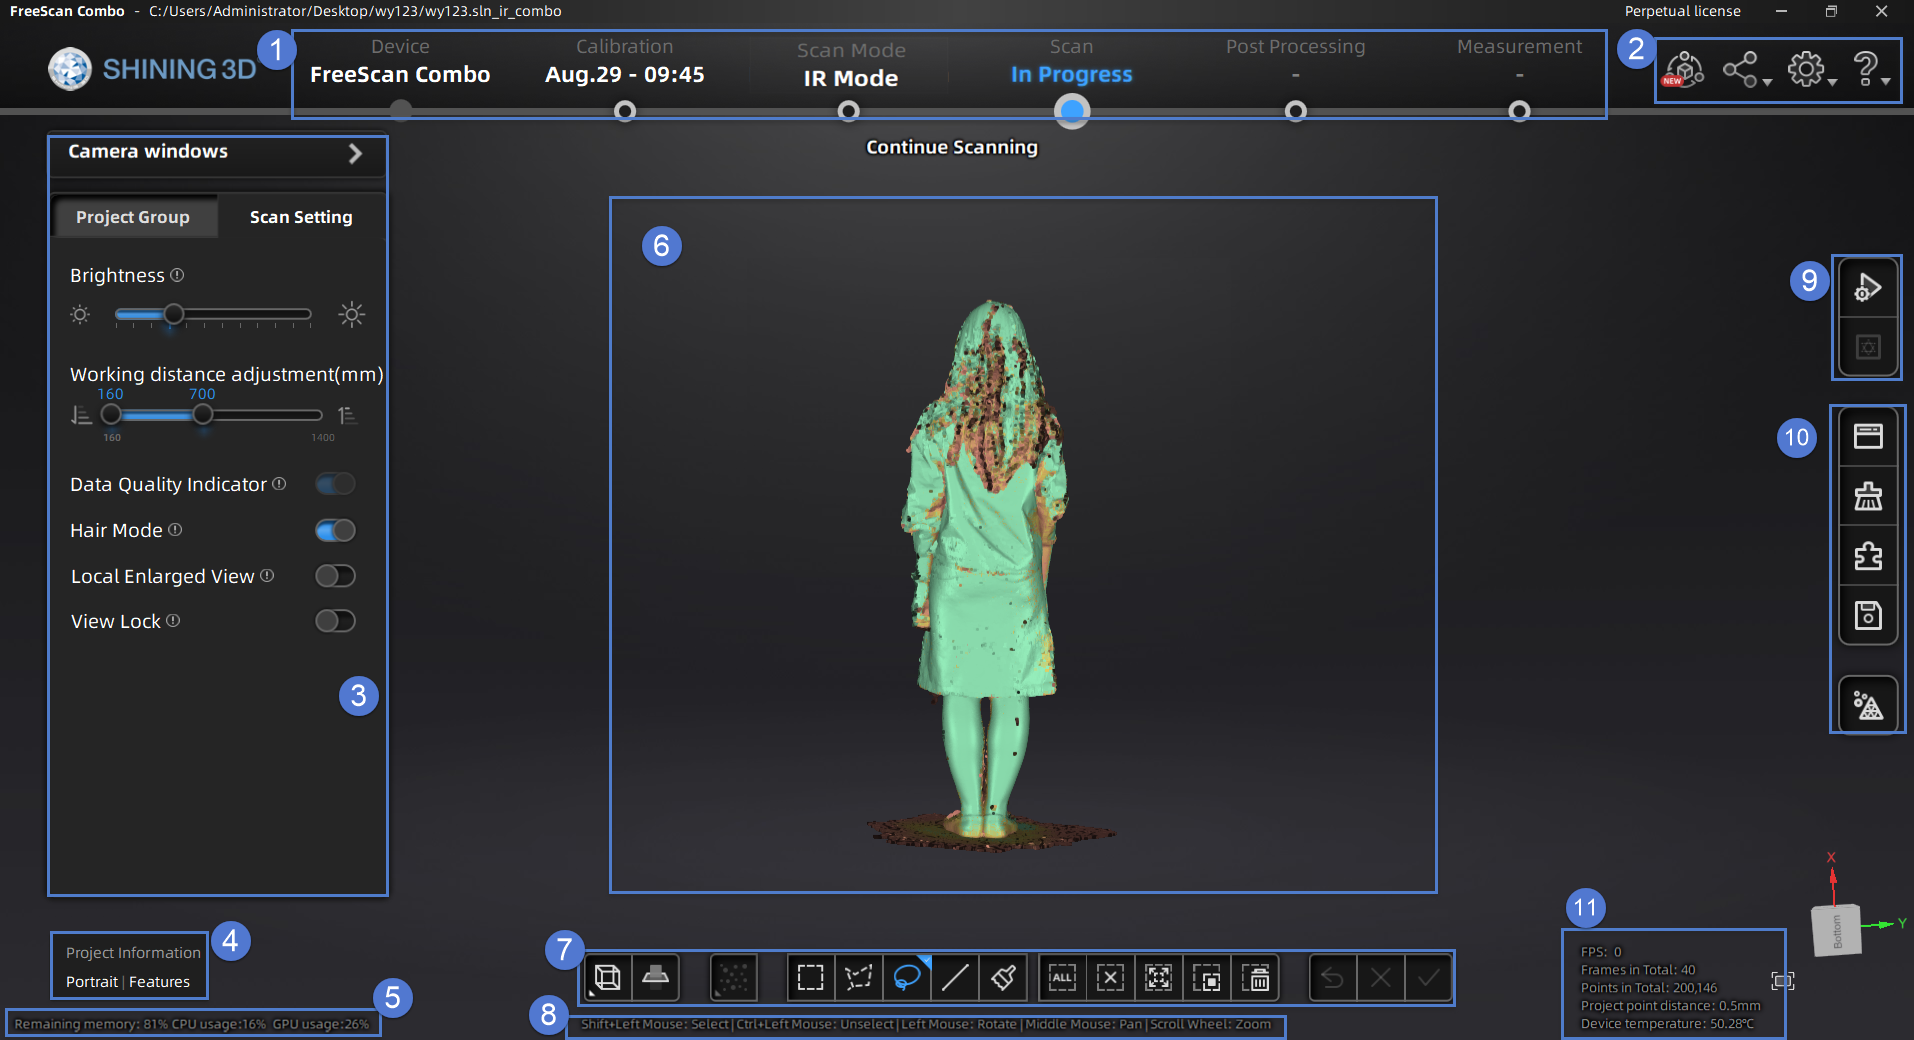
| ●Device: Display the device status: online / offline. Click ●Calibration: Click it to calibrate. ●Scan Mode: Choose the scan mode. ●Scan: Go into scan process. ●Post Processing: Go into post processing after generate point cloud, which includes mesh and mesh editing. ●Measurement: To measure your model. |
||
| ●Reverse Engineering Service ●Link - Official Website: Open the official website of Shining 3D to learn about the company’s products and information. -Facebook: Enter Shining 3D’s Facebook to view product introduction and other operations. - Support Platform: Enter Shining 3D’s support platform to view product introduction and other operations. ●Settings - Advanced Mode: Check the box to select a smaller dot pitch when creating a new project1. - User Experience: To help us improve the user experience. We hope to be allowed to collect usage experience information and we will . - Factory Default: All settings can be restored to the initial settings, and the software will restart automatically. - Language: To set the language displayed in the software. - About: View related software release information, contact information, etc. ●Help - User Manual: Open the user manual. - Teamviewer: The quick access to remote assistance. Please send the ID and password in the pop-up window to the technical supporters for remote assistance. |
||
| ●Camera Window: To preview the actual scene during scanning. Parameters can be adjusted accurately through the camera window. ●Project Group: To manage projects and the project group. For more, see Project and Project Group. ●Scanning Parameters: To set scanning parameters. For more, see Setting. |
||
| To show the information about the object size and the alignment mode. | ||
| ●Remaining memory. ●CPU usage: If the running program occupies a large proportion, it is recommended to close other software. ●GPU usage. |
||
| Window for viewing the preview and scanning model. | ||
| For more, see Data Edit. | ||
| Quickly move the model or adjust the angle through shortcut keys. | ||
| For more, see scanning。 | ||
| For more, see functions。 | ||
| To show information about FPS, Frames in Total, Points in Total, etc. |