Installation and Connection
Follow the instructions below to assemble or disassemble the device.
Tripod Installation
Before using the tracker, mount it on the tripod.
- Take the tripod out of the carrying case.
-
Open the tripod.
- Unlock the leg locks on legs 1 and 2.
-
Extend the legs and tighten the leg locks.
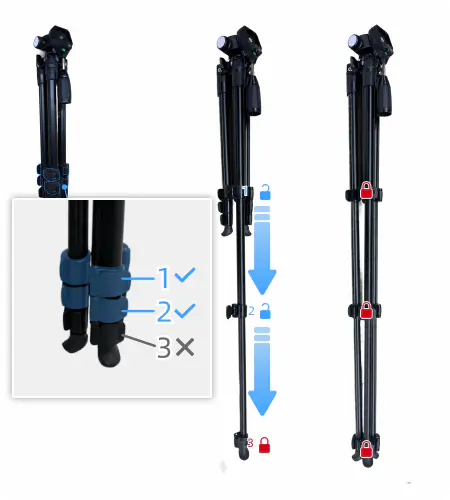
-
Open the tripod and place it on a flat surface.
-
Adjust the tripod.
-
Turn the knob counterclockwise, raise or lower the handle to adjust the bubble in the spirit level as shown, then tighten the knob clockwise.
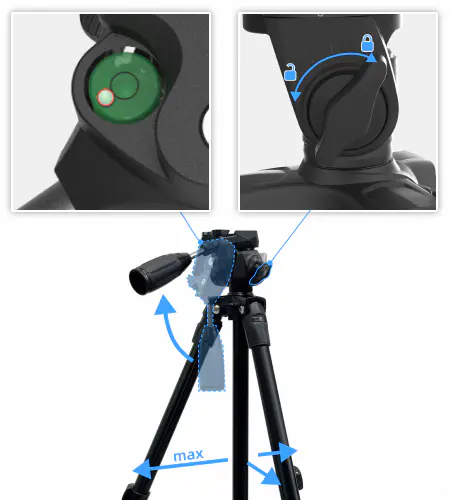
-
Pull down the switch, turn the latch counterclockwise to release it.
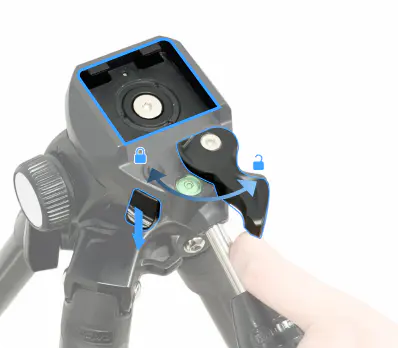
-
-
Place the tracker on the tripod head, turn the latch clockwise to lock it.
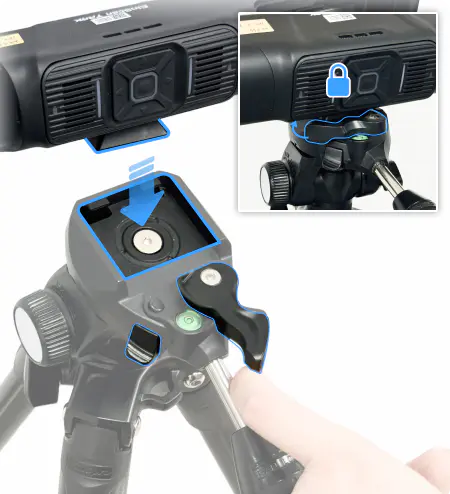
Ball Frame Installation and Removal
This device supports two usage modes: Using with the Ball Frame and Using the Scanner Independently.
Installing the Ball Frame
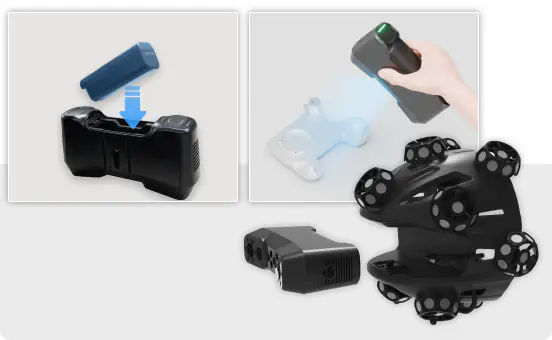
When scanning in Track Mode, mount the scanner on the ball frame for an integrated experience.
-
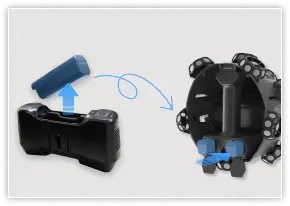
Power off the scanner and remove the battery from the scanner.
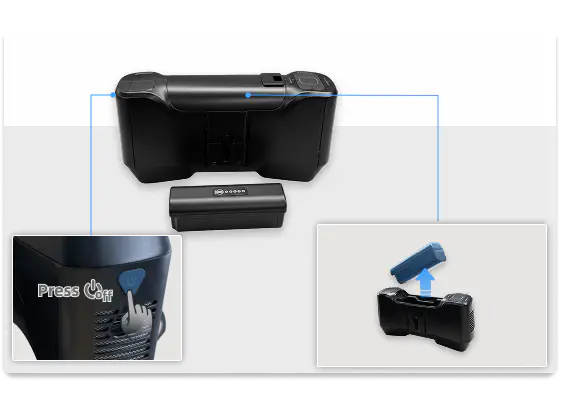
-
Place the scanner into the slot on the ball frame, and turn the latch at the bottom of the ball frame counterclockwise to lock it.
Col
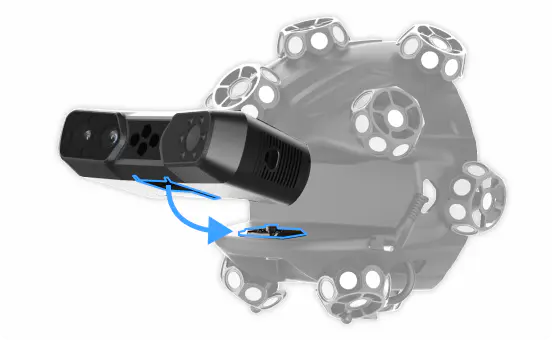
Col
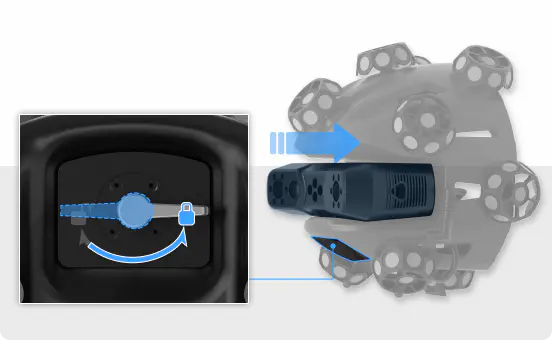
-
Use a Type-C cable to connect the scanner and the ball frame, and tighten the safety screw.
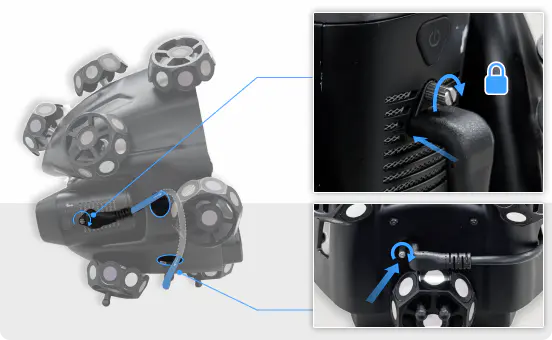
-
Insert the battery into the battery compartment of the ball frame.
Note
The device can function normally with only one battery installed; however, installing two batteries is recommended for longer battery life.
Removing the Ball Frame
When scanning in Scanner Mode, it is recommended to detach the scanner from the ball frame and use it as a standalone device.
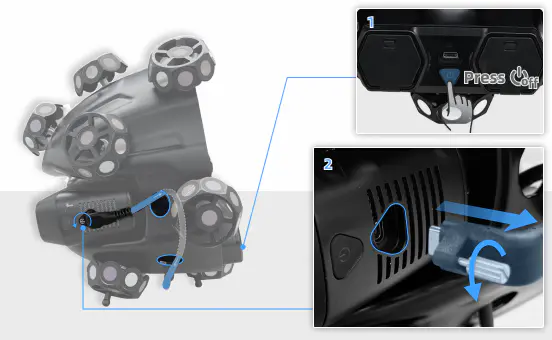
- Power off the scanner and remove the battery from the ball frame.
-
Loosen the safety screw on the Type-C cable end and disconnect the Type-C cable connecting the scanner and the ball frame.
-
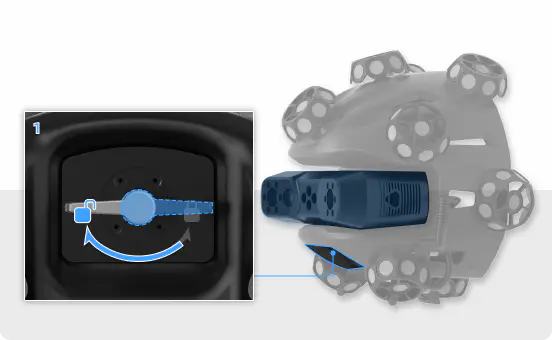
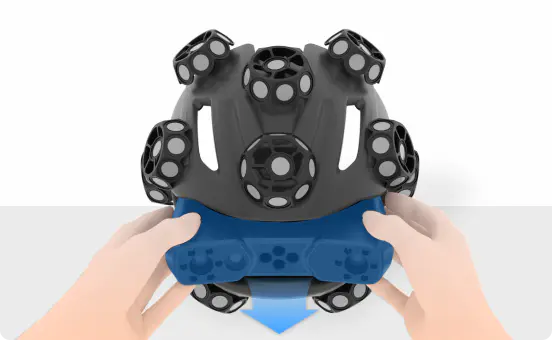
Place the ball frame flat on a table, turn the latch at the bottom of the ball frame clockwise to release it, then gently push the scanner downward and outward to remove it from the ball frame.
Col
Col
-
Insert the battery into the battery compartment of the scanner.
Device Connection
Follow the instructions below to connect the device using a wired or wireless method.
Wired Connection
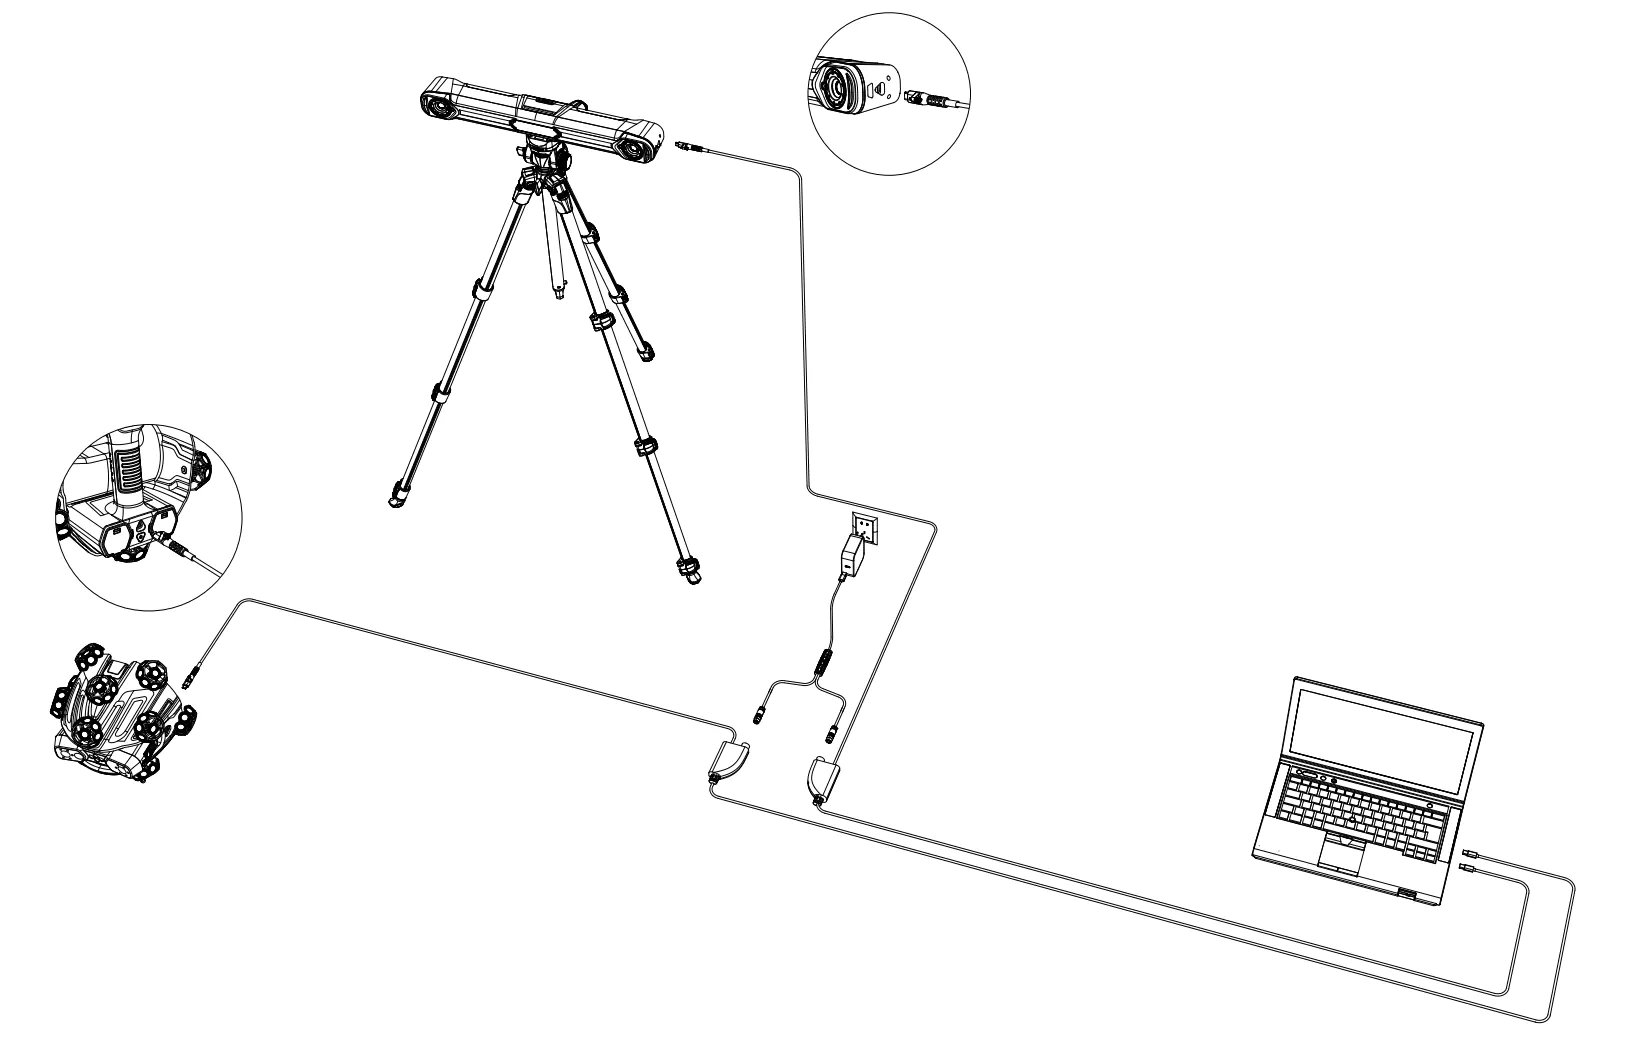
- Connect the power-data cable to the tracker and the scanner respectively.
- Plug the USB end of the power-data cable into the computer or docking station.
- Connect the power cable to the power adapter; the device will power on automatically.
- Launch the software and check the device connection status.
Wireless Connection
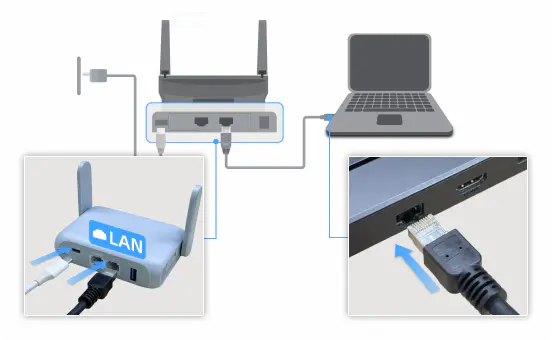
- Use an Ethernet cable to connect the computer to the LAN port of the router.
-
Connect the router to power.
-
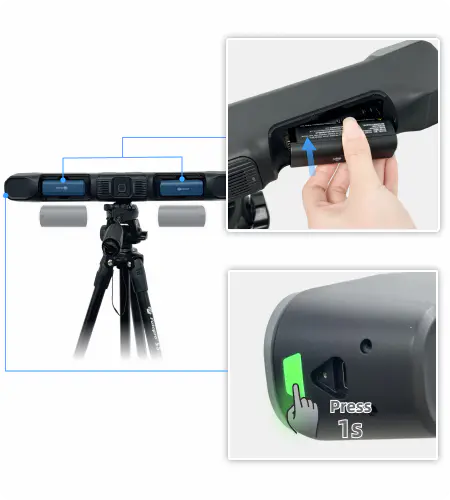
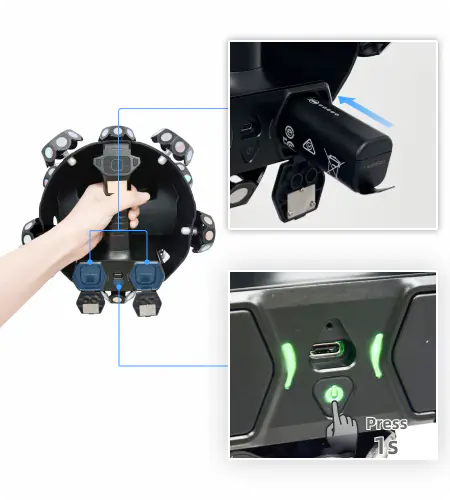
Install the appropriate batteries into the scanner and the tracker respectively.
-
Press the power button briefly to start the device.
Col
Col
-
Launch the software and check the device connection status.
Note
For more information on wireless device connection and related diagrams, please refer to Device Connection.