FAQ
You can find frequently asked questions and solutions for using this device in this chapter.
Channel Settings
If there are many wireless devices in use nearby, channel congestion may cause stuttering or frame rate drops during scanning. If this occurs, you can try changing the channel to resolve scan stuttering and frame drops:
Method 1
Note
This method applies when using the router that comes standard with this device.
-
Click
 > General > Channel Configurator > Configure.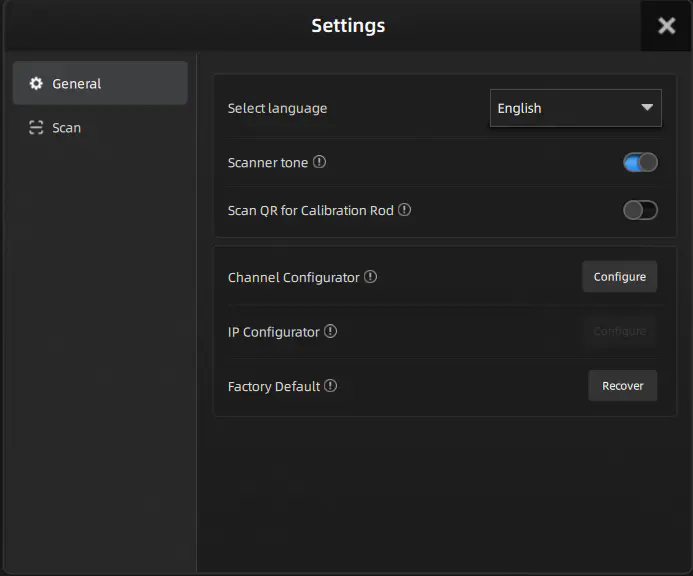
-
The software automatically verifies the router's IP and password.
Note
- Default IP: 192.168.10.1.
- Default password: shining3D123.
-
If the router's IP and password are correct, a channel selection window will appear.
-
Select a different channel.
Note
It is recommended to prioritize channels that are listed first and are non-DFS.
-
After configuration, the router will reboot. Please wait 1–2 minutes.
Method 2
Note
This method applies when using a different router.
- Connect the router to the computer and power it on.
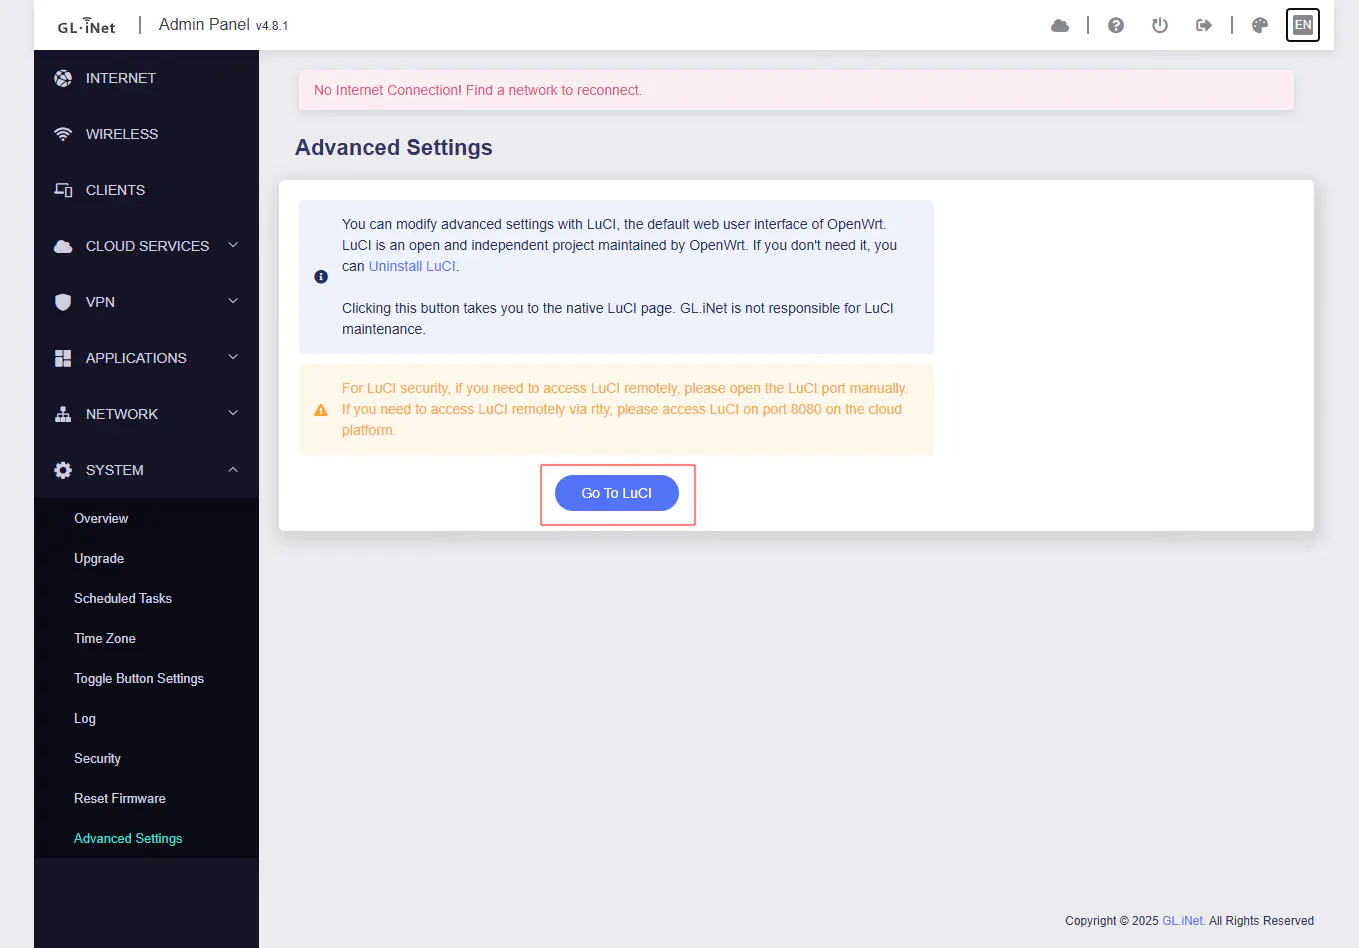
- Access http://192.168.10.1/#/advanced and enter the router's username and password.
-
Enter the website in the red area below (Go to LuCI) and enter the username and password.
-
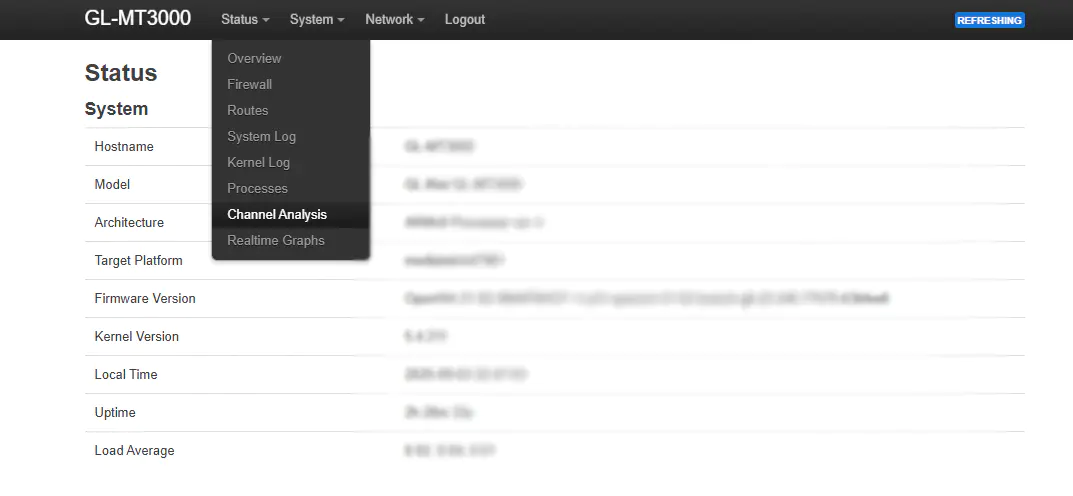
Select Channel Analysis from the Status tab at the top.
-
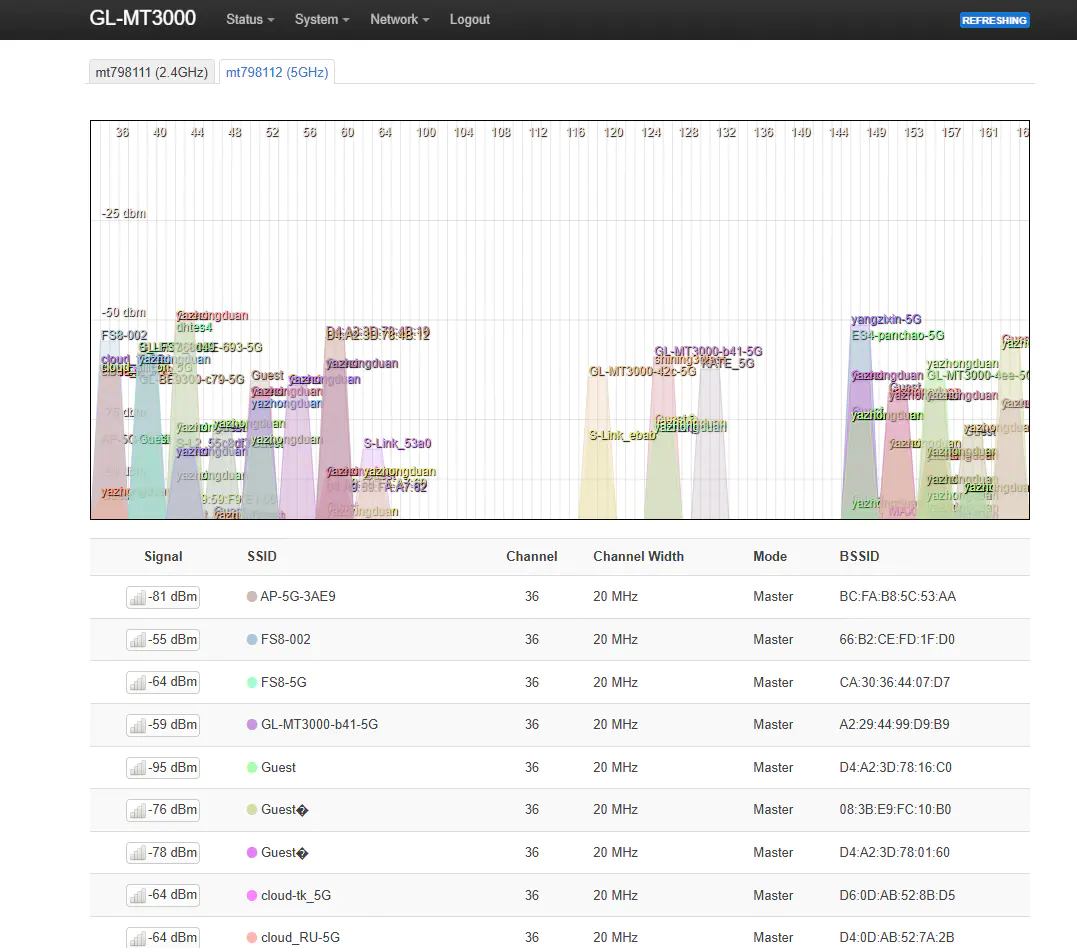
Select 5GHz to view the wireless networks and their channels in the current environment.
-
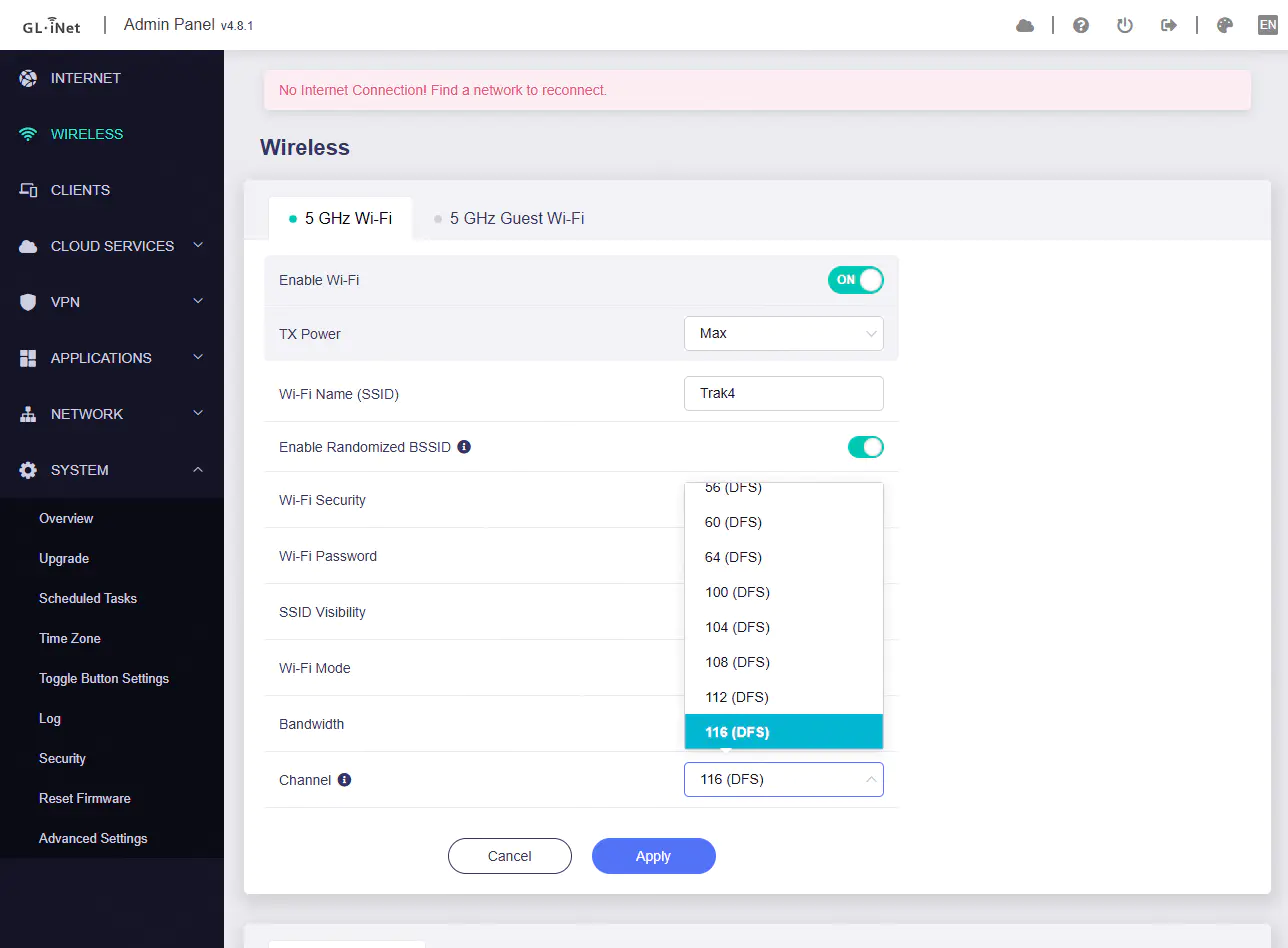
Return to the router management panel and select Wireless (http://192.168.10.1/#/wireless) from the navigation bar.
-
Based on the channel results from Step 5, select a cleaner channel (e.g., 100 / 104 / 108 in this example).
-
Click Apply and wait for the device to reconnect successfully.
Note
If reconnection fails, try switching to a DFS channel.
High-Performance Settings
- Press
Win+R→ entercmd→Ctrl+Shift+Enter(Administrator CMD). - In the Command Prompt (CMD) window, enter
powercfg /listand press Enter to view all power plans on this computer. -
If the High Performance plan already exists in the list, continue entering
powercfg -setactive 8c5e7fda-e8bf-4a96-9a85-a6e23a8c635cin the Command Prompt (CMD) window to directly activate the High Performance plan.Note
If the High Performance plan cannot be found in the list, enter
powercfg -duplicatescheme 8c5e7fda-e8bf-4a96-9a85-a6e23a8c635cto recreate the High Performance plan, and then enterpowercfg -setactive 8c5e7fda-e8bf-4a96-9a85-a6e23a8c635cto activate it. -
In the Command Prompt (CMD) window, enter
powercfg /listand press Enter to check whether the currently active power plan is High Performance.
Note
The plan marked with an asterisk * is the currently active plan.