Institution
On the Institution, you can view and manage the basic information, authentication details, member permissions and other settings of the current institution.

Note
If an user is an ordinary member, the user have no right to change the setting of institution.
Dissolve Institution
When the current institution is no longer in use, you can use this function to dissolve the institution. After the institution is dissolved, all institution-related data including orders, relationship networks, members, patients, etc. will be automatically cleared. Please check if there are any unfinished orders and handle them promptly. If you have other institutions still in use, you can use the data transfer function to migrate data from the institution to be dissolved to the institution still in use.
Click the ellipsis ![]() in the upper right corner of the page, and click Dissolve Institution
in the upper right corner of the page, and click Dissolve Institution ![]() in the dropdown list to dissolve the current institution.
in the dropdown list to dissolve the current institution.
Note
- Dissolving an institution does not affect the normal use of the current account, which can still log in to the cloud platform normally.
- After the institution is successfully dissolved, the data cannot be recovered, so please make appropriate backups.
Data Transfer
If you have multiple institutions and need unified data management, you can merge data from multiple institutions through data transfer.
Click the ellipsis ![]() in the upper right corner of the page, and click Data Transfer
in the upper right corner of the page, and click Data Transfer ![]() in the dropdown list to export or receive data.
in the dropdown list to export or receive data.
Data Export
Click ![]() Data Transfer > Data Export to start the export process and complete the export steps according to the interface prompts.
Data Transfer > Data Export to start the export process and complete the export steps according to the interface prompts.
Note
- Cross-border data transfer is currently not supported.
- Data migration is only supported to verified institutions of the same nature.
- After data export, it will no longer be possible to view and manage data in this institution.
- Please contact the receiving institution in advance, as the final step of export requires entering the receiving institution's receive code to initiate the transfer.
Data Receiving
Click ![]() Data Transfer > Data Receiving to start the receiving process and complete the receiving steps according to the interface prompts.
Data Transfer > Data Receiving to start the receiving process and complete the receiving steps according to the interface prompts.
Note
- Cross-border data transfer is currently not supported.
- Only institutions that have completed uniqueness verification can receive data.
- After successful data receipt, the data will be managed by the receiving institution.
- Please contact the exporting institution in advance, as the final step of receiving requires entering the exporting institution's verification code to initiate the receiving.
Site Switching
When using different sites, you can use the site switching function to modify the data storage site.
Click the ellipsis ![]() in the upper right corner of the page, and click
in the upper right corner of the page, and click ![]() Site Switching in the dropdown list to open the site settings window for storage site switching or site data migration.
Site Switching in the dropdown list to open the site settings window for storage site switching or site data migration.
Note
- Site switching can only be changed once per calendar year.
- After switching sites, patient data will be synchronized to the new site.
- After switching sites, newly uploaded data can be viewed on the new site, but old data still needs to be viewed on the original site. If you need to switch all data to the new site for viewing, please use the data migration function.
Basic information
You can view and change the address, contact person, contact information, default conversion format, automatic review mechanism, and other information of the current institution.
- Click Reset to undo all the modifications made on this page that have not been submitted.
- Click Submit to directly save the changes.
Payment Settings
On this page, you can view payment records and cards detail.
Payment Records:
-
You can view payment records under the current institution, including case No., payment account, payment channel, payment amount (or credits), payment time, and payment status.
-
You can set filter conditions (e.g., Case No., Account Name, Payment Time, etc.) to filter the payment records.
Note
-
Click Export in the top right corner to export the payment records under the institution as an Excel.
-
After setting the filter conditions, you can click Reset to undo the applied filter conditions.
Cards Detail:
-
You can view the credits value and remaining credits for gift card or stored value card.
-
You can set filter conditions (e.g., Card Type, Card No., etc.) to filter the cards detail.
Note
-
Click payment details
 on the operation column to view the payment records.
 -
After setting the filter conditions, you can click Reset to undo the applied filter conditions.
Credit Cards Purchase History
View credit card purchase history, where you can cancel payments for orders in payment status, make repayments, etc.; if the order has been completed, you can download the invoice for the corresponding order.
Notification settings
In this interface, the administrators can set the types of messages received by the members and can set notifications for connection members' information changes and order status. The ways to receive messages include SMS, E-mail, and Messages. The top right corner of the interface shows the SMS used statistics for the month.
Warn
- For members to receive the messages successfully, the types of messages set by administrators must match the ones set by the members.
- Enabling messages and disabling SMS notifications can help reduce costs.
- When accessing Shining 3D Dental Cloud via the Apple Safari browser, make sure to enable the Auto-Play to receive audible notifications for messages.
- Click Reset to undo all the modifications made on this page that have not been submitted.
- Click Submit to directly save the changes.

Customized settings
You can view and change the OEM customization information for the current institution. This includes the institution logo in three language modes, the logo on inspection reports, and background images.
- Click Reset to undo all the modifications made on this page that have not been submitted.
- Click Submit to directly save the changes. The modification records will be synchronized in the Information List on the right side.
- Click Edit allows you to edit the historical upload information.
- Click the Delete to delete the specific information.
Device Management
You can view the information of bound devices and unbind already bound devices here.
Note
Only the first-time device binding can earn credits.
Uniqueness verification
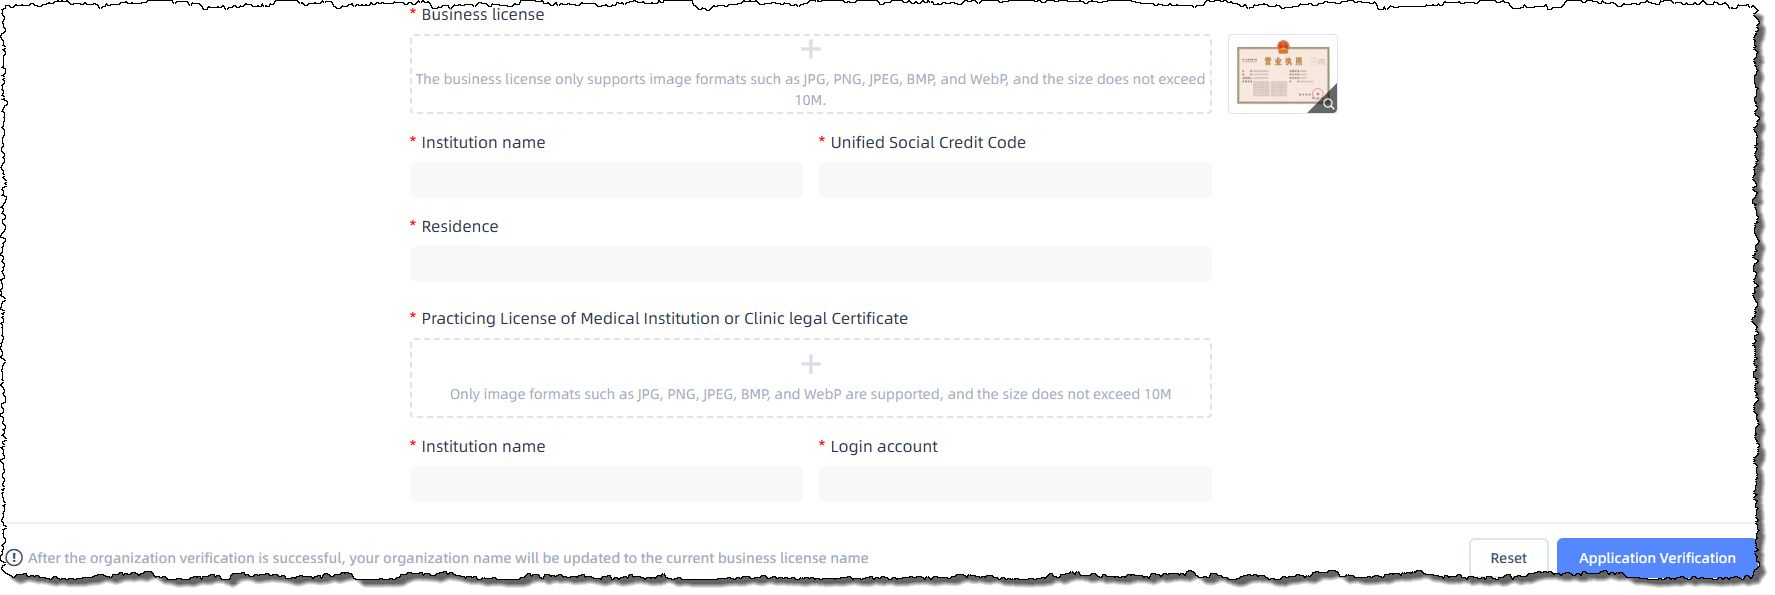
You can perform institution verification or view the authentication information for the current institution. This includes business licenses, declaration letters, and other relevant information.
Image requirements
- The business license only supports image formats such as JPG, PNG, JPEG, BMP, and WebP, and the size does not exceed 10 M;
- It is essential to ensure that the national emblem, the seal of the superior supervisory department, and other elements are clear and complete. The document must include a document border and ensure that there is no obstruction, smudging, watermarking, or damage to the document.
- The declaration letter only supports image formats such as JPG, PNG, JPEG, BMP, and WebP are supported, and the size does not exceed 10 M; Please print the template and affix the official seal, then take a photo or scan it for uploading.
Buttons introduction
- Click the Reset button will undo all the changes made on this page that have not been submitted.
- Click the Apply for Verification button will submit the verification information and wait for review.
- Click the Cancel Verification button will cancel the currently submitted or approved verification information.
Note
Verified institutions will display a verification badge![]() , which serves as proof of the authenticity of your institution for your customers to confirm.
, which serves as proof of the authenticity of your institution for your customers to confirm.
Third party
You can view and add the third party information.
- Click Add to open a dialog where you can enter the name of the target third-party platform and Submit it.
- Click Cancel Authorization
 and a two-step confirmation dialog will pop up. Click Confirm to cancel authorization.
Lab quotation
You can view the product information provided by labs, including product names, images, prices, and other relevant details.
Permission settings
You can view the basic information (such as phone numbers and email) of ordinary members in the institution and change their additional permissions, including the permissions to view members, establish connection, and view patients and cases of other members.
Dental disease template
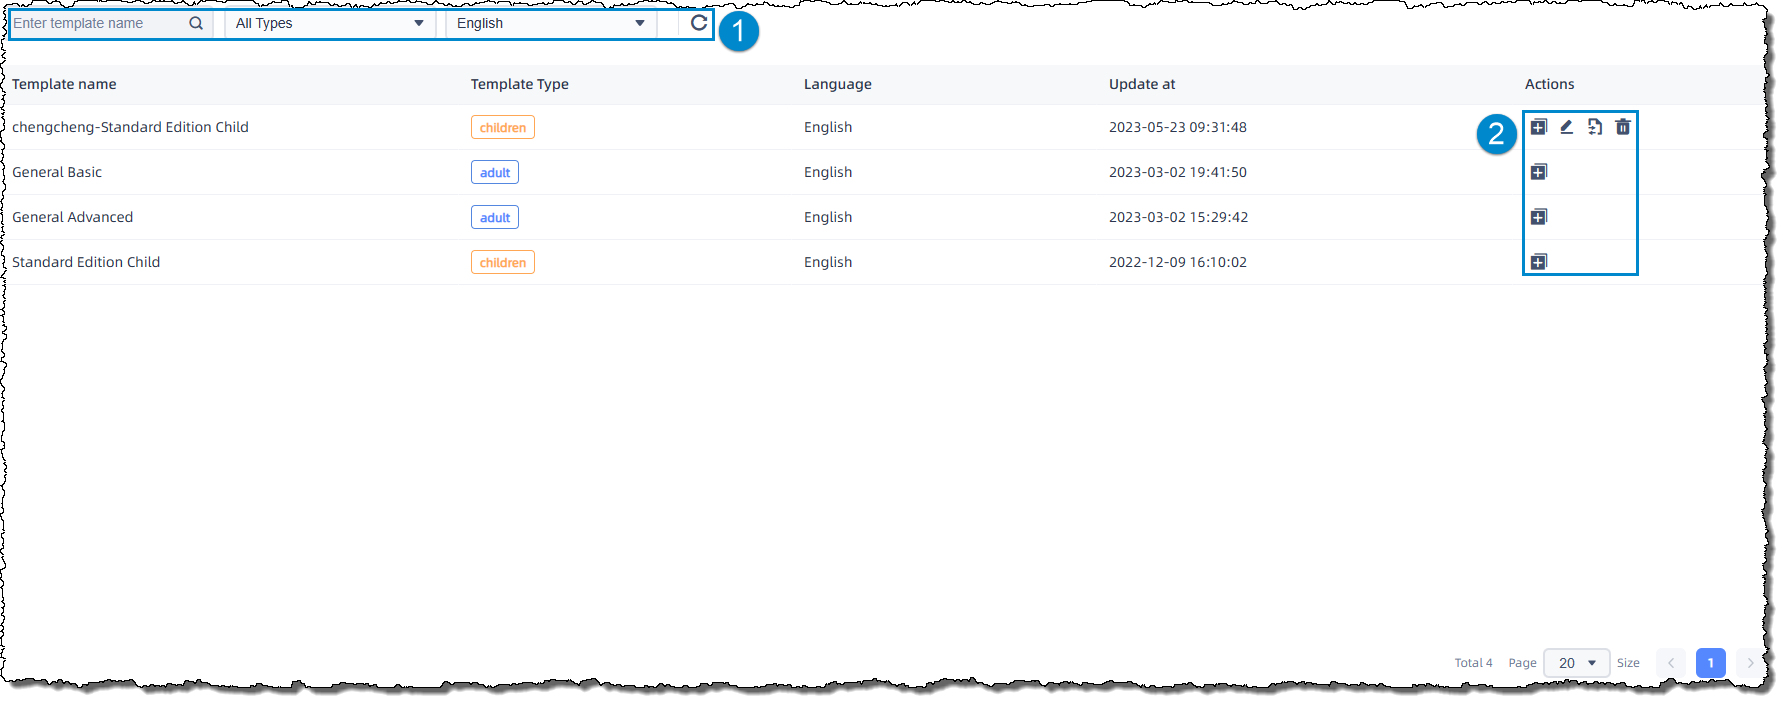
Six templates are available, which you can duplicate one of it and generate new templates.
①: You can filter templates by name, type and language. To reset the filter, click Reset ![]() .
.
② Buttons introduction:
![]() Copy: Click this button and a Copy Template dialog will pop up for you to enter the new template name.
Copy: Click this button and a Copy Template dialog will pop up for you to enter the new template name.
![]() Edit: Click this button to navigate to the edit area.
Edit: Click this button to navigate to the edit area.
![]() Import and export: Click this button and a dialog will pop up for you to import and export of dental templates (Only xls and xlsx format files are supported with size does not exceed 500kb).
Import and export: Click this button and a dialog will pop up for you to import and export of dental templates (Only xls and xlsx format files are supported with size does not exceed 500kb).
Please expand the admonitions below for more details.
Note

Click Add Type to add new disease type. You can select the classification and enter the description and plan.
: Add sub disease.
![]() : Add plan of main disease and sub-disease.
: Add plan of main disease and sub-disease.
![]() : Delete main disease and sub-disease.
: Delete main disease and sub-disease.
Instruction:
- Each disease can only be added once.
- If delete a disease, its sub-diseases will also be deleted.
- Click Cancel to exit the editing mode, but any added content will be saved for the next time you edit this template.
![]() Delete template: Click this button and a two-step confirmation dialog will pop up. Click Confirm to delete the template.
Delete template: Click this button and a two-step confirmation dialog will pop up. Click Confirm to delete the template.