Calibration
Calibration readjusts the device parameters, ensuring both accuracy and scanning quality.
Calibration is required under the following conditions:
- The device has been idle for 1 ~ 2 weeks.
- The device was severely shaken or vibrated during transportation.
- Scanned data is incomplete or data quality has significantly degraded during scanning.
- Scanning accuracy has significantly dropped, such as frequent alignment failures or the inability to recognize markers.
Precautions
- Do not wipe the calibration tools with any chemical liquids.
- After using the calibration tools, store them properly.
- The calibration tools are for calibration purposes only.
- Do not place heavy objects or sundries on the calibration tools.
- Keep the calibration tools away from corrosive solutions, metals, and sharp objects.
- Ensure that the markers on the calibration tools are not damaged or stained, and that the front side of the calibration board is clean and free of scratches.
- After powering on the device, allow sufficient warm-up time before performing calibration to ensure accuracy stability.
Calibration Operation
Follow the on-screen calibration wizard to complete the calibration step by step.
Note
To enlarge the calibration interface, press F11 for full-screen display. In full-screen mode, press F11 or Esc to exit.
Tracker Calibration
-
Extend the tripod and place it on a flat surface.
Note
-
Please clear the calibration area in advance and ensure sufficient space as shown in the diagram.
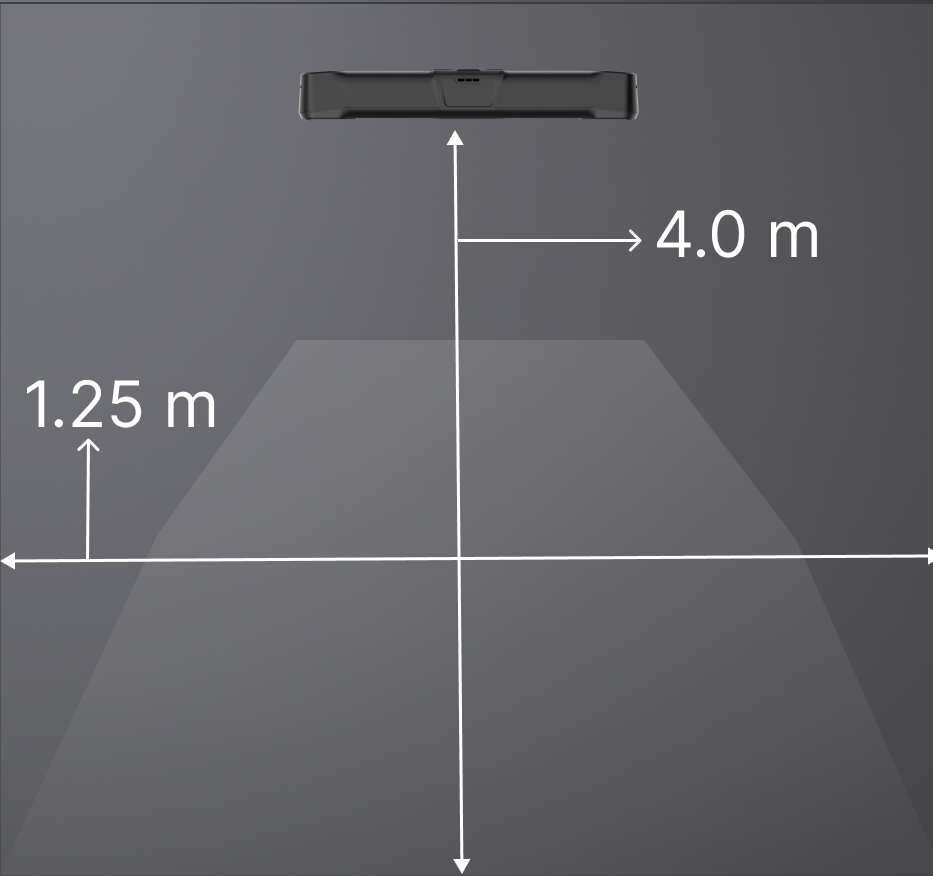
-
Extend 2 sections of the tripod legs and adjust the height of the tripod head to ensure sufficient height for calibration. For detailed guidance for tripod installation, please refer to the Installation and Connection section.
-
-
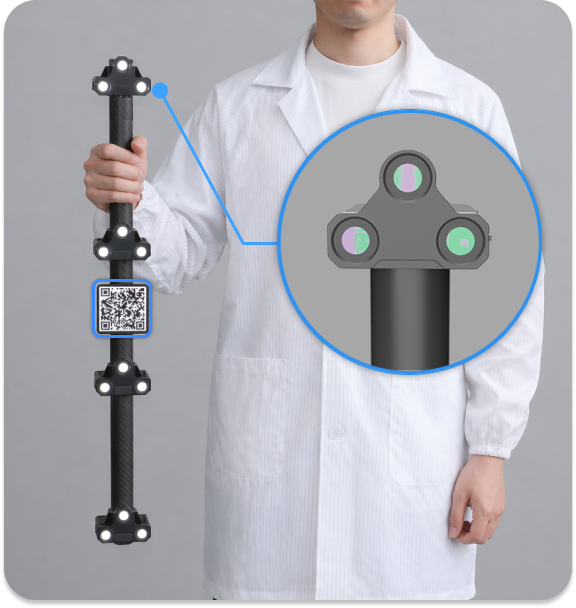
Use the tracker to scan the QR code on the calibration rod as shown on the screen; once the QR code is successfully scanned, the tracker calibration can begin.
Note
- Supports Quick Calibration and Standard Calibration. In general, Quick Calibration is sufficient. If the scanning accuracy decreases, please perform Standard Calibration.
- If you confirm that the calibration rod number matches the factory-configured number exactly, click
 in the upper right corner to disable the Scan QR for Calibration Rod feature. Once disabled, re-entering Tracker Calibration will skip the QR code scanning step.
-
Stand in the visual field of the tracker holding the calibration rod.
-
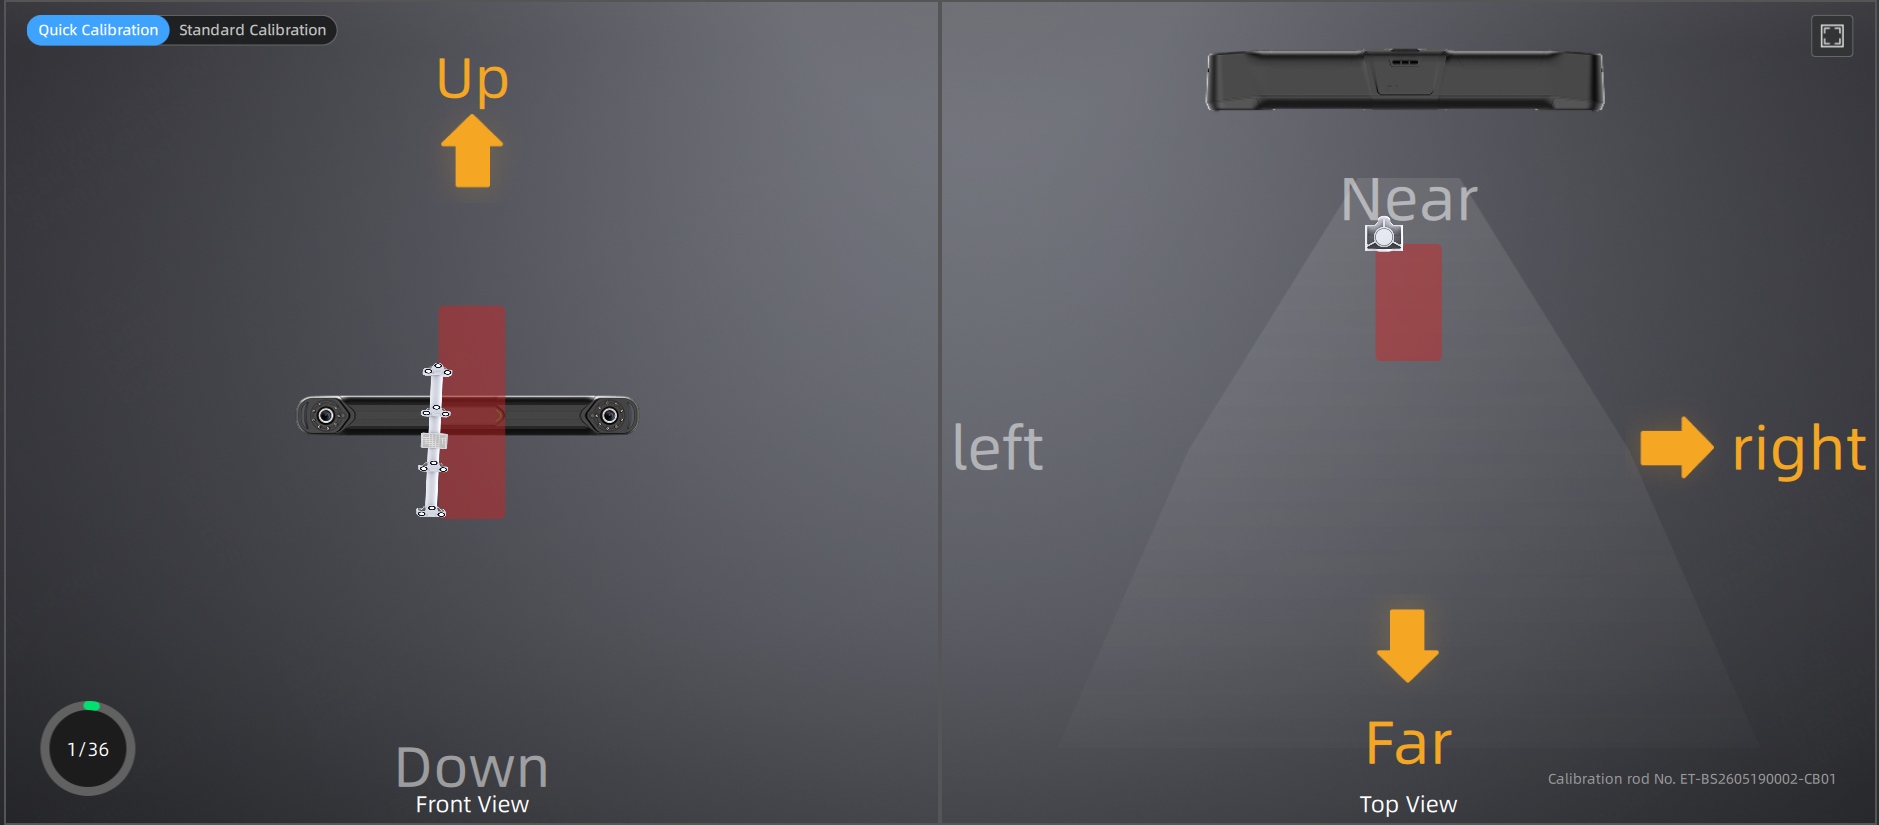
According to the on-screen guidance, move the calibration rod to the corresponding positions. The position indicator on the interface will turn green.
Note
Once the calibration for that position is successful, the device will beep once.
-
Change the handheld angle according to the on-screen guidance until all angles and positions are calibrated.
Note
- Do not cover or damage the markers on the calibration rod.
- This calibration mode requires both the tracker and the scanner to be online.
- If the calibration rod is not recognized during calibration, follow the on-screen diagram to adjust the rod direction so that it is in the correct calibration position in both the front view and the top view.
System Calibration
Note
- Before performing system calibration, the ball frame must be installed.
- This calibration mode requires both the tracker and the scanner to be online simultaneously.
-
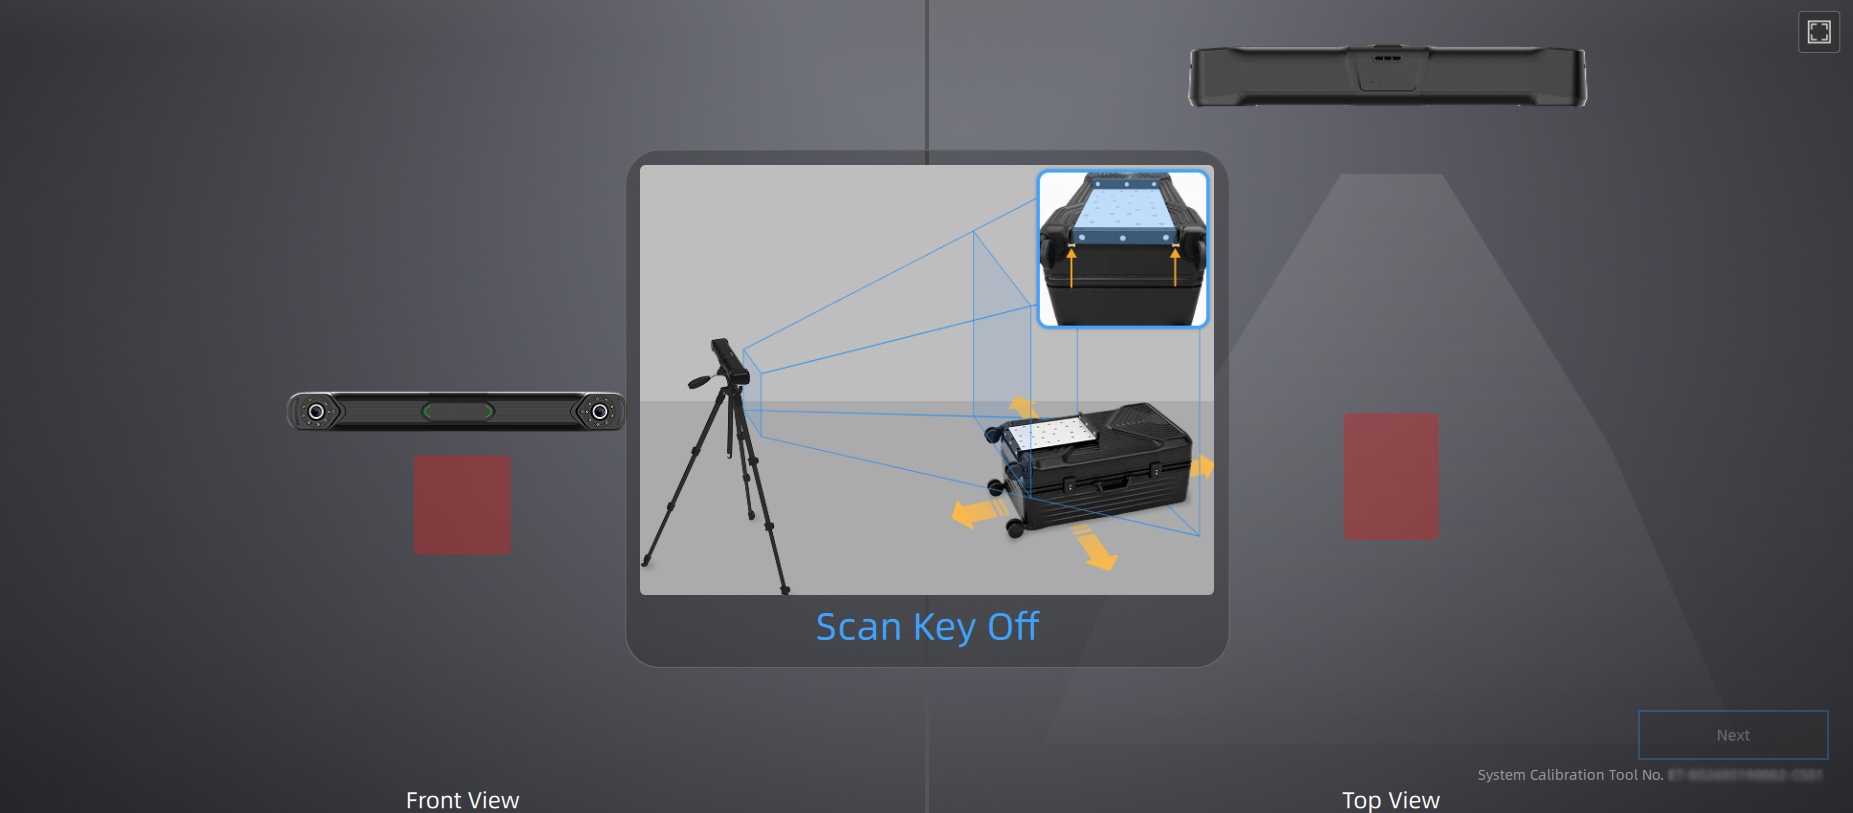
Place the calibrator in the position indicated on the carrying case, and adjust the tracker angle until the calibrator is shown in the green range on the software interface. If the carrying case is not available, place the calibrator on a stable surface and then adjust the tracker angle.
-
Click Next or press the scan button of the scanner to proceed with system calibration.
-
Align the three-dimensional graphics and coordinates of the scanner with the diagrams on the interface one by one to complete the calibration for all positions.
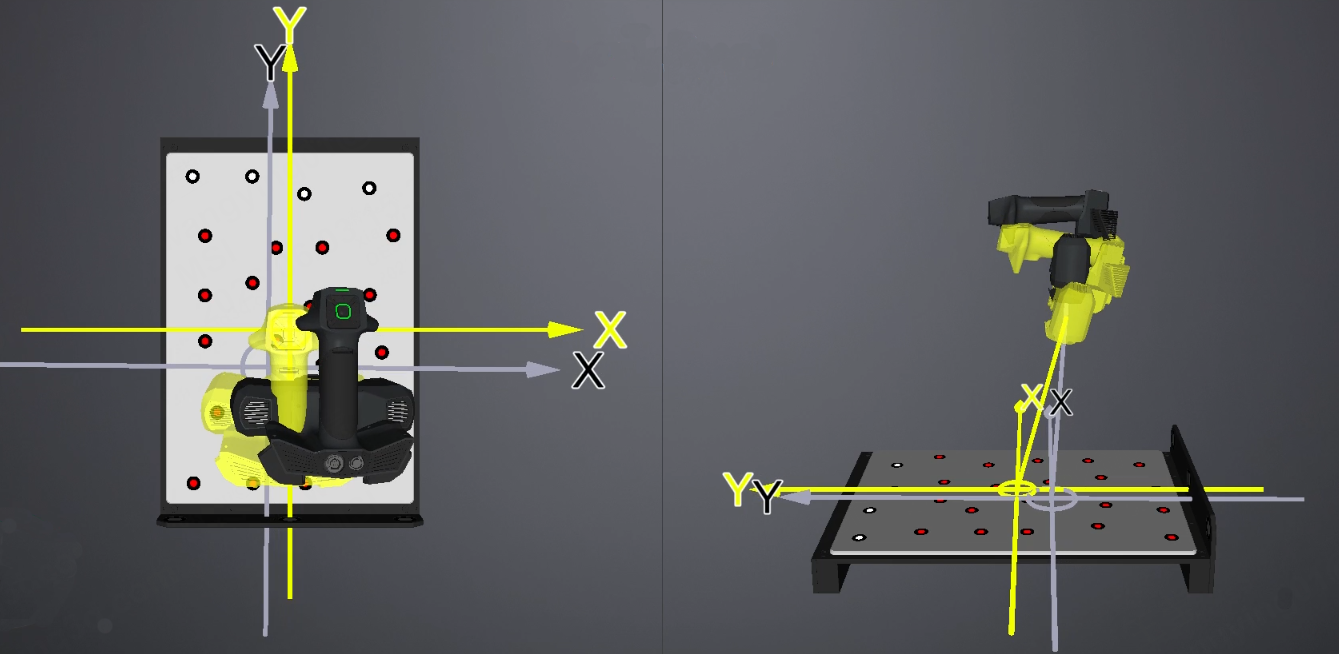
- Green on the scanner model means it is aligned. Please stay still and wait for calibration.
- Red or yellow on the scanner model means it is too far from the target position. Please move as shown in the illustration.
-
Hold the scanner vertically within the tracker's field of view.
-
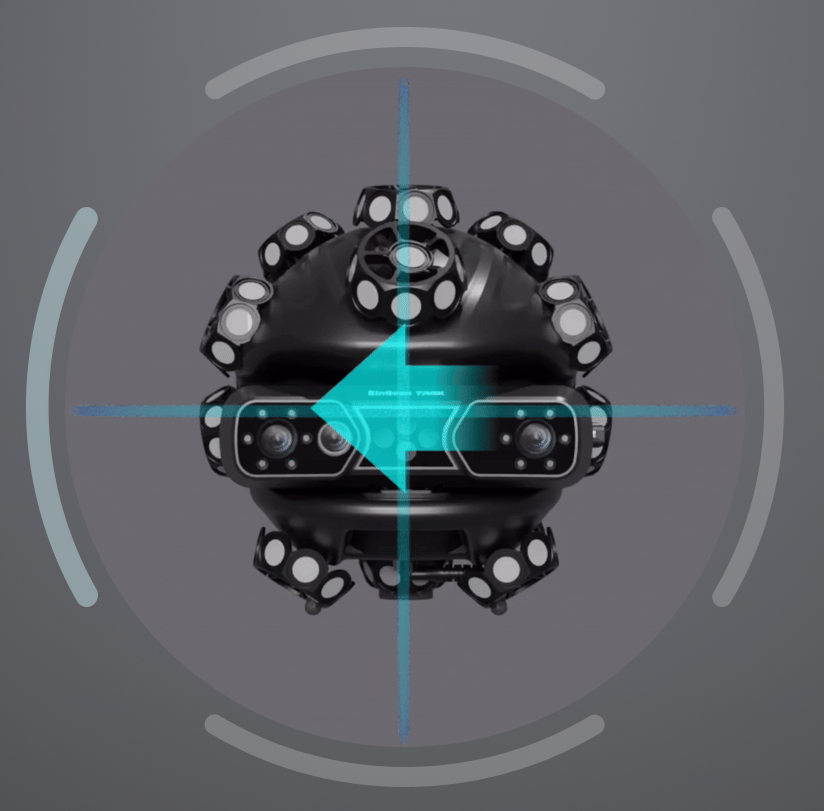
Once the tracker identifies the scanner, rotate the scanner in the specified direction as prompted by the interface to complete the ball frame construction in all directions.
Scanner Calibration
When only the scanner is online, you can calibrate the scanner. Align the three-dimensional graphics and coordinates of the scanner with the diagrams on the interface one by one to complete the calibration for all positions.
White Balance Calibration
When performing texture scanning with the device, please perform white balance calibration before scanning.
Note
Please ensure that the ambient light for white balance calibration is consistent with the ambient light when scanning.
- Please point the scanner at a white wall or calibration board.
- Hold the scanner and adjust the distance from the wall until the height distance bar on the interface turns green.
- Keep the scanner still until the interface indicates that the white balance calibration is complete.