Home Screen
After launching the software, you will automatically enter the home screen. You can quickly access recent project group files, create or open project groups, and jump to other interfaces.
Note
If this is your first time launching the software, you will automatically enter the beginner tutorial, where you can learn the basic operations of this device and software. After completing the beginner tutorial, you can view it again in Learning & Support > Beginner Tutorial.
Overview
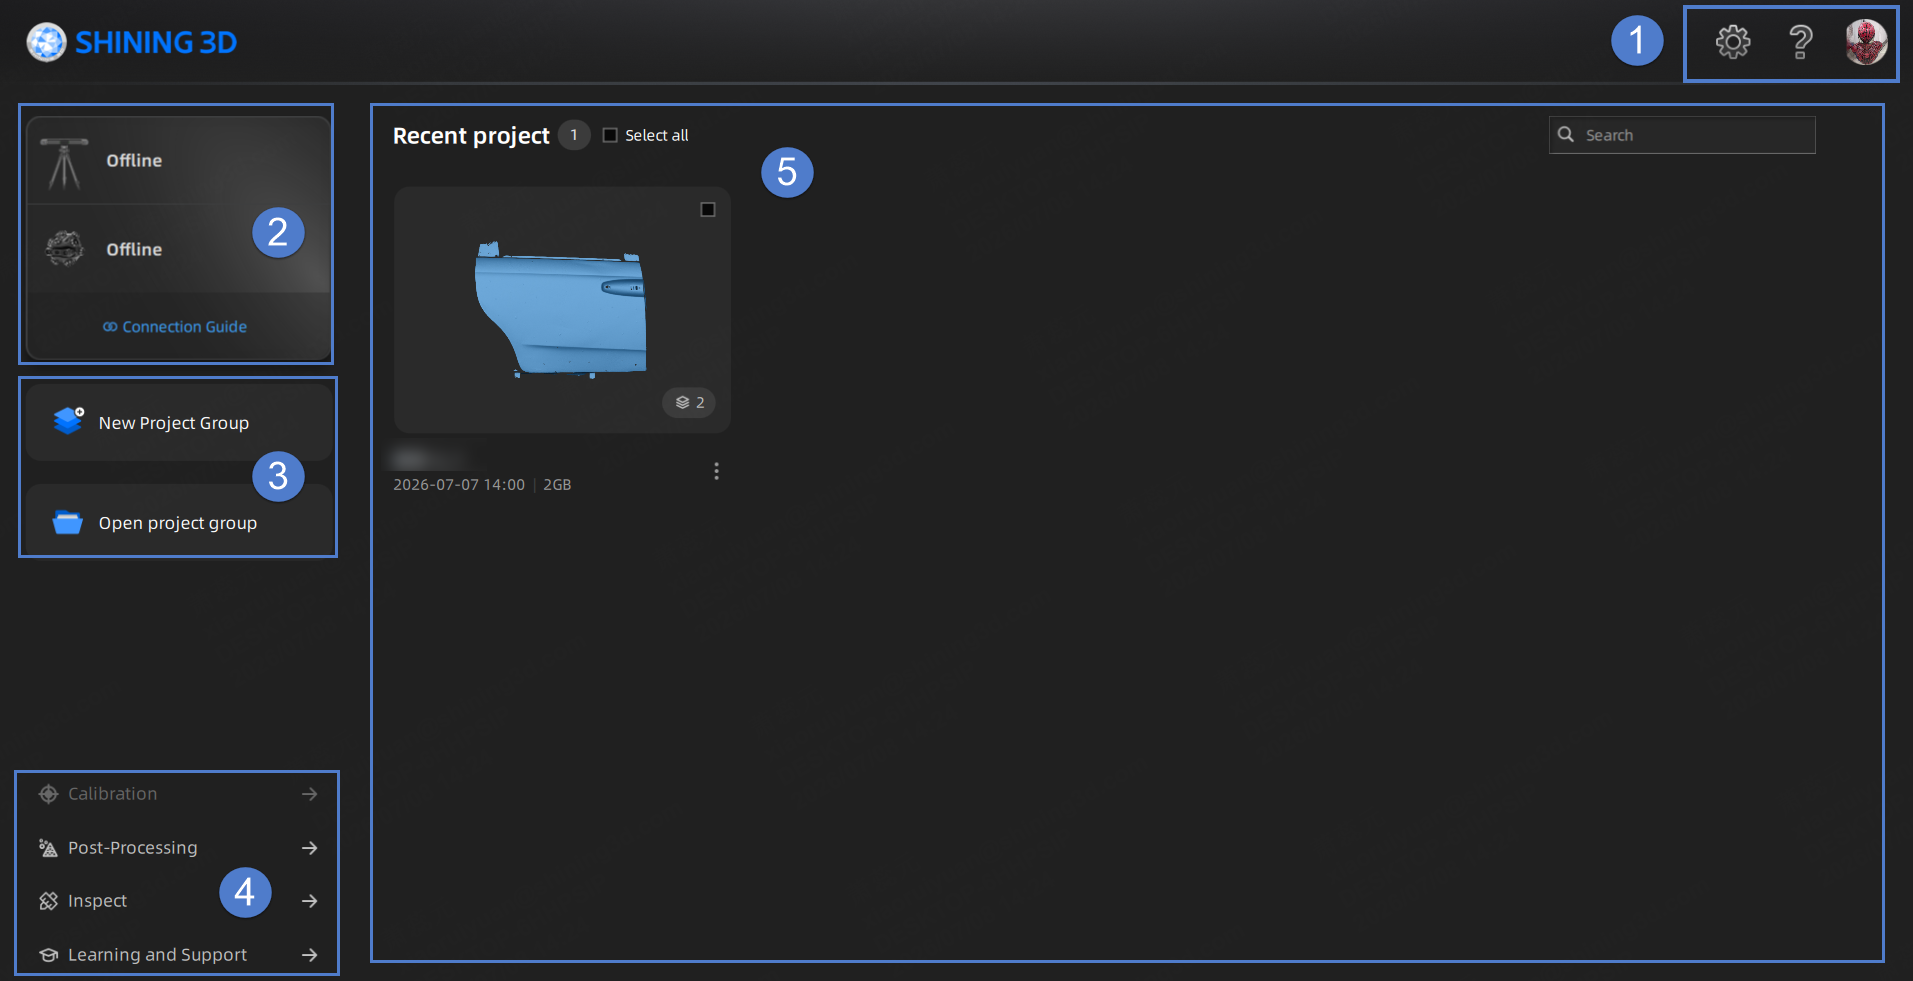
① Top Right Corner
General Settings
- Select Language: Choose the language for software.
- Scanner Tone: Turn the scanner beep on or off.
- Scan QR for Calibration Rod: This feature is enabled by default. When enabled, performing Tracker Calibration requires using the tracker to scan the QR code on the calibration rod, ensuring the number matches the factory-configured number exactly.
-
IP Configurator: When the device cannot be used properly due to network IP issues, you can use the IP configurator.
Note
If the device cannot connect to the software or the computer cannot connect to the Internet after connecting the device to the laptop, you can try adjusting the network card priority through the IP configurator.
-
Factory Default: Click Recover to restore all settings to their defaults. The software will restart automatically.
Scan Settings
- Scan Preview: When enabled, you can preview the scan before scanning.
- Laser Turns Off Intelligently: When enabled, the scanner will not project laser lines when no data is detected during marker scanning.
- Tracking Distance: When enabled, in Track Mode > Scan Point Cloud, Local Resolution or Hybrid Leapfrog, the interface displays the real-time distance between the scanner and the tracker (unit: meters).
-
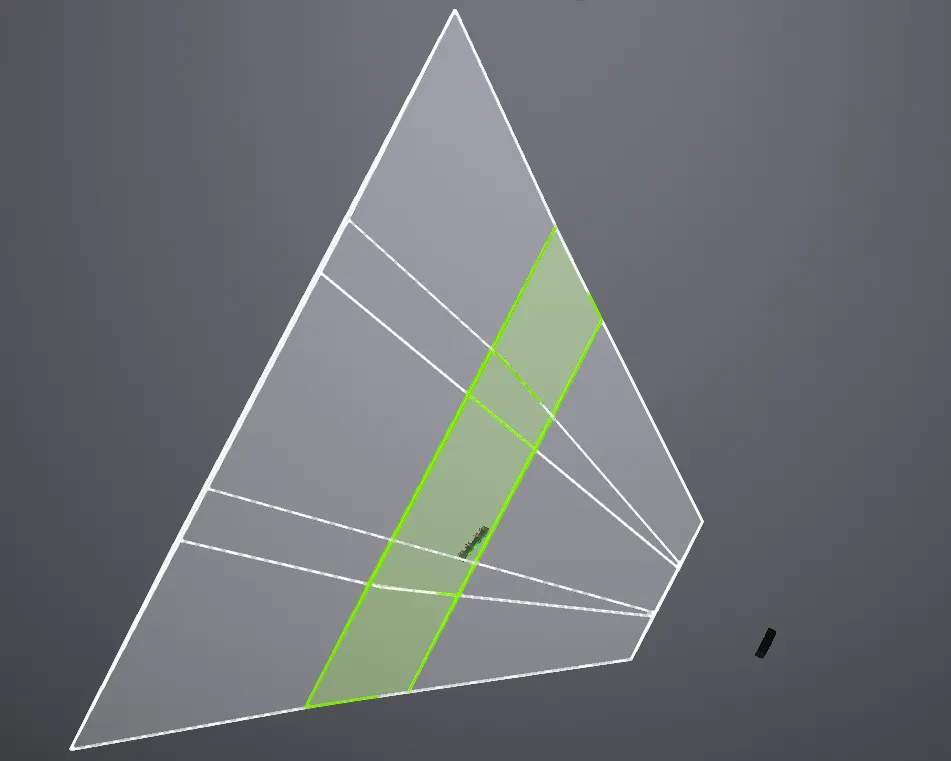
Temperature Monitoring: It is recommended to enable this function when the ambient temperature is unstable. Once enabled, please follow the diagram below: hold the calibration rod with the QR code side facing the tracker, and place it vertically or horizontally within the tracker's field of view as indicated by the guide frame.
Note
- When this function is enabled, the Tracking Volume function will be enabled simultaneously.
- Do not move the calibration rod during scanning to avoid affecting the scanning effect.
-
Scanning Distance Indication Method: The indication method includes laser line indication and distance bar indication. During scanning, you can adjust the scanning distance based on the color indication of the laser line or distance bar.
Blue indicates the scanning distance is too far, green indicates the distance is proper, and red indicates the distance is too close.
Col
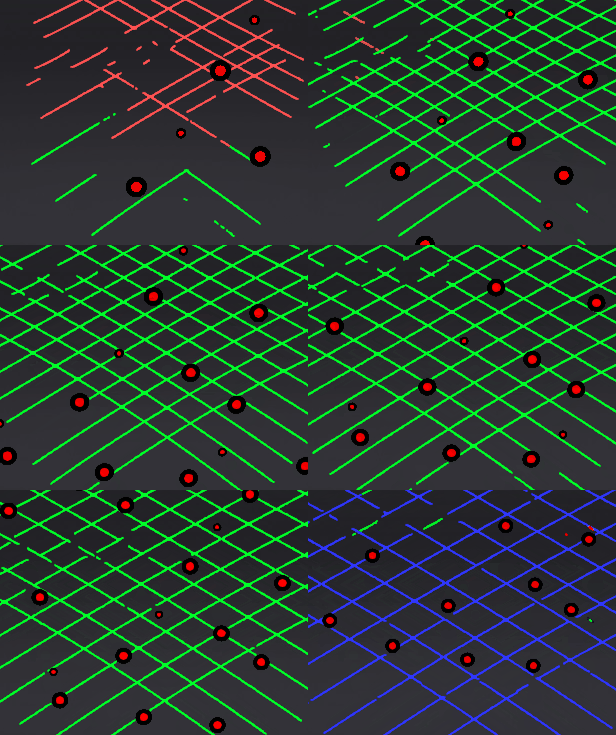 Laser Line Indication
Col
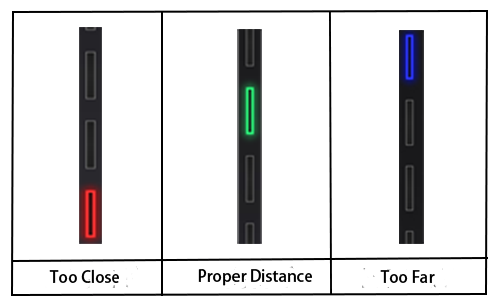 Distance Bar Indication
Note
The laser line indication method is only available in Track Mode / Scanner Mode > Scan Point Cloud and Local Resolution.
-
Wireless FPS: When scanning is laggy due to low computer specifications, you can use this feature to reduce the scanning frame rate.
Note
Reducing the frame rate will affect the scanning speed.
 About: View the device name, serial number, calibration board, and software version information.
 System Diagnose: Diagnose the operating environment to check if the computer meets the operating conditions. If all items show
  , it indicates that the device information is read normally or the configuration meets the software requirements. If any abnormality is displayed, check the device connection, computer configuration, or resolve the issue as prompted, then click Refresh to re-run the diagnosis.
If you have not logged in to the passport, click here to log in. If you have already logged in, you can perform the following operations.
- Account Center: Click to enter the passport account center, where you can perform account settings, device activation, device binding, and document downloads.
- Shining 3D Digital Cloud: Click to enter Shining 3D Digital Cloud for cloud storage and other operations.
② Device Information
If the device is successfully connected, the name, serial number, and battery level of the connected device will be displayed here. If the device is not connected, please connect the device via a wired or wireless method.
Col
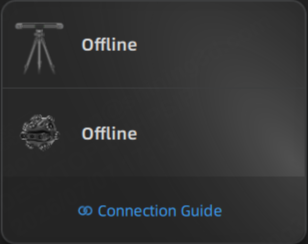
Device not connected
Col
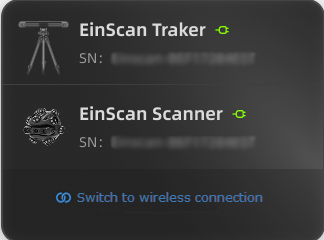
Device connected via cable
Col
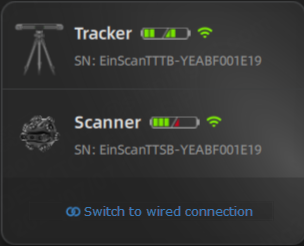
Device connected wirelessly
③ Project Group
Click here to quickly create or open a project group.
New Project Group
- Click New Project Group.
- In the file dialog, enter the project group name.
- Click Browse to select the save path.
- Click Confirm. All data related to this project group will be saved to this path.
Open Project Group
- Click Open Project Group.
- Select Open Local File.
- Select the project group file you want to open.
- Click Open to import the project group file into the software.
④ Quick Links
Click Calibration →, Post-Processing →, Inspect →, or Learning & Support → to quickly jump to the corresponding interface.
⑤ Project Group List
Recently opened or newly created project group files and their related information are displayed here.
Note
This area can display up to 30 project files.
| Function | |
|---|---|
 |
Enter a name to quickly find a project or project group. |
| Delete | This button appears after selecting a project or project group. Click this button to delete the selected project or project group. Once deleted, it cannot be restored. |
| Click to expand the function list, where you can open the project, rename it, open the project storage path, or delete the project. |