Local Resolution
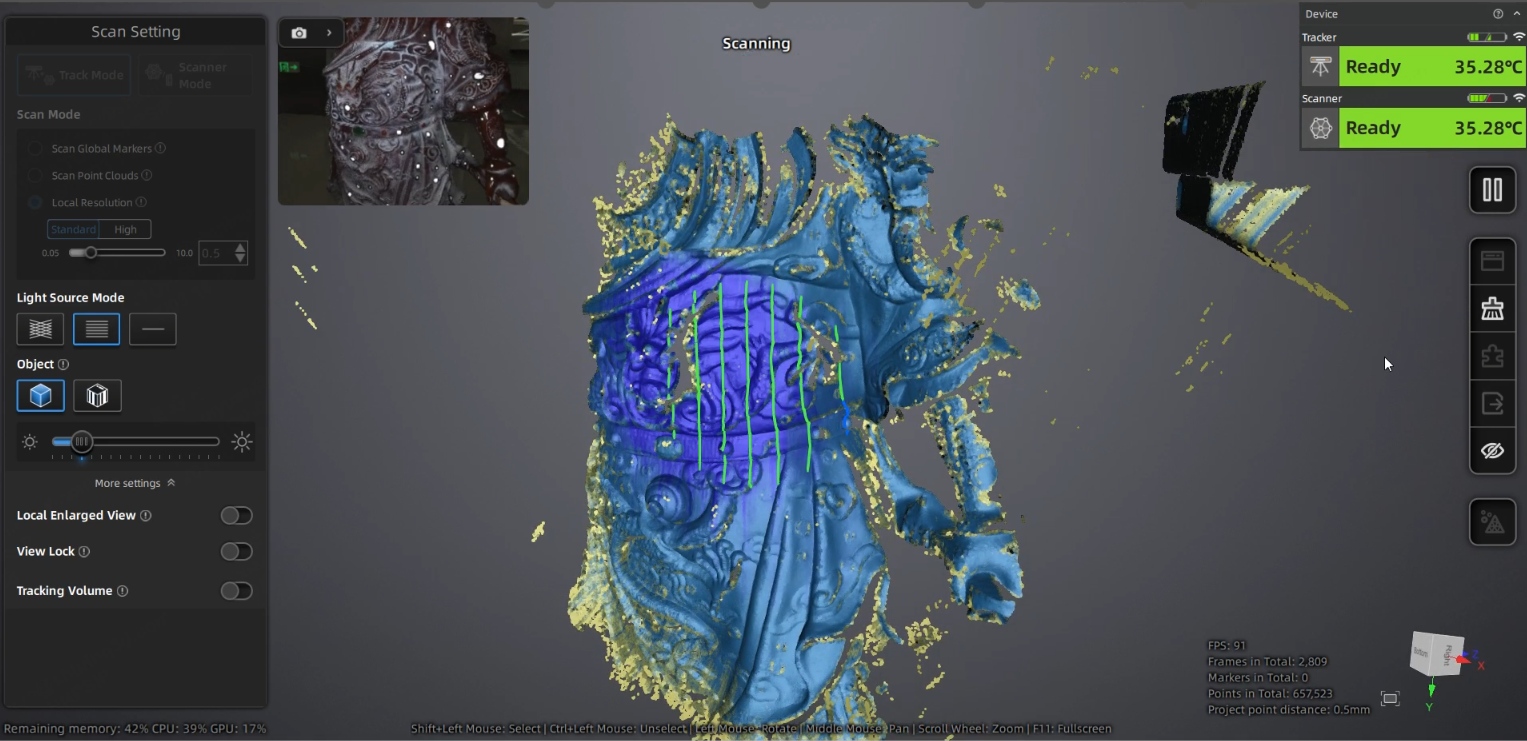
Trak Mode and Scanner Mode support the Local Resolution mode. Using Local Resolution mode, you can perform targeted scanning.
Caution
- When using Trak Mode for scanning, both the tracker and scanner need to be online.
- In Scanner Mode, after scanning point cloud using feature alignment, the Local Resolution mode cannot be used.
- In Local Resolution mode, importing global markers files or adding new global markers is not supported.
Steps
-
After obtaining object data through Scan Point Cloud, you can switch to Local Resolution mode.
Note
- In Trak Mode, when the scanner performs single-station scanning, no markers are required, but ensure that the tracker and the scanned object do not move.
- You can directly import a project with point cloud data and use Local Resolution mode, or follow the steps above to first scan data using Scan Point Cloud mode, then use Local Resolution mode.
- In Local Resolution mode, the light source mode will automatically switch to parallel lines; you can also switch to cross lines or single line based on actual conditions.
-
Select Local Resolution mode (Standard Resolution or High Resolution). Before any scanning is performed, you can freely switch between resolution modes. Once data has been scanned using either resolution mode, you cannot switch to another local resolution for scanning.
Note
- Standard Resolution: After switching to Standard Resolution, the point distance will change to half of the original project point distance. This mode requires the project point distance to be greater than 0.2 mm.
- High Resolution: After switching to High Resolution, the point distance will change to one quarter of the original project point distance. This mode requires the project point distance to be greater than 0.4 mm.
-
Review the scanned object data and identify the areas that need fine scanning.
Note
Click
 to view the data model from different angles and confirm the area that needs fine scanning. You can also rotate by holding down the left button or pan by holding down the middle button to confirm the area.
 -
(Optional) Click
 or press the scan button on the scanner to enter preview mode. You can adjust scan parameters based on the preview status.
Note
- The data scanned at this time is not automatically saved and is only used for viewing the scanning effect.
- Preview can be disabled by clicking
 in the top-right corner of the interface. Once disabled, you can skip the preview step.
-
After adjusting the scan parameters, click
 or press the scan button on the scanner to start fine scanning.
Local Resolution Mode Data Quality Indicator Color (Ideal Data) Data Quality Indicator Color (Insufficient Data) Standard Dark Blue Yellow High Purple Yellow -
After scanning, you can use the bottom editing toolbar to edit the data.
Caution
If you need to switch modes, click
 to delete all data in the current project. After deletion, you can switch to another resolution mode.
 -
Click
 to wrap and optimize the data.
Note
The point distance of Local Resolution takes effect only after wrapping and optimization.
-
After optimization, you can click
 to save the data or proceed to post-processing or measurement for other operations.